> ## Documentation Index
> Fetch the complete documentation index at: https://docs.getthread.com/llms.txt
> Use this file to discover all available pages before exploring further.
# Inbox Navigation: Rail, Side Panel, and Views
> Tour Inbox navigation — the rail and side panel that organize My Inbox, Mentions, Drafts, Timer, Approvals, and shared Views for your service team.
 ## The left navigation
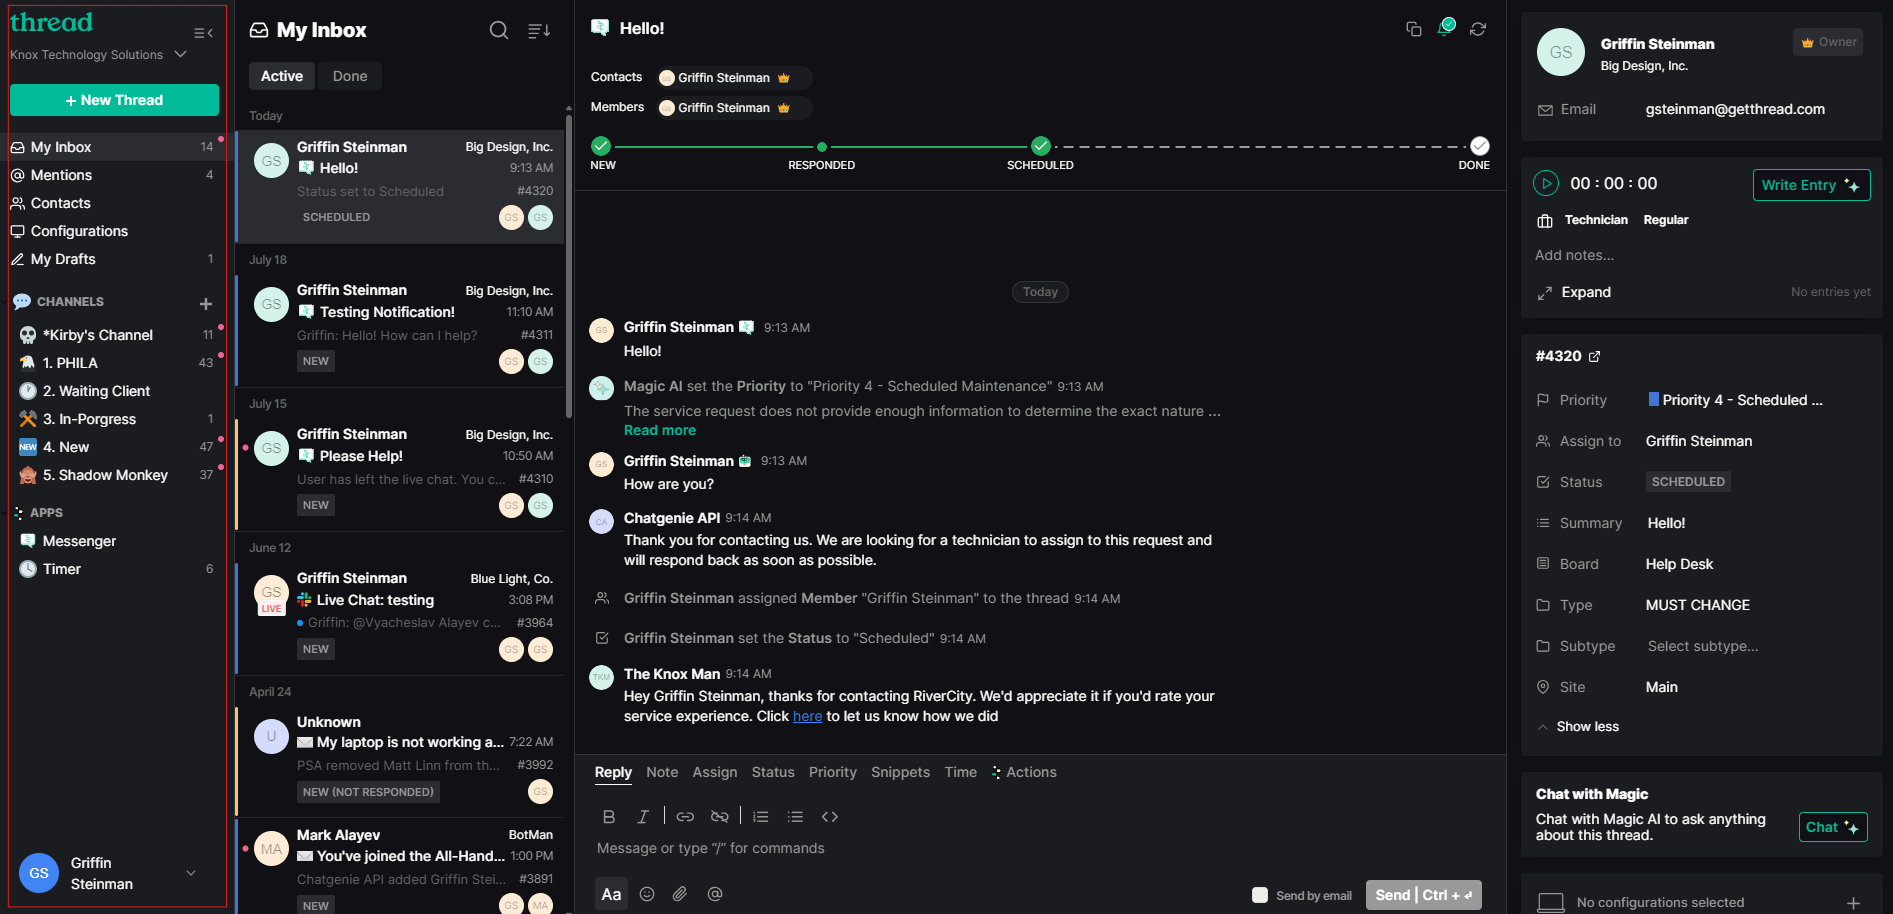
Inbox navigation has two parts that sit side by side on the far left:
* A vertical **rail** of icons for your main destinations — **Magic** (Super Magic, where
enabled), **Inbox**, **Planner**, **Contacts** (or **Clients**), and **Configs**. You can
reorder rail items and even recolor the rail from your navigation preferences.
* A **side panel** that opens for the Inbox rail item and holds your personal views and shared
Views (covered below).
Some screenshots on this page reflect an earlier sidebar layout. The items described here —
My Inbox, Mentions, Drafts, Timer, Approvals, and Views — are the same; they now live in the
rail-plus-side-panel navigation, which you can drag to reorder.
The Inbox side panel is split into a few groups:
* A **personal** group tailored to each tech — **My Inbox**, **Mentions**, **My Drafts**,
**Timer**, and (where enabled) **Approvals**.
* A **Views** group of fully customizable, shareable Views where most collaboration happens —
optionally organized into **Teams**.
Everything here is a real-time window into open threads, kept up to date and synced almost
instantly.
You might be thinking, "Why are some views bolded?" Well those are notification indicators, which you can learn more about in these docs:
1. How to Manage Your Inbox Notifications
2. How Notifications Work for your Team
### Section 1
#### **New Thread**
This section has many unique features. Let’s start from the top and move our way down. At the top, we have the “New Thread” Button. This button allows you to create a non-live thread on behalf of a contact. When creating a new thread using this method, you select the contact, the board that the thread should be on, a thread summary, and then type the initial message. For these types of thread, the “send by email” checkbox is checked by default.
## The left navigation
Inbox navigation has two parts that sit side by side on the far left:
* A vertical **rail** of icons for your main destinations — **Magic** (Super Magic, where
enabled), **Inbox**, **Planner**, **Contacts** (or **Clients**), and **Configs**. You can
reorder rail items and even recolor the rail from your navigation preferences.
* A **side panel** that opens for the Inbox rail item and holds your personal views and shared
Views (covered below).
Some screenshots on this page reflect an earlier sidebar layout. The items described here —
My Inbox, Mentions, Drafts, Timer, Approvals, and Views — are the same; they now live in the
rail-plus-side-panel navigation, which you can drag to reorder.
The Inbox side panel is split into a few groups:
* A **personal** group tailored to each tech — **My Inbox**, **Mentions**, **My Drafts**,
**Timer**, and (where enabled) **Approvals**.
* A **Views** group of fully customizable, shareable Views where most collaboration happens —
optionally organized into **Teams**.
Everything here is a real-time window into open threads, kept up to date and synced almost
instantly.
You might be thinking, "Why are some views bolded?" Well those are notification indicators, which you can learn more about in these docs:
1. How to Manage Your Inbox Notifications
2. How Notifications Work for your Team
### Section 1
#### **New Thread**
This section has many unique features. Let’s start from the top and move our way down. At the top, we have the “New Thread” Button. This button allows you to create a non-live thread on behalf of a contact. When creating a new thread using this method, you select the contact, the board that the thread should be on, a thread summary, and then type the initial message. For these types of thread, the “send by email” checkbox is checked by default.
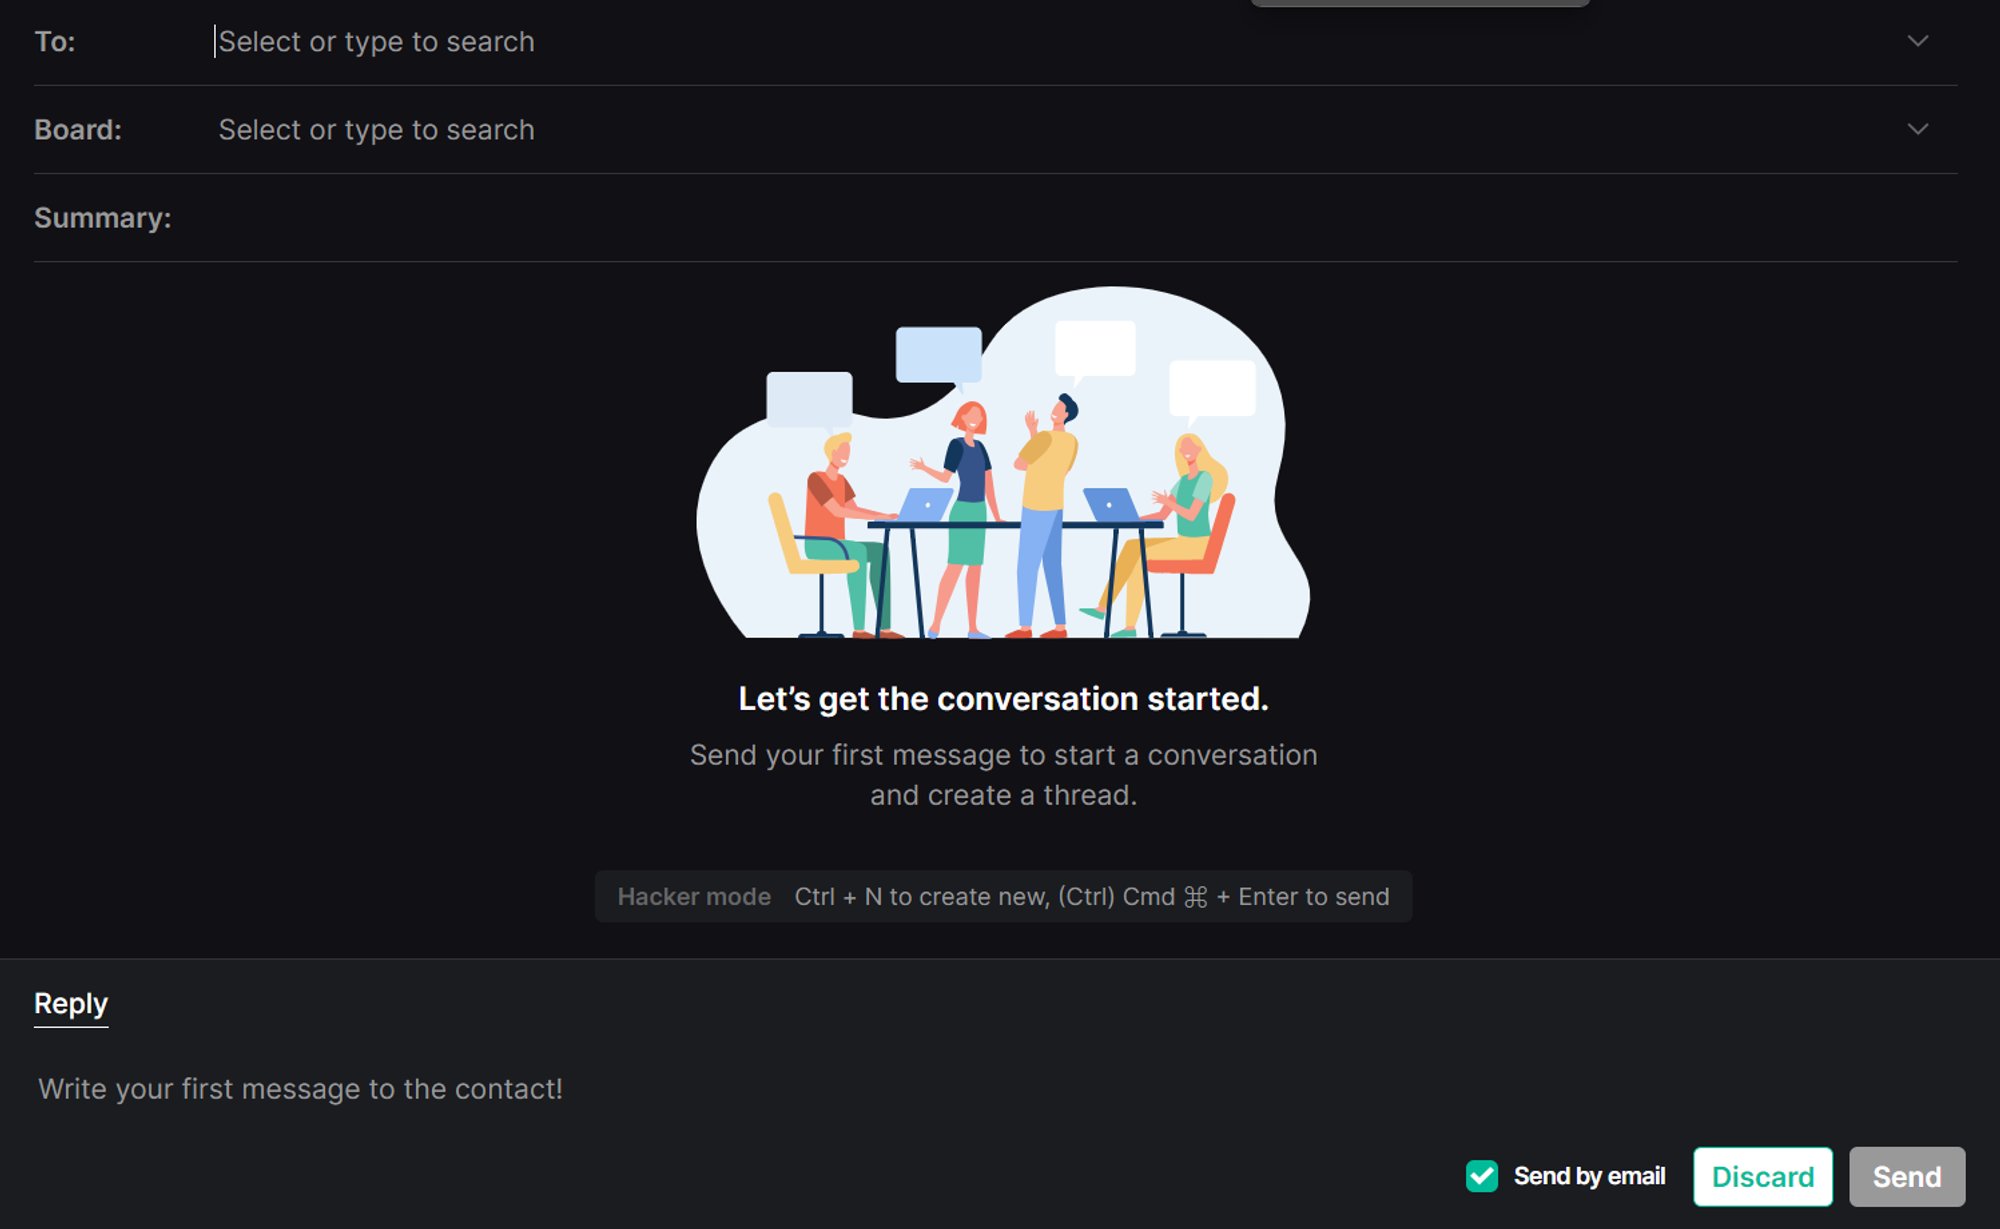 This is typically a feature used by internal members when an issue is reported via an alternate method.
#### **My Inbox View**
This is typically a feature used by internal members when an issue is reported via an alternate method.
#### **My Inbox View**
 This view is tailored to each individual tech.
Q: "
How does a thread enter this View?"
A: Only threads that are ASSIGNED to you will appear in this View. This is also referred to as being the primary resource.
#### **@ Mentions View**
This view is tailored to each individual tech.
Q: "
How does a thread enter this View?"
A: Only threads that are ASSIGNED to you will appear in this View. This is also referred to as being the primary resource.
#### **@ Mentions View**
 This View is the same as the “My Inbox” View but has a slightly different functionality.
Q: "
How does a thread enter this view?
"
A: Only threads where you are a SECONDARY RESOURCE will appear in this View. You can become a secondary resource by being “@ mentioned” in a thread, or by being manually added
#### **Planner**
This View is the same as the “My Inbox” View but has a slightly different functionality.
Q: "
How does a thread enter this view?
"
A: Only threads where you are a SECONDARY RESOURCE will appear in this View. You can become a secondary resource by being “@ mentioned” in a thread, or by being manually added
#### **Planner**
 Thread Planner tab shows a customizable view of all of your scheduled threads. For more information on thread planner, please see [this doc](/inbox/using-planner).
#### **Configurations & Contacts**
Thread Planner tab shows a customizable view of all of your scheduled threads. For more information on thread planner, please see [this doc](/inbox/using-planner).
#### **Configurations & Contacts**
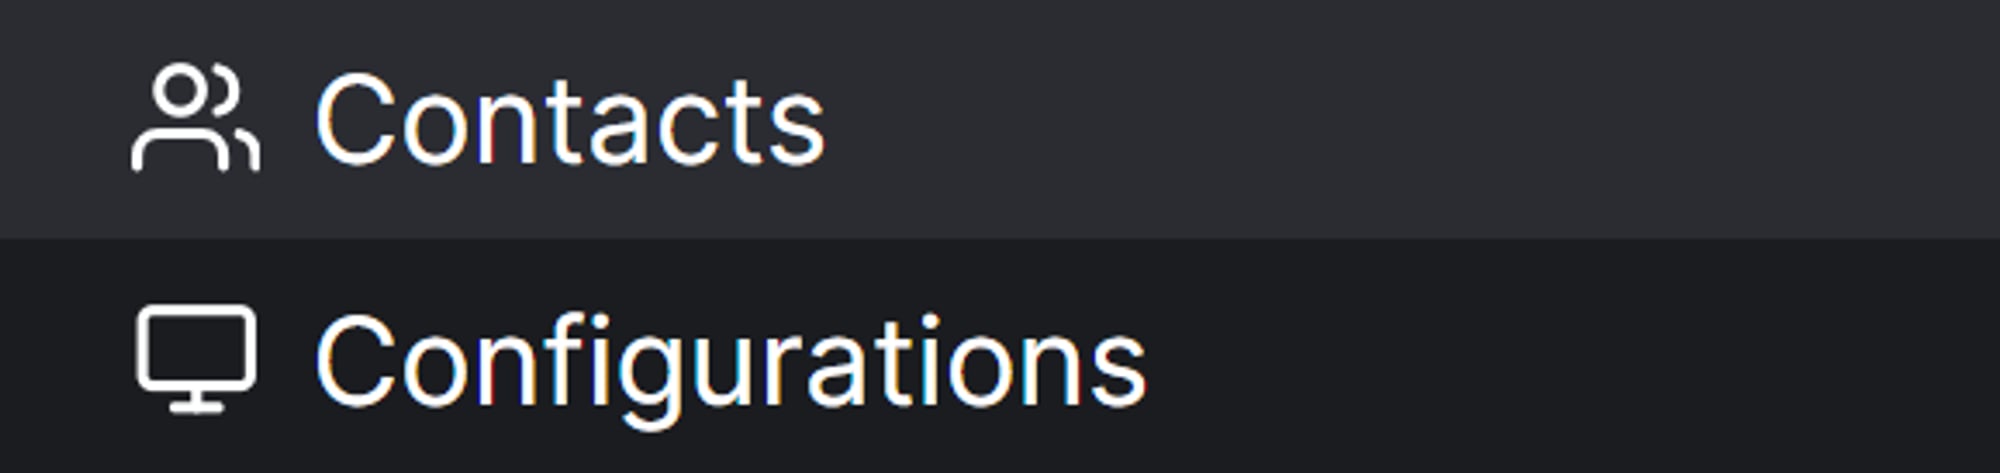 These Views show all contacts and configurations synced over to thread from your PSA.
#### **My Drafts**
These Views show all contacts and configurations synced over to thread from your PSA.
#### **My Drafts**
 This View usually contains threads for a short amount of time. The threads that appear inside this View are threads where you have begun typing a message but have not yet sent.
Q: "
How does a thread enter this view?
"
A: Once you begin typing a reply or an internal note, that thread will appear in the view. As long as there are any characters in the chatbox, the thread will appear here.
### Section 2
This section contains custom views created by users that are tailored to certain criteria. Each view has specific flow criteria attached to it. Let us first go over how to create a View.
#### **Creating a View**
First, you click the “+” button at the end of the “Views” title
This View usually contains threads for a short amount of time. The threads that appear inside this View are threads where you have begun typing a message but have not yet sent.
Q: "
How does a thread enter this view?
"
A: Once you begin typing a reply or an internal note, that thread will appear in the view. As long as there are any characters in the chatbox, the thread will appear here.
### Section 2
This section contains custom views created by users that are tailored to certain criteria. Each view has specific flow criteria attached to it. Let us first go over how to create a View.
#### **Creating a View**
First, you click the “+” button at the end of the “Views” title
 You will want to name the view and upload an icon
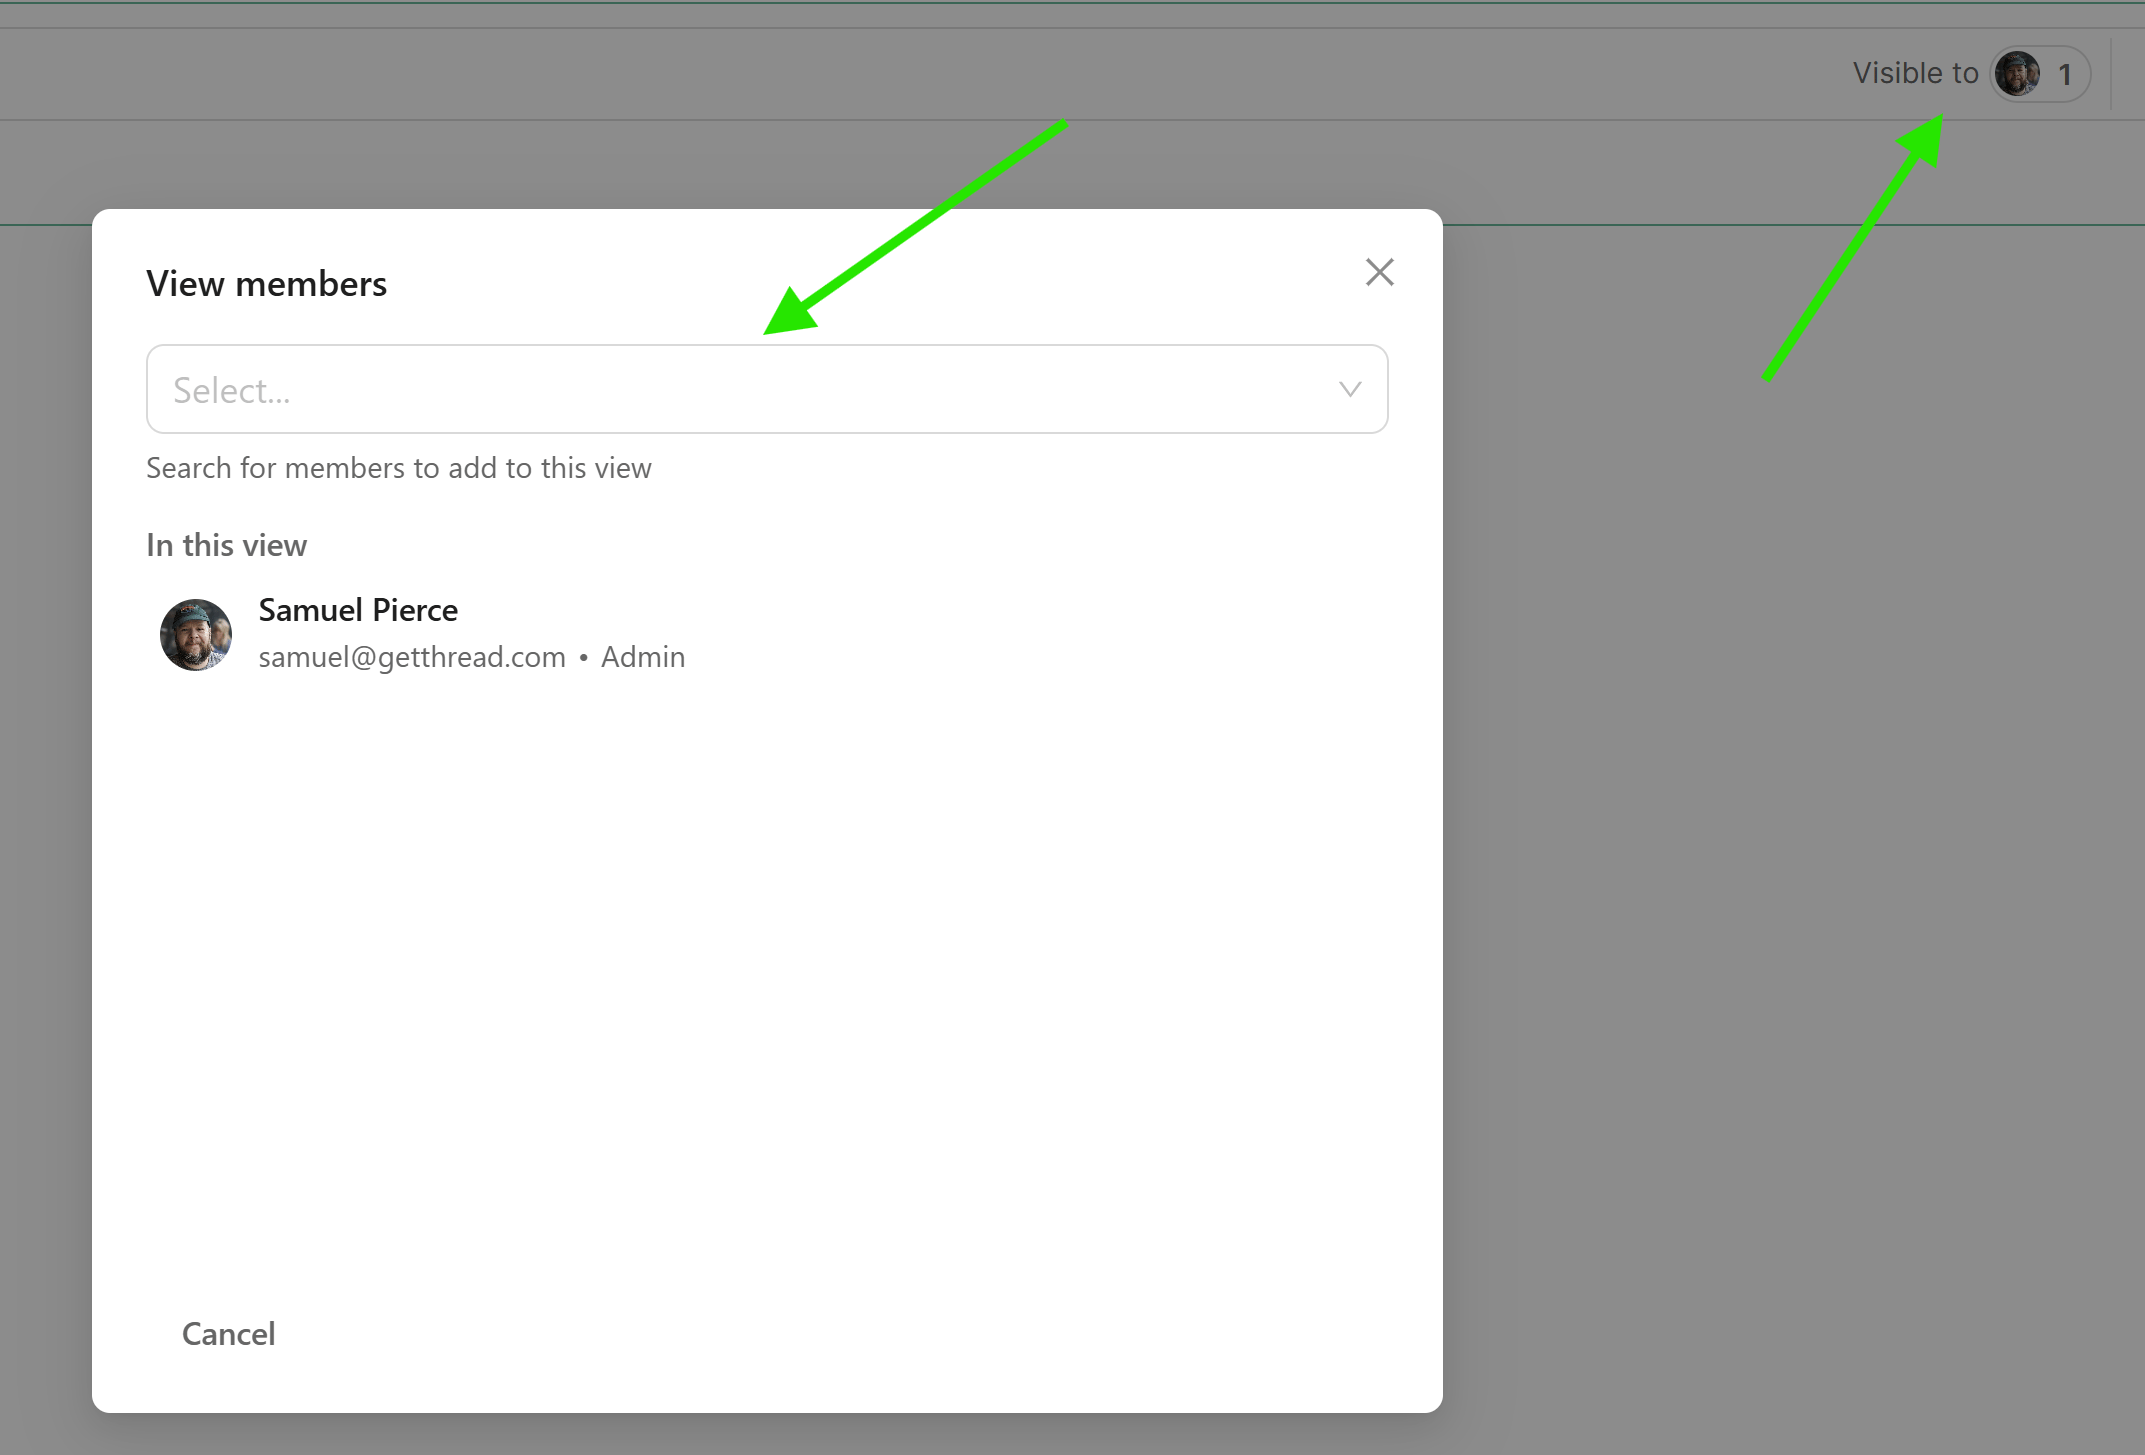
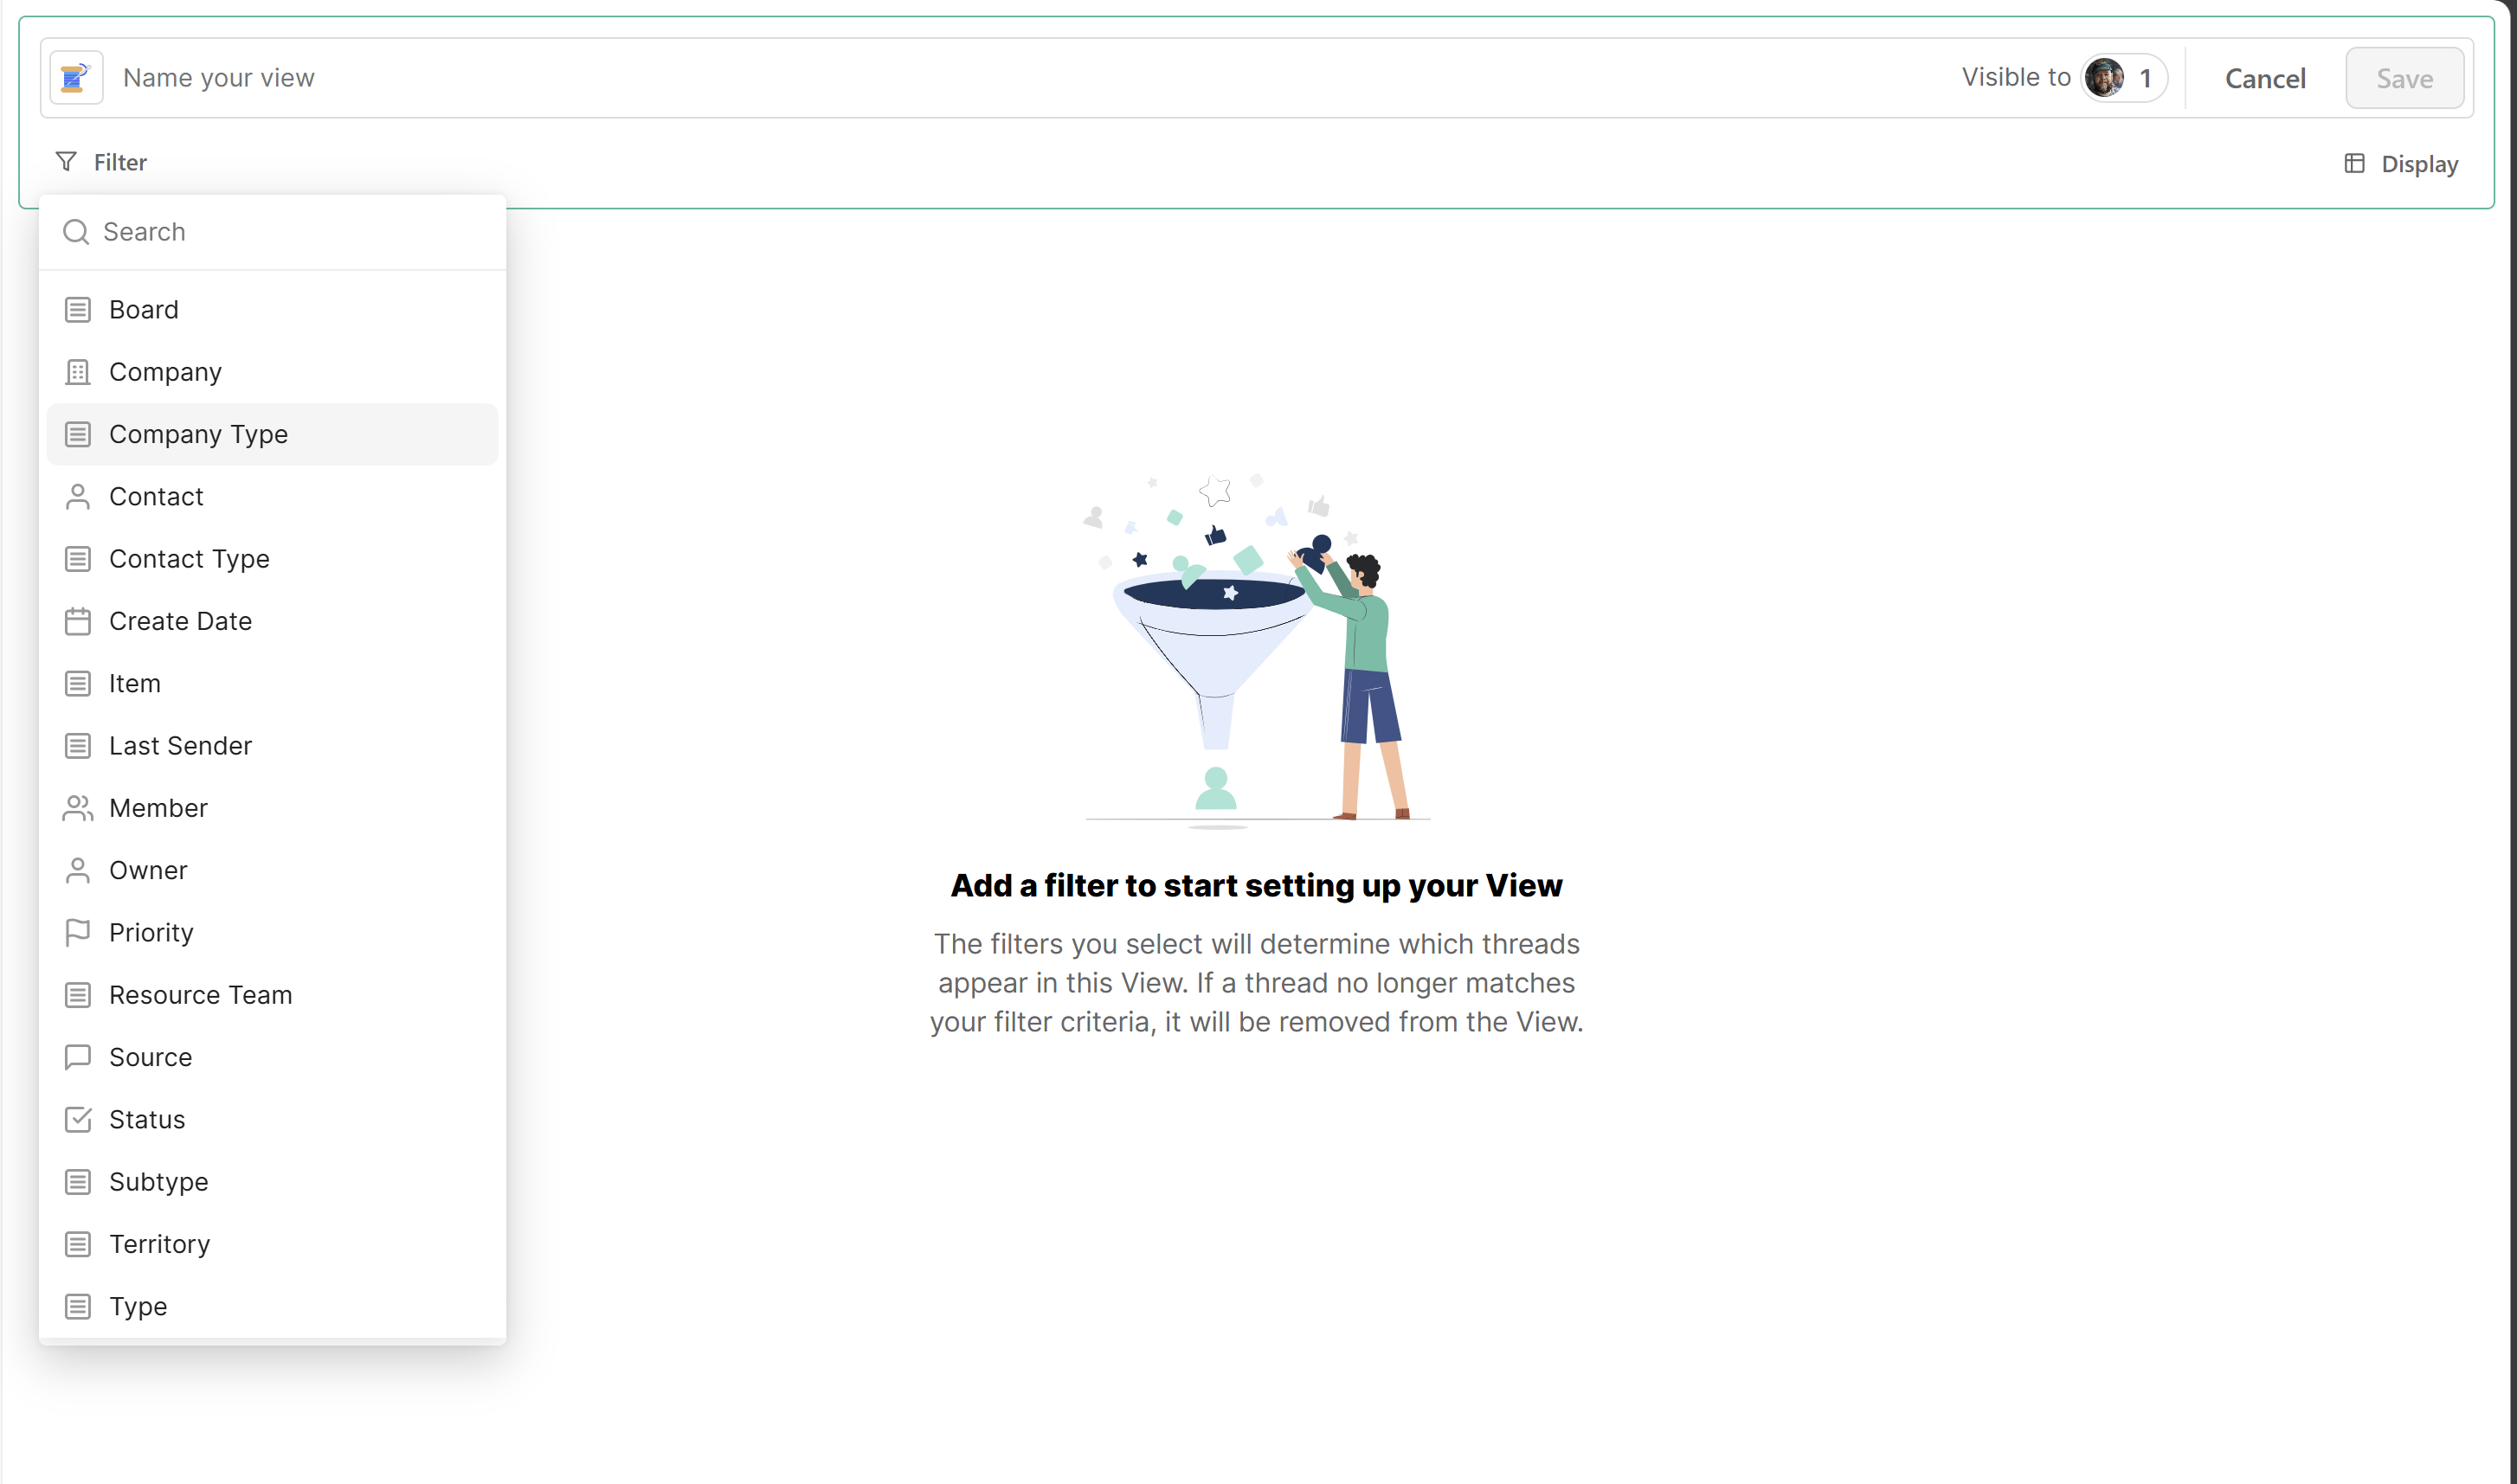 Next click on View to, then add your team members
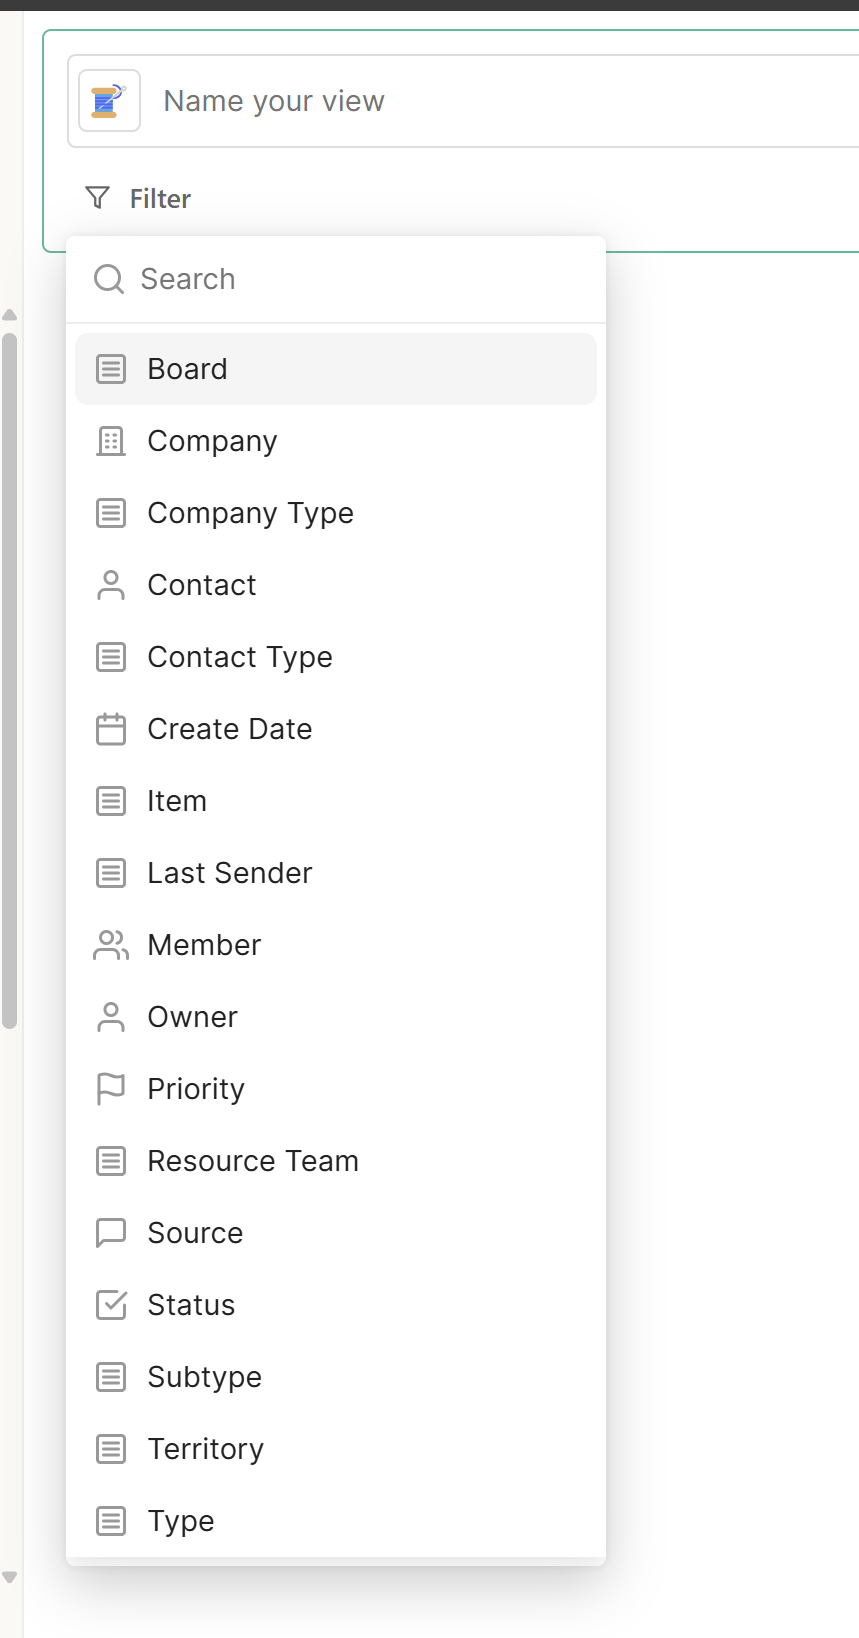
 Next you will create the logic that you want associated with the view. Click on filter and select your filter options.
 Once you complete these steps, hit save
#### **The View List**
Once you complete these steps, hit save
#### **The View List**
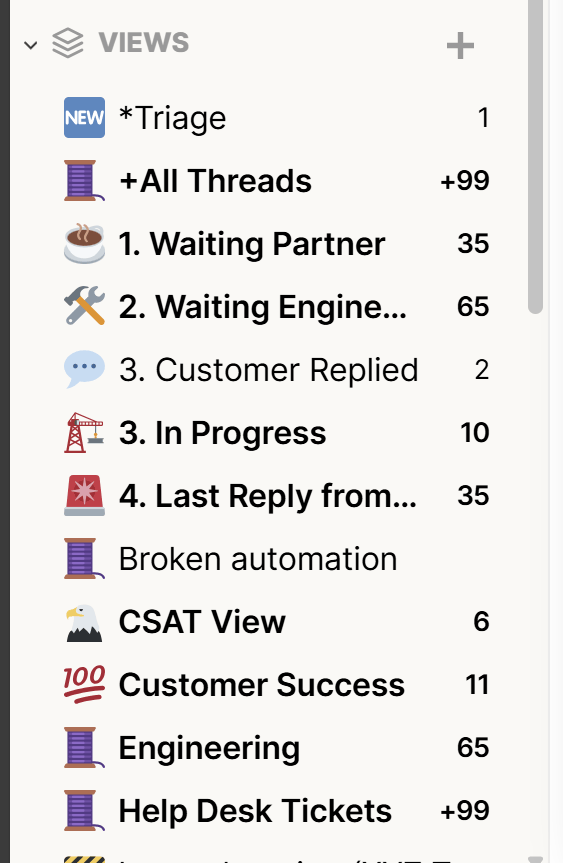 Now that you have created a view, you understand how they work and what their purpose is. For instance, in the image above we see that we have multiple views. Each one has a unique purpose, and customers tailor them to fit their own workflow and help desk needs.
Only **Admins** can create shared Views. Members can't create Views from scratch, but they
can apply their own **sub-filters** on top of a View they have access to — visible only to
them, without changing the View for anyone else.
### Section 3
Now that you have created a view, you understand how they work and what their purpose is. For instance, in the image above we see that we have multiple views. Each one has a unique purpose, and customers tailor them to fit their own workflow and help desk needs.
Only **Admins** can create shared Views. Members can't create Views from scratch, but they
can apply their own **sub-filters** on top of a View they have access to — visible only to
them, without changing the View for anyone else.
### Section 3
 #### **Timer**
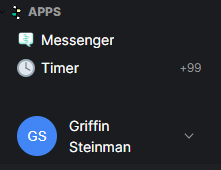
The **Timer** item contains all threads that currently have a Time Pad timer running. This is
specific to you — the timer must be running for *you*, not anyone else.
#### **Account menu**
At the bottom, by clicking on your name you are able to access:
1. **Snippets**
2. **Preferences** (including your workflow automations)
3. **Beast Mode Shortcuts** (the full keyboard-shortcut reference)
4. **Sign out**
#### **Snippets**
Let’s look at the Snippets Menu:
#### **Timer**
The **Timer** item contains all threads that currently have a Time Pad timer running. This is
specific to you — the timer must be running for *you*, not anyone else.
#### **Account menu**
At the bottom, by clicking on your name you are able to access:
1. **Snippets**
2. **Preferences** (including your workflow automations)
3. **Beast Mode Shortcuts** (the full keyboard-shortcut reference)
4. **Sign out**
#### **Snippets**
Let’s look at the Snippets Menu:
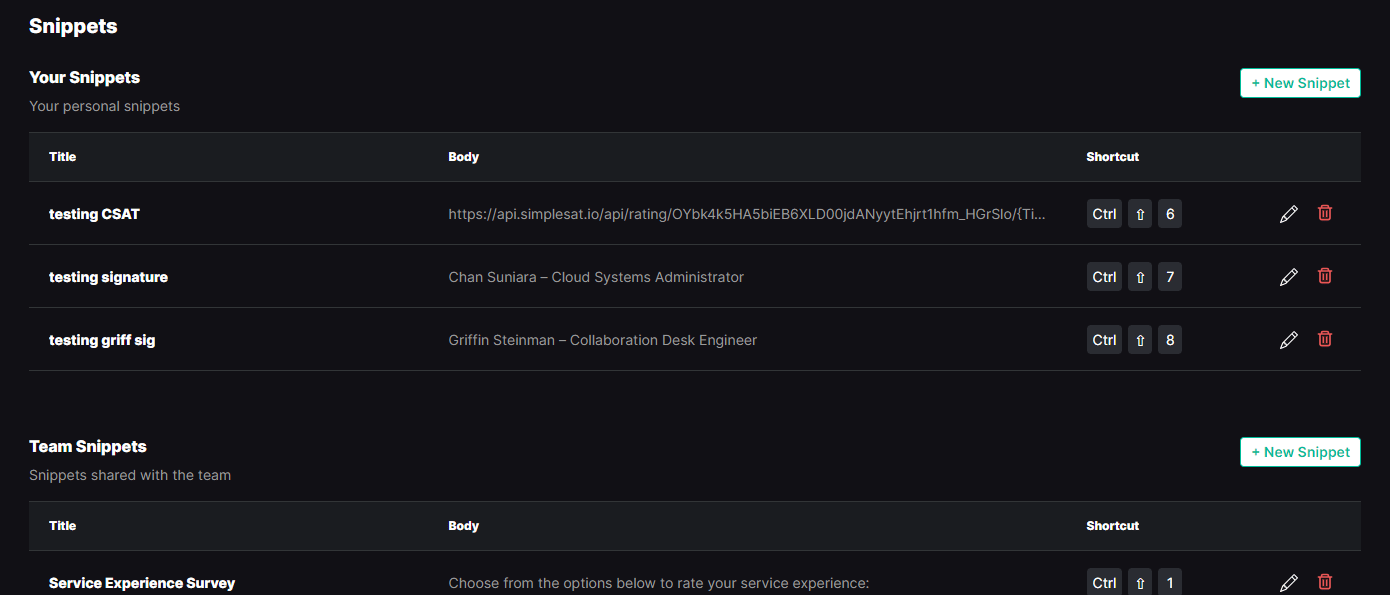 The snippets menu has 2 sections:
1. ***“Your Snippets”*** - These snippets are created by you and only viewable by you
2. ***“Team Snippets”*** - These snippets are created by anyone on the team and are able to be used by anyone on the team.
**Snippets** are used by help desk users to automate repetitive messages or tasks. Common snippets may include a scheduling link, a CSAT survey, or a Triage message.
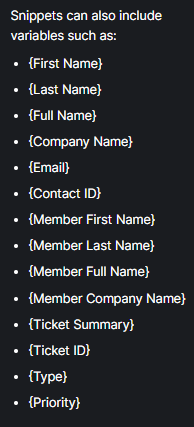
Snippets are unique because they can use variables that are filled in from the thread when the
snippet is inserted:
| Variable | Fills in with |
| ------------------ | ------------------------------------------- |
| `{Ticket ID}` | The thread/ticket number (or PSA system ID) |
| `{Ticket Summary}` | The thread summary |
| `{Full Name}` | The contact's name |
The snippets menu has 2 sections:
1. ***“Your Snippets”*** - These snippets are created by you and only viewable by you
2. ***“Team Snippets”*** - These snippets are created by anyone on the team and are able to be used by anyone on the team.
**Snippets** are used by help desk users to automate repetitive messages or tasks. Common snippets may include a scheduling link, a CSAT survey, or a Triage message.
Snippets are unique because they can use variables that are filled in from the thread when the
snippet is inserted:
| Variable | Fills in with |
| ------------------ | ------------------------------------------- |
| `{Ticket ID}` | The thread/ticket number (or PSA system ID) |
| `{Ticket Summary}` | The thread summary |
| `{Full Name}` | The contact's name |
 #### **Inbox Preferences**
Each user can edit their inbox preferences at a user level.
#### **Inbox Preferences**
Each user can edit their inbox preferences at a user level.
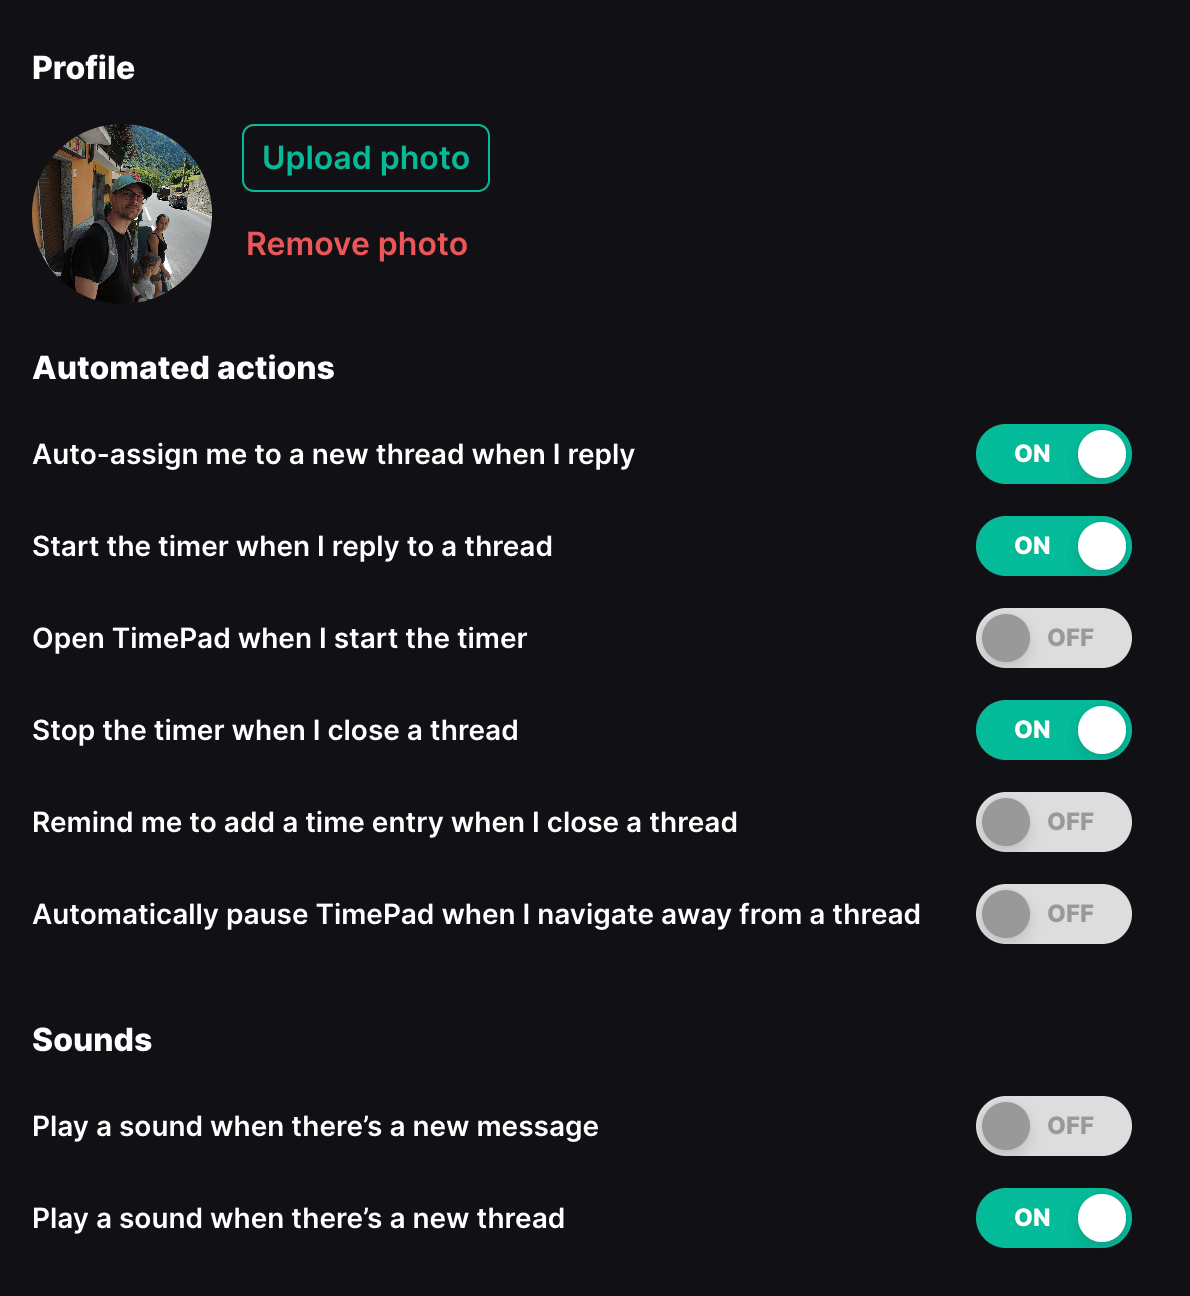 1. **Auto-assign me to a new thread when I reply** - When this is enabled, you will automatically be assigned as the owner of a thread after you send the first customer facing reply
2. **Start the timer when I reply to a thread** - When this is enabled, your Time Pad timer will automatically start once you send a customer facing reply
3. **Open Time Pad when I start the timer** - When this is enabled, the Time Pad will expand in the control panel when you start the timer
4. **Stop the timer when I close a thread** - When this is enabled, the Time Pad timer will stop after you change the status of a thread to a configured "closed" status
5. **Remind me to add a time entry when I close a thread** - This will engage a popup reminding you to submit a time entry if the timer is still running when you close a thread
1. **Auto-assign me to a new thread when I reply** - When this is enabled, you will automatically be assigned as the owner of a thread after you send the first customer facing reply
2. **Start the timer when I reply to a thread** - When this is enabled, your Time Pad timer will automatically start once you send a customer facing reply
3. **Open Time Pad when I start the timer** - When this is enabled, the Time Pad will expand in the control panel when you start the timer
4. **Stop the timer when I close a thread** - When this is enabled, the Time Pad timer will stop after you change the status of a thread to a configured "closed" status
5. **Remind me to add a time entry when I close a thread** - This will engage a popup reminding you to submit a time entry if the timer is still running when you close a thread
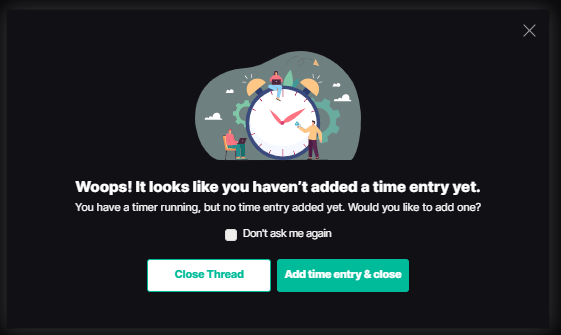 6. **Automatically pause TimePad when I navigate away from a thread** - This will automatically pause the timer when you navigate away from the thread within Inbox. Note: the timer will still continue if the thread is open but you navigate to another tab
7. **Sounds** - you can learn more about these two preferences [in this doc](/notifications/how-will-notifications-work-internally#the_global_user_level)
See **Inbox** and **UI & UX** updates in the [changelog](/changelog/q3-2026).
## FAQ Section
**On the web** — go to [inbox.getthread.com](https://inbox.getthread.com), sign in with your work email, and confirm the one-time passcode sent to you.
**As an app** — Inbox is available for Windows, Mac, iOS and Android. Download links are at [getthread.com/downloads](https://www.getthread.com/downloads).
Open the dropdown under your name and choose **Beast Mode Shortcuts** to see the full list. They work best in the Inbox desktop app.
A: If you notice that some things are not synced to thread, you can run a manual sync. To do this, navigate to the thread admin panel and go to Integrations -> PSA -> PSA Sync. From here you can run a manual sync.
It may take up to 1 hour for these syncs to complete
A: You will need to manually add any new members to views you have created after they have synced over to thread
## Related topics
- [Get around Inbox](/start-here/roles/technician/get-around-inbox.md)
- [Views and Insights in Thread Inbox](/inbox/views-and-insights.md)
- [Contact Intelligence FAQ](/ai-agents/contact-intelligence-faq.md)
6. **Automatically pause TimePad when I navigate away from a thread** - This will automatically pause the timer when you navigate away from the thread within Inbox. Note: the timer will still continue if the thread is open but you navigate to another tab
7. **Sounds** - you can learn more about these two preferences [in this doc](/notifications/how-will-notifications-work-internally#the_global_user_level)
See **Inbox** and **UI & UX** updates in the [changelog](/changelog/q3-2026).
## FAQ Section
**On the web** — go to [inbox.getthread.com](https://inbox.getthread.com), sign in with your work email, and confirm the one-time passcode sent to you.
**As an app** — Inbox is available for Windows, Mac, iOS and Android. Download links are at [getthread.com/downloads](https://www.getthread.com/downloads).
Open the dropdown under your name and choose **Beast Mode Shortcuts** to see the full list. They work best in the Inbox desktop app.
A: If you notice that some things are not synced to thread, you can run a manual sync. To do this, navigate to the thread admin panel and go to Integrations -> PSA -> PSA Sync. From here you can run a manual sync.
It may take up to 1 hour for these syncs to complete
A: You will need to manually add any new members to views you have created after they have synced over to thread
## Related topics
- [Get around Inbox](/start-here/roles/technician/get-around-inbox.md)
- [Views and Insights in Thread Inbox](/inbox/views-and-insights.md)
- [Contact Intelligence FAQ](/ai-agents/contact-intelligence-faq.md)