> ## Documentation Index
> Fetch the complete documentation index at: https://docs.getthread.com/llms.txt
> Use this file to discover all available pages before exploring further.
# Views and Insights in Thread Inbox
> Create filtered Views to organize Service Desk threads by pod, tier, or function, share them with teammates, and use Insights for real-time workload reporting.
### **What Are Views?**
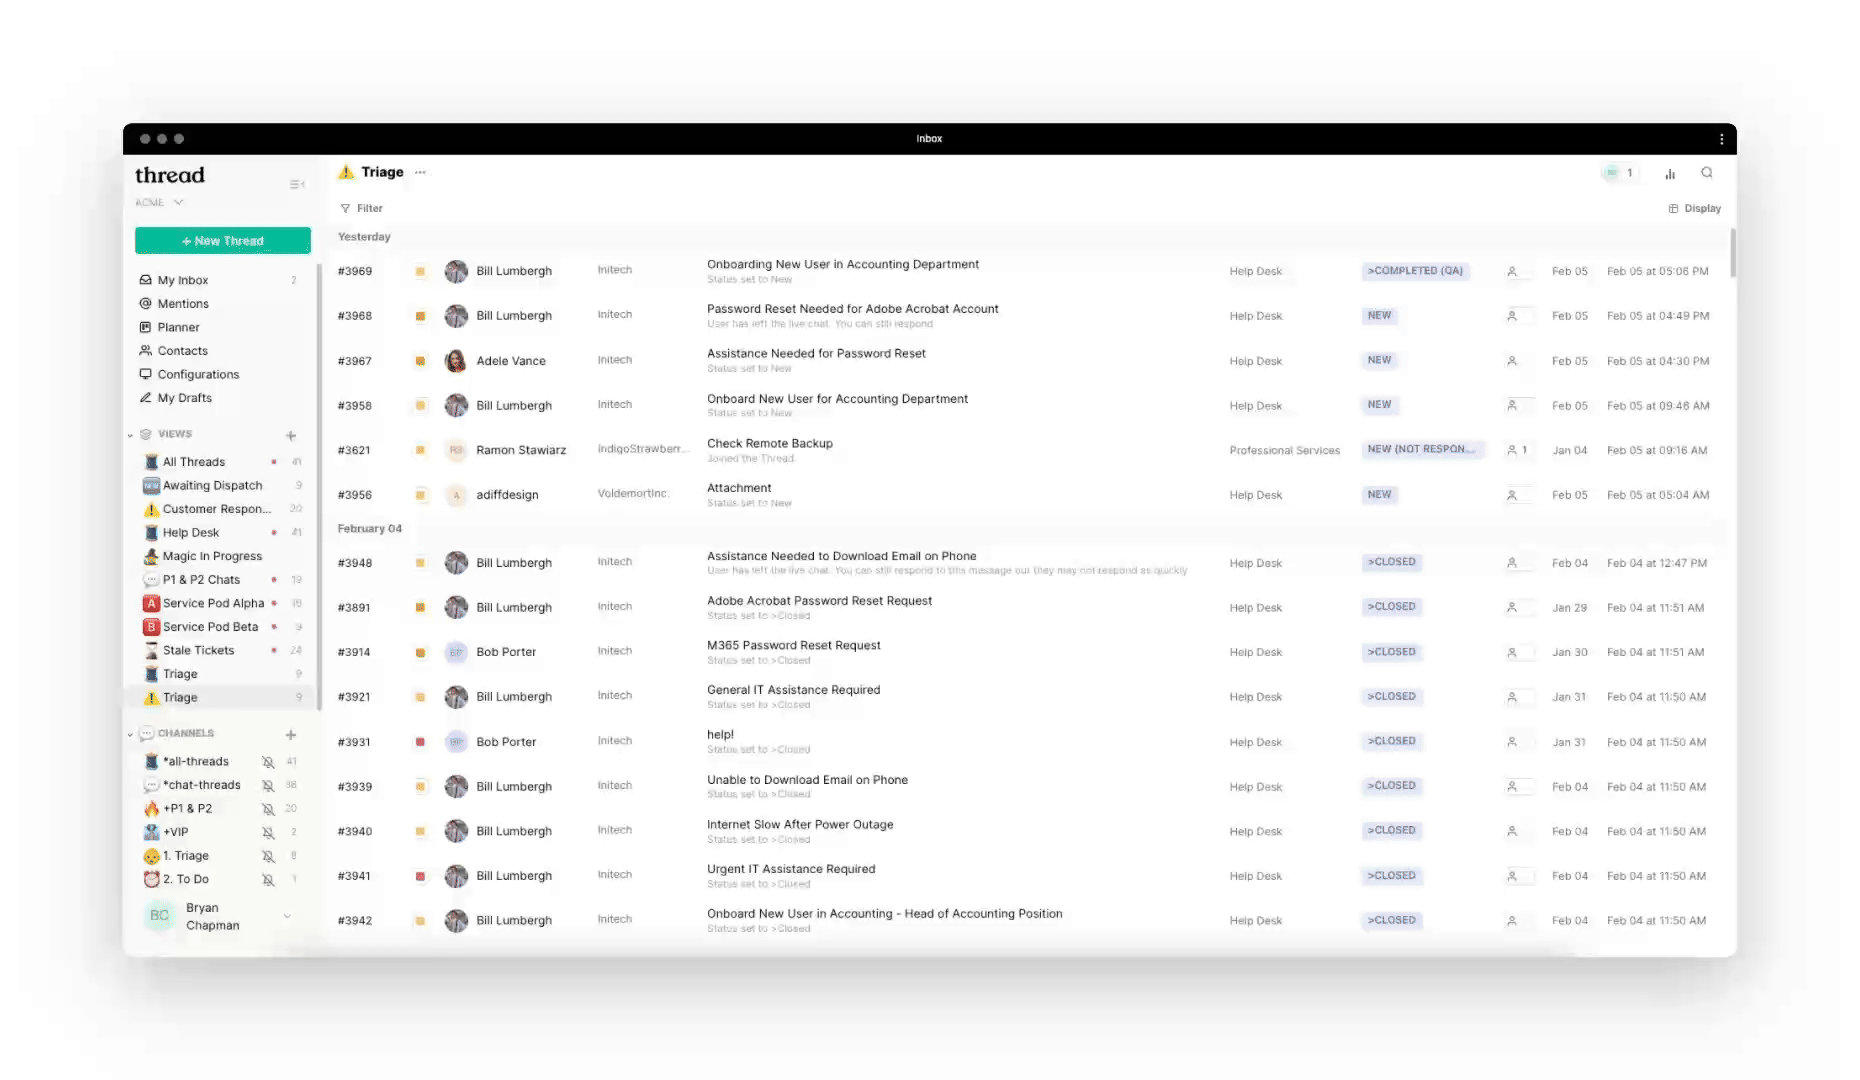
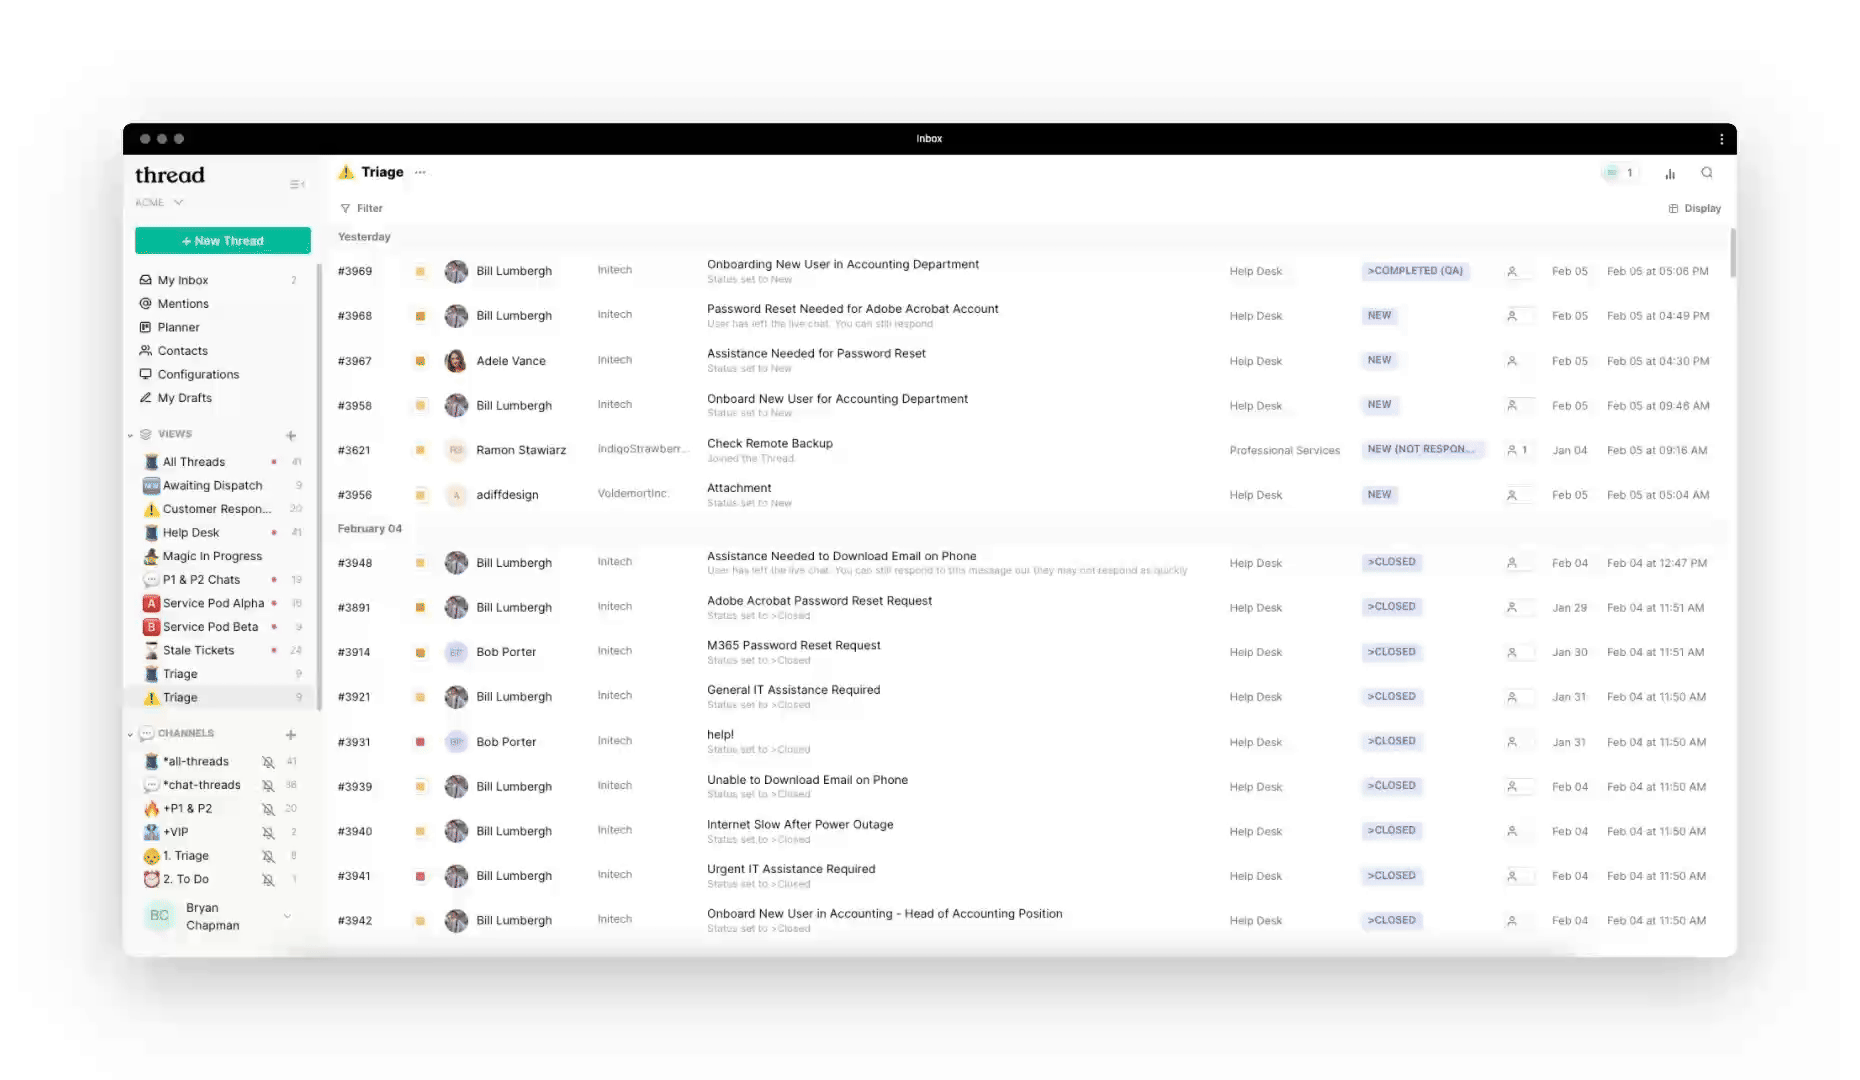
Views help Service Desk teams organize and prioritize their work efficiently. They allow users to group threads using filters and save customized views, which can be shared with teammates. This enables teams to align their workflows with:
* **Internal structures** (e.g., Pods, Tiers)
* **Functional goals** (e.g., "Chat-only squads")
* **Other team-specific needs**
Views update in real-time, ensuring technicians can quickly access, respond to, and resolve threads. The **Thread Inbox** is powered by these Views, making them the core tool for managing daily tasks.
 ### **What Are Insights?**
**Insights** provides real-time reporting and visibility for every View. With Insights, users can:
* **Monitor trends** within specific Views
* **Balance workloads** across teammates
* **Improve operational efficiency** with data-driven decisions
By leveraging Views and Insights together, Service Desk teams can streamline their workflows, improve response times, and optimize service delivery.
### **What Are Insights?**
**Insights** provides real-time reporting and visibility for every View. With Insights, users can:
* **Monitor trends** within specific Views
* **Balance workloads** across teammates
* **Improve operational efficiency** with data-driven decisions
By leveraging Views and Insights together, Service Desk teams can streamline their workflows, improve response times, and optimize service delivery.
 ### **How do I create a view?**
To create a new view in Inbox:
Open Inbox.
Go to the Views section in the left menu (under “My Drafts” in the Default Tools section).
Click the + icon.
Choose at least one filter (e.g., Board = Service Desk).
Enter a name for the view.
(Optional) Choose an emoji to represent your view
(Optional) Invite members to access the view
Click **Save**.
Once saved, you can invite additional members, add sub-filters (viewable only to you), change display settings, sort threads, and explore Insights
### **Display Settings**
To further personalize your experience, Thread Inbox offers two display modes:
1. **Inbox** is ideal for technicians who need to quickly switch between threads, this traditional "inbox-style" view presents conversations in a familiar format, allowing for fast navigation and response times.
2. **List** is preferred by service team leads or users who manage multiple threads, this structured layout provides an organized list of conversations, making it easier to filter, sort, and jump between threads efficiently.
### **How to Customize Your Display Settings**
You can change your display mode, sorting preferences, or thread state (View All, Active, Done) with the following steps:
Click into an existing **View**
Click the "Display" button in the top-right corner
Customize your display mode, sorting options, or thread state to fit your preference
### **Keyboard shortcuts (Beast Mode)**
Inbox has a full set of keyboard shortcuts — open the **Beast Mode** shortcut reference from
your account menu to see them all. A few of the most useful for working a View:
* Ctrl/⌘ + K / Ctrl/⌘ + J — move to the next /
previous conversation in the channel
* Ctrl/⌘ + A — switch between **Active** and **Done**
* Ctrl + N — start a new thread
* Ctrl + T — toggle the navigation panel
* Ctrl/⌘ + R — refresh
### **Who can create a View?**
Only Admins or the creator of a view can modify its filters or display settings in Edit Mode.
| Admins | Members |
| ----------------------------------------- | ----------------------------------------- |
| Can create new views from scratch | Cannot create new views from scratch |
| Can modify existing views | Cannot modify existing views |
| Can save filtered views as a new view | Cannot save filtered views as a new view |
| Can apply sub-filters to an existing view | Can apply sub-filters to an existing view |
### **Who can access a View?**
By default, views are private and only accessible to the creator. You can share a view with others by inviting them.
#### **How to Share a View**
Open the view and click ••• -> **Edit**.
In the top-right corner, click the participants pill to open **View Members**.
Use the search menu to find and add members.
You can also see who has access by clicking the Participants pill in View Mode.
#### **How to Remove Members from a View**
Open the view and click ••• -> **Edit**.
In the top-right corner, click the participants pill to open **View Members**.
Hover over a member, click “Remove”, and then click “Remove” in the confirmation modal.
### **How do I edit a View?**
Changes to parent-level filters will affect all members in the view.
Hover over an existing view in the left-hand navigation
Click the three dots (ellipses) to open the menu
Choose Edit View to modify any of the following
1. Filters (applies to all members)
2. View name and emoji
Click **Save** to apply changes
Any changes to the filters or display settings will update the view for all users with access.
### **Who can edit a view?**
Only Admins or the creator of a view can modify its filters or display settings in Edit Mode.
### **What Are Insights?**
Insights provide a visual representation of threads within a view, enabling you to analyze conversations by:
* Priority
* Status
* Owner
* Company
* Create Date
* Sentiment *(where enabled)*
* XLA *(where Experience Level Agreements are enabled)*
With Insights, you can drill down into data dynamically, allowing for more efficient thread management and analysis. Visualizations cover the first page of threads in the View (up to 200) for performance.
### **How do I use Insights?**
Insights are especially useful for technicians, service team leads, and MSP professionals to quickly assess workload and priorities.
Admins and Team Admins can also see a **read-only** version of Insights on a team's [Team Home](/inbox/team-home) page — same slice set, scoped to any View that belongs to the team, but clicks don't drill into the underlying threads. Open the View itself when you need to act on what you see.
Open a view and click the graph icon ("Insights") in the top-right corner
Switch between the available dimensions (Priority, Status, Owner, Company, Create Date, and — where enabled — Sentiment and XLA) to slice the data
Click on elements in the graph to drill deeper into specific threads
Click again to zoom out and see all threads
When finished, click Insights again to collapse the view
### **How to Manage View Notifications**
Notification preferences
are set per technician and do not apply globally across Thread Inbox.
Inbox users receive notifications for threads in their Views and can customize them to fit their needs.
To adjust notifications for a View, click the `•••` menu, hover over **Notification Preferences**, and select your preferred setting.
Hover over an existing view and click the three dots (ellipses)
Select **Notification preferences**, then choose an option:
1. **New Threads, Owner, and Mentions** → Get notified for new threads, when you're assigned, or when mentioned
2. **Owner** → Get notifications only for threads where you're the owner or mentioned
3. **@ Mentions** → Only receive notifications when mentioned
4. **Off** → No notifications
Learn more here: [Managing Your Inbox Notifications](/notifications/managing-your-inbox-notifications).
### **How to Invite Members to a View**
Hover over a view and click the three dots (ellipses)
Select **Manage members**
Use the search dropdown to find members and click **Add**
Once added, members gain immediate access to the view
### **How to Remove Members from a View**
Hover over a view and click the three dots (ellipses)
Select **Manage members**
Click **Remove** next to the member you wish to remove and the member will immediately lose access to the view
### **How to Delete a View**
Once deleted, a view cannot be recovered.
Hover over a view and click the three dots (ellipses)
Select **Delete**
A confirmation pop-up will appear. Click **Delete** to remove the view.
See **Inbox** and **UI & UX** updates — including generally available custom filters, saved
Views, and column customization — in the [changelog](/changelog/q3-2026).
## Personalise My Inbox
Technicians can change how they see their own assigned tickets without changing what they can
access.
* **Filters** — narrow assigned tickets to what matters right now.
* **Inbox / List toggle** — switch between the threaded Inbox view and a flat List view.
* **Column customisation** — show, hide and reorder columns to surface the right context.
### **How do I create a view?**
To create a new view in Inbox:
Open Inbox.
Go to the Views section in the left menu (under “My Drafts” in the Default Tools section).
Click the + icon.
Choose at least one filter (e.g., Board = Service Desk).
Enter a name for the view.
(Optional) Choose an emoji to represent your view
(Optional) Invite members to access the view
Click **Save**.
Once saved, you can invite additional members, add sub-filters (viewable only to you), change display settings, sort threads, and explore Insights
### **Display Settings**
To further personalize your experience, Thread Inbox offers two display modes:
1. **Inbox** is ideal for technicians who need to quickly switch between threads, this traditional "inbox-style" view presents conversations in a familiar format, allowing for fast navigation and response times.
2. **List** is preferred by service team leads or users who manage multiple threads, this structured layout provides an organized list of conversations, making it easier to filter, sort, and jump between threads efficiently.
### **How to Customize Your Display Settings**
You can change your display mode, sorting preferences, or thread state (View All, Active, Done) with the following steps:
Click into an existing **View**
Click the "Display" button in the top-right corner
Customize your display mode, sorting options, or thread state to fit your preference
### **Keyboard shortcuts (Beast Mode)**
Inbox has a full set of keyboard shortcuts — open the **Beast Mode** shortcut reference from
your account menu to see them all. A few of the most useful for working a View:
* Ctrl/⌘ + K / Ctrl/⌘ + J — move to the next /
previous conversation in the channel
* Ctrl/⌘ + A — switch between **Active** and **Done**
* Ctrl + N — start a new thread
* Ctrl + T — toggle the navigation panel
* Ctrl/⌘ + R — refresh
### **Who can create a View?**
Only Admins or the creator of a view can modify its filters or display settings in Edit Mode.
| Admins | Members |
| ----------------------------------------- | ----------------------------------------- |
| Can create new views from scratch | Cannot create new views from scratch |
| Can modify existing views | Cannot modify existing views |
| Can save filtered views as a new view | Cannot save filtered views as a new view |
| Can apply sub-filters to an existing view | Can apply sub-filters to an existing view |
### **Who can access a View?**
By default, views are private and only accessible to the creator. You can share a view with others by inviting them.
#### **How to Share a View**
Open the view and click ••• -> **Edit**.
In the top-right corner, click the participants pill to open **View Members**.
Use the search menu to find and add members.
You can also see who has access by clicking the Participants pill in View Mode.
#### **How to Remove Members from a View**
Open the view and click ••• -> **Edit**.
In the top-right corner, click the participants pill to open **View Members**.
Hover over a member, click “Remove”, and then click “Remove” in the confirmation modal.
### **How do I edit a View?**
Changes to parent-level filters will affect all members in the view.
Hover over an existing view in the left-hand navigation
Click the three dots (ellipses) to open the menu
Choose Edit View to modify any of the following
1. Filters (applies to all members)
2. View name and emoji
Click **Save** to apply changes
Any changes to the filters or display settings will update the view for all users with access.
### **Who can edit a view?**
Only Admins or the creator of a view can modify its filters or display settings in Edit Mode.
### **What Are Insights?**
Insights provide a visual representation of threads within a view, enabling you to analyze conversations by:
* Priority
* Status
* Owner
* Company
* Create Date
* Sentiment *(where enabled)*
* XLA *(where Experience Level Agreements are enabled)*
With Insights, you can drill down into data dynamically, allowing for more efficient thread management and analysis. Visualizations cover the first page of threads in the View (up to 200) for performance.
### **How do I use Insights?**
Insights are especially useful for technicians, service team leads, and MSP professionals to quickly assess workload and priorities.
Admins and Team Admins can also see a **read-only** version of Insights on a team's [Team Home](/inbox/team-home) page — same slice set, scoped to any View that belongs to the team, but clicks don't drill into the underlying threads. Open the View itself when you need to act on what you see.
Open a view and click the graph icon ("Insights") in the top-right corner
Switch between the available dimensions (Priority, Status, Owner, Company, Create Date, and — where enabled — Sentiment and XLA) to slice the data
Click on elements in the graph to drill deeper into specific threads
Click again to zoom out and see all threads
When finished, click Insights again to collapse the view
### **How to Manage View Notifications**
Notification preferences
are set per technician and do not apply globally across Thread Inbox.
Inbox users receive notifications for threads in their Views and can customize them to fit their needs.
To adjust notifications for a View, click the `•••` menu, hover over **Notification Preferences**, and select your preferred setting.
Hover over an existing view and click the three dots (ellipses)
Select **Notification preferences**, then choose an option:
1. **New Threads, Owner, and Mentions** → Get notified for new threads, when you're assigned, or when mentioned
2. **Owner** → Get notifications only for threads where you're the owner or mentioned
3. **@ Mentions** → Only receive notifications when mentioned
4. **Off** → No notifications
Learn more here: [Managing Your Inbox Notifications](/notifications/managing-your-inbox-notifications).
### **How to Invite Members to a View**
Hover over a view and click the three dots (ellipses)
Select **Manage members**
Use the search dropdown to find members and click **Add**
Once added, members gain immediate access to the view
### **How to Remove Members from a View**
Hover over a view and click the three dots (ellipses)
Select **Manage members**
Click **Remove** next to the member you wish to remove and the member will immediately lose access to the view
### **How to Delete a View**
Once deleted, a view cannot be recovered.
Hover over a view and click the three dots (ellipses)
Select **Delete**
A confirmation pop-up will appear. Click **Delete** to remove the view.
See **Inbox** and **UI & UX** updates — including generally available custom filters, saved
Views, and column customization — in the [changelog](/changelog/q3-2026).
## Personalise My Inbox
Technicians can change how they see their own assigned tickets without changing what they can
access.
* **Filters** — narrow assigned tickets to what matters right now.
* **Inbox / List toggle** — switch between the threaded Inbox view and a flat List view.
* **Column customisation** — show, hide and reorder columns to surface the right context.
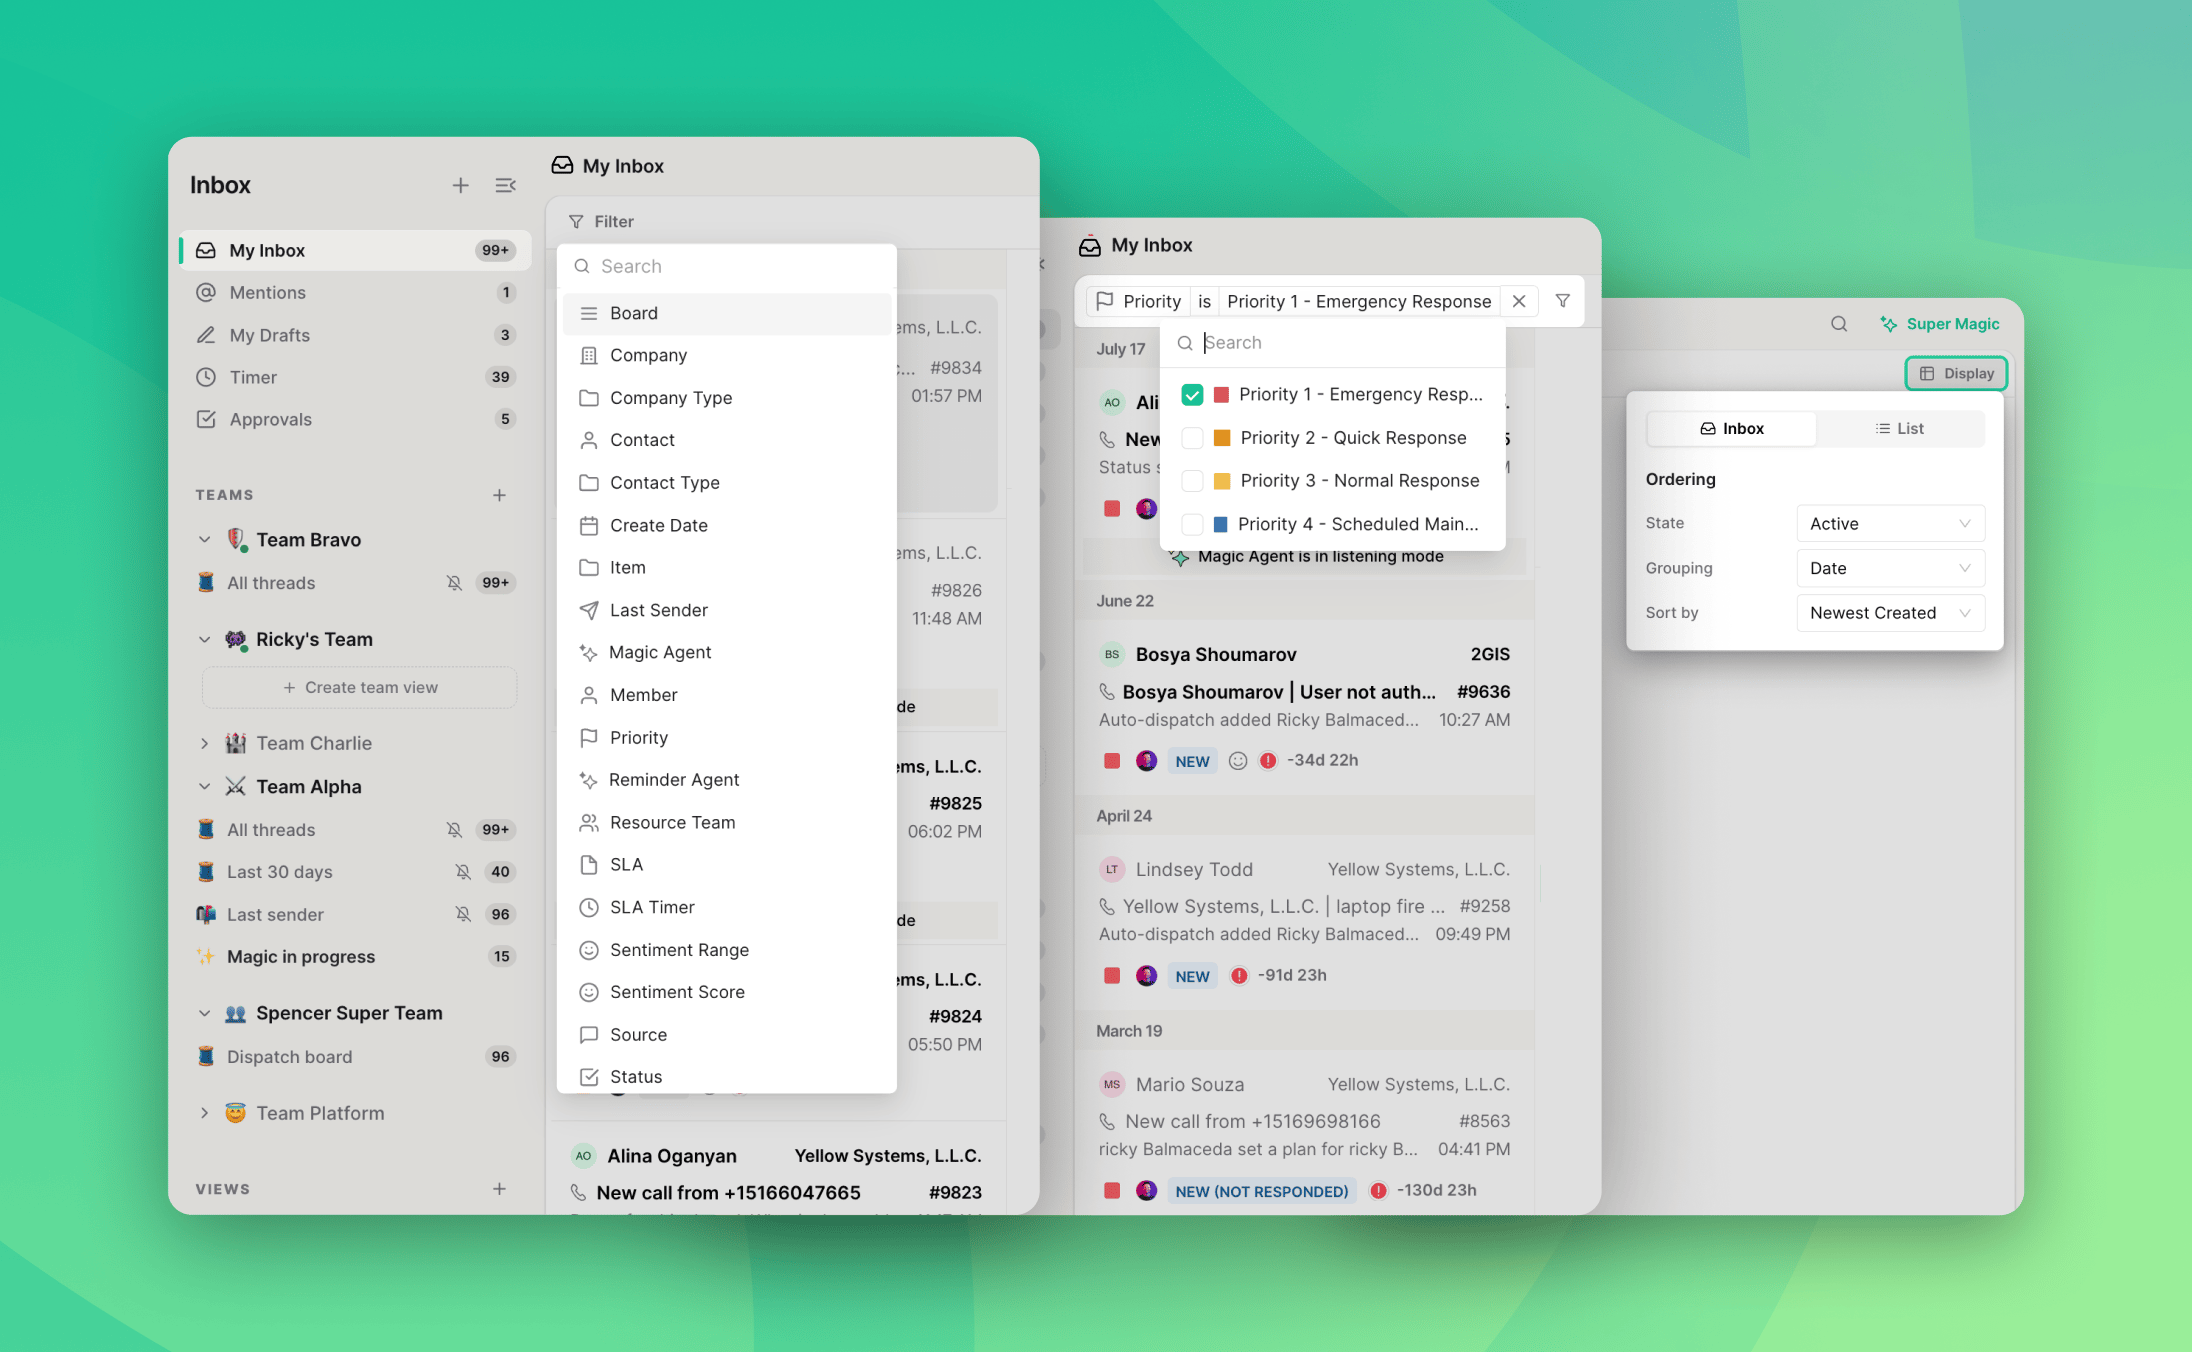 My Inbox stays scoped to each member's own threads. Members can filter and change display
options but **cannot create** My Inbox views yet.
## Skills that use this
Let Super Magic build and score the Views your team works from.
Build the Views your team needs, conversationally.
Always know which ticket to work next.
Your open tickets, skimmable in under a minute.
Every automation and Flows skill.
## Related topics
- [Thread Control Panel: Contact, Time Pad, and AI Insights](/inbox/4-the-control-panel.md)
- [Inbox Channels Deprecation: What's Changing and When](/inbox/channels-deprecation-in-inbox.md)
- [Set Up Thread Inbox by Service Team Structure](/inbox/service-team-structure.md)
My Inbox stays scoped to each member's own threads. Members can filter and change display
options but **cannot create** My Inbox views yet.
## Skills that use this
Let Super Magic build and score the Views your team works from.
Build the Views your team needs, conversationally.
Always know which ticket to work next.
Your open tickets, skimmable in under a minute.
Every automation and Flows skill.
## Related topics
- [Thread Control Panel: Contact, Time Pad, and AI Insights](/inbox/4-the-control-panel.md)
- [Inbox Channels Deprecation: What's Changing and When](/inbox/channels-deprecation-in-inbox.md)
- [Set Up Thread Inbox by Service Team Structure](/inbox/service-team-structure.md)