

 Magic Library
Overview
Planner is the scheduling board in Thread Inbox. Every member you show gets their own column, with their own Todo list and a shared Triage panel at the bottom of the screen. You assign work by dragging a ticket to a person, and schedule it by dragging it onto a time or a day. Plans you make in Planner become schedule entries in your PSA, and schedule entries made in your PSA show up in Planner.Plan your first ticket
1
Open Planner
In Thread Inbox, select Planner in the left navigation.
2
Choose whose schedule you see
In the Planner side panel, select All members, My schedule, or one of your teams. On All members or a team, use Manage members to pick who gets a column. See Choose whose schedule you see.
3
Pick a view
Use the Day / Week / Columns toggle in the toolbar. See Switch between Day, Week and Columns.
4
Assign a ticket
Drag a ticket from the Triage panel at the bottom onto a member’s Todo. That member becomes the ticket owner, in Thread and in your PSA.
5
Schedule it
Drag the ticket onto a time slot to plan it at that time, or onto a day in the multi-member Week view or Columns to plan it for that day without a time. Planner writes the plan to your PSA as a schedule entry. See Assign and schedule by drag and drop.
What’s different from the previous Planner
The previous Planner showed each member as a column of day boxes (Overdue, Assigned, then one box per day). The new Planner adds:- An hour-by-hour calendar. In Day view, each member’s column is a time grid in half-hour slots, with a red line marking the current time.
- Todo instead of the Assigned box. Tickets a member owns but hasn’t scheduled sit in their Todo, directly under their calendar.
- Triage at the bottom, as a full ticket list. You can search it, filter it, sort it, and switch it to a saved view.
- A choice of who you see. Switch between All members, My schedule, and any of your teams.
- Day, Week and Columns views, resizable panels, and a compact layout. Columns keeps the classic layout: one lane per member with their To do list and the days of the week.
- Cards that open the ticket in place, so you can work it without leaving Planner.
Triage, Todo and the calendar
Every ticket on the board is in one of three places:
Todo is there so nothing waits on your calendar. Claim a ticket into your Todo the moment it comes in, so everyone can see you own it, then drag it onto the calendar when you’re ready to put it on the clock.
Choose whose schedule you see
The Planner side panel lists:- All members: any members you pick from your workspace.
- My schedule: only your own calendar.
- Teams: each of your teams, in the same order as Inbox.
Switch between Day, Week and Columns
Use the Day / Week / Columns toggle in the toolbar:- Day shows one column per member on a 24-hour time grid, in 30-minute slots. A red line marks the current time when you’re looking at today.
- Week with a single member (for example, My schedule) shows Monday through Sunday as columns on the same time grid.
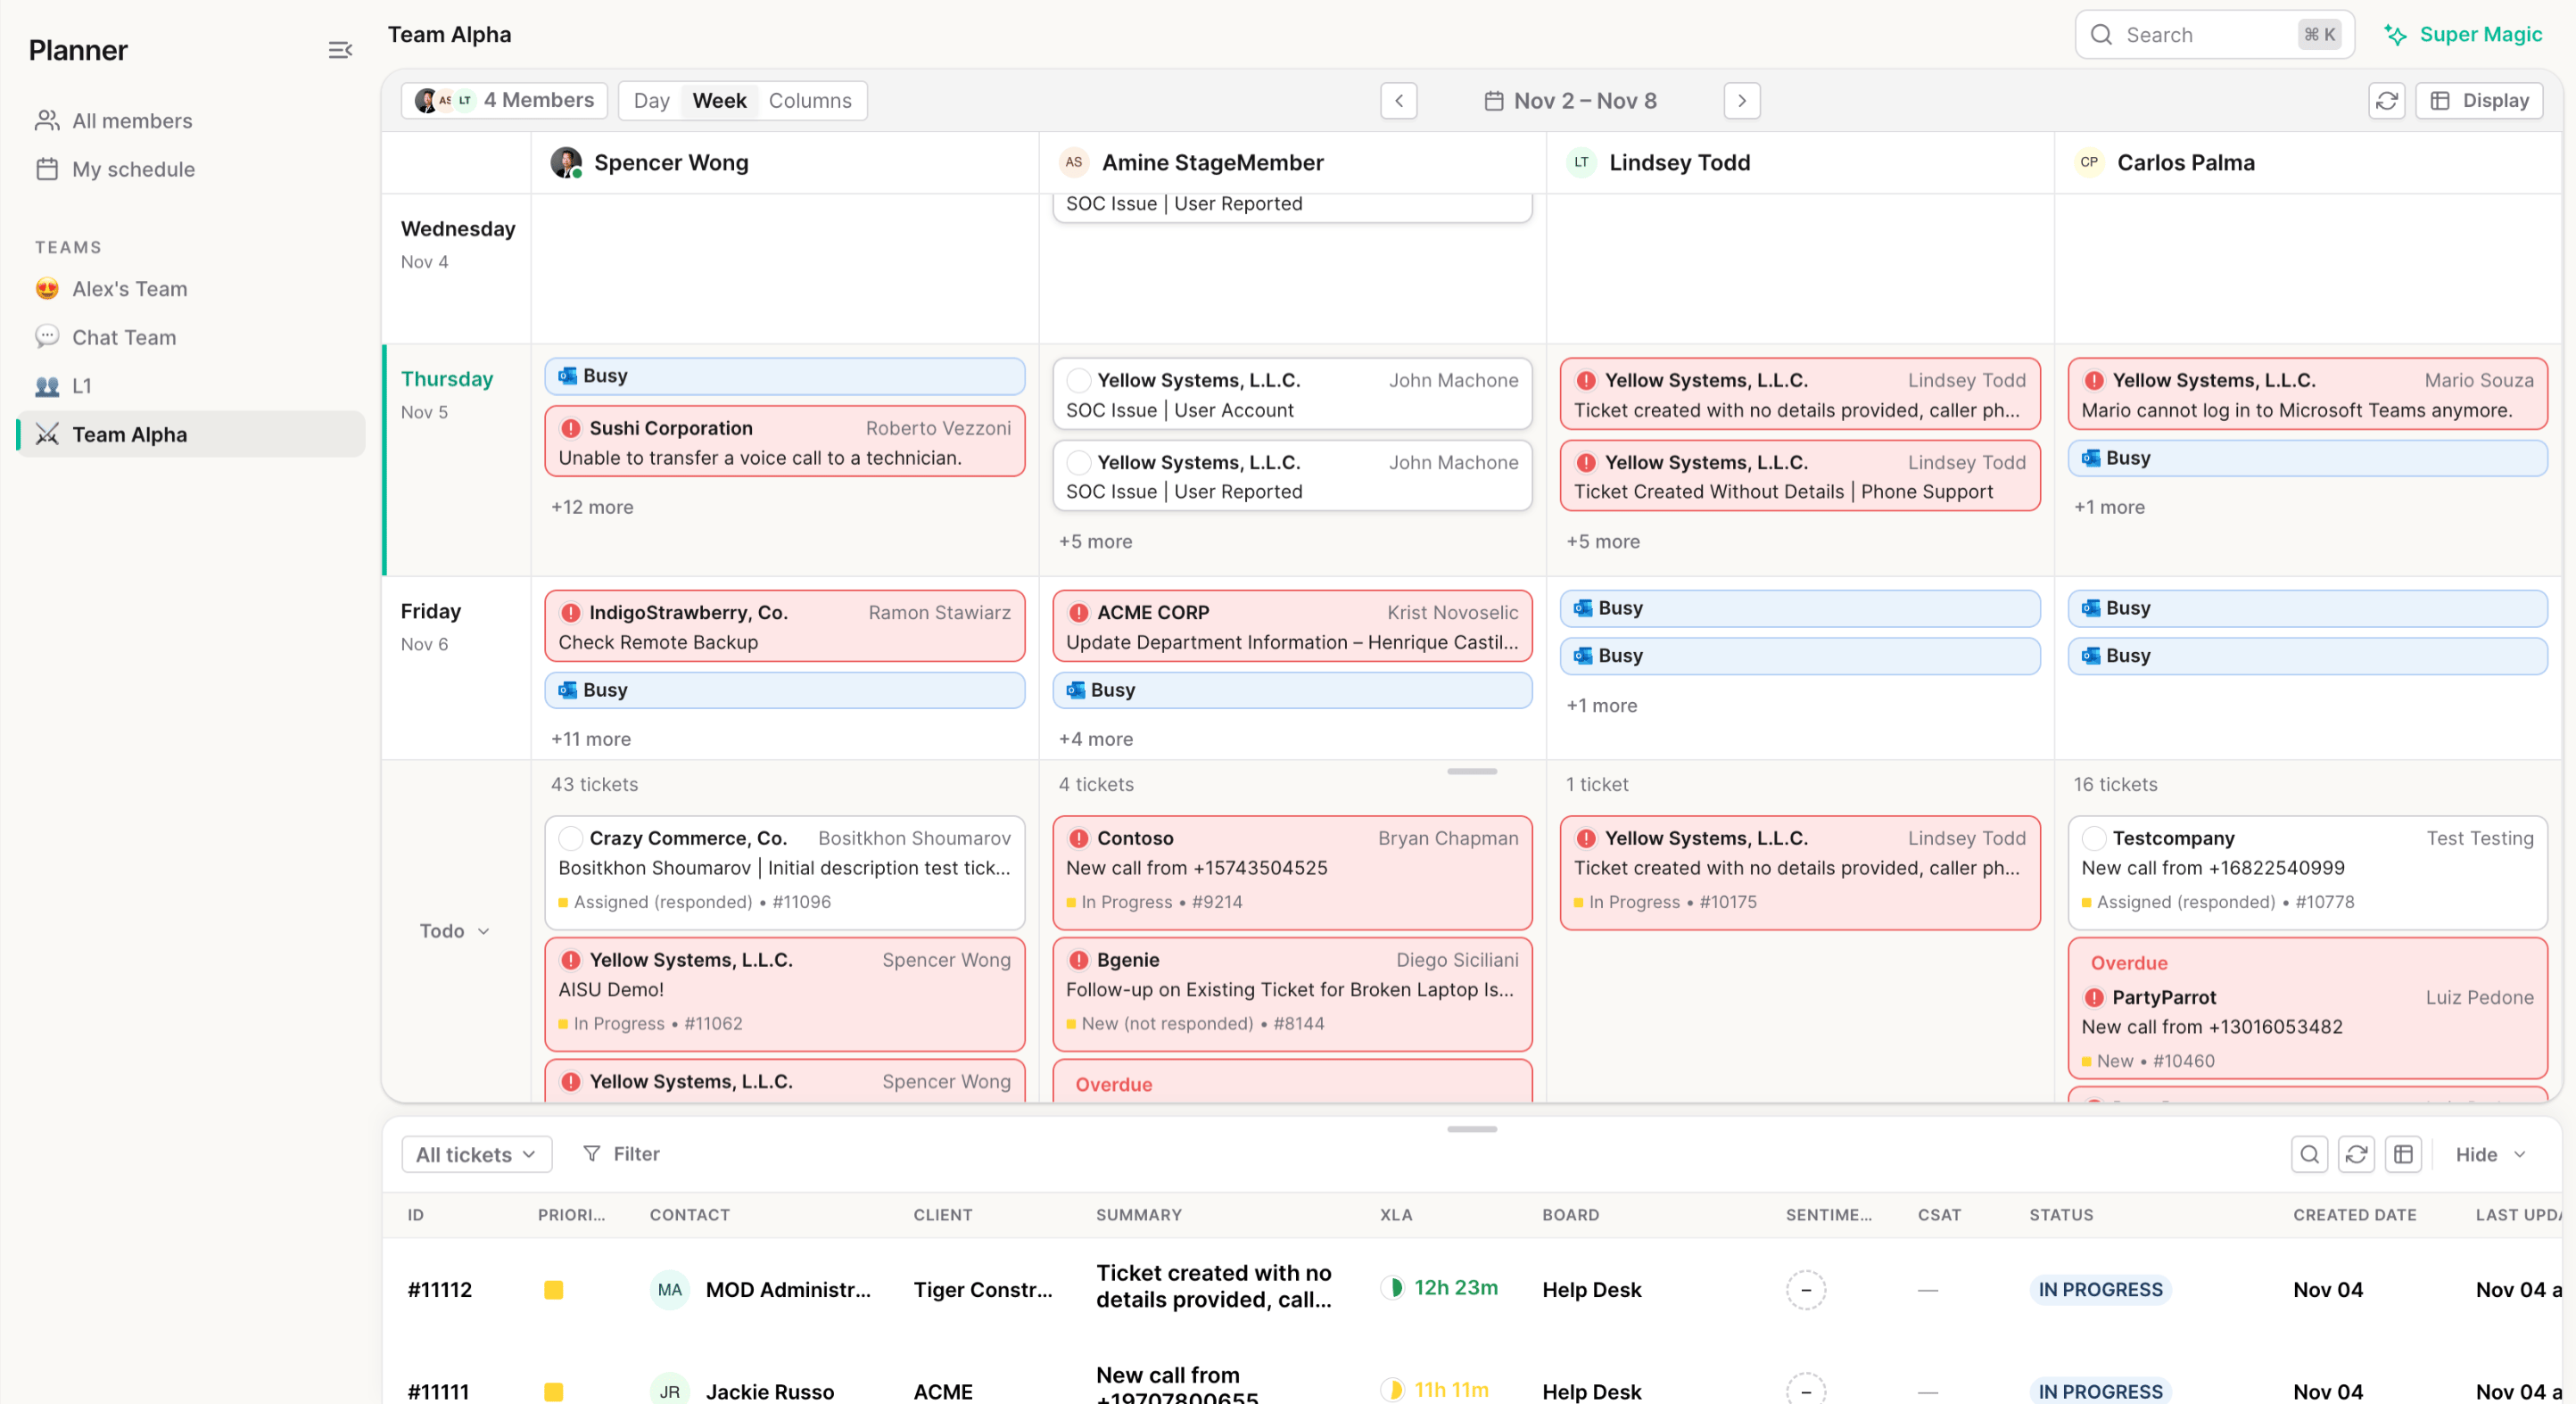
- Week with several members shows one column per member and one row per day, Monday through Sunday. Each cell lists that member’s plans for the day. Select +N more to see the rest of a busy day.
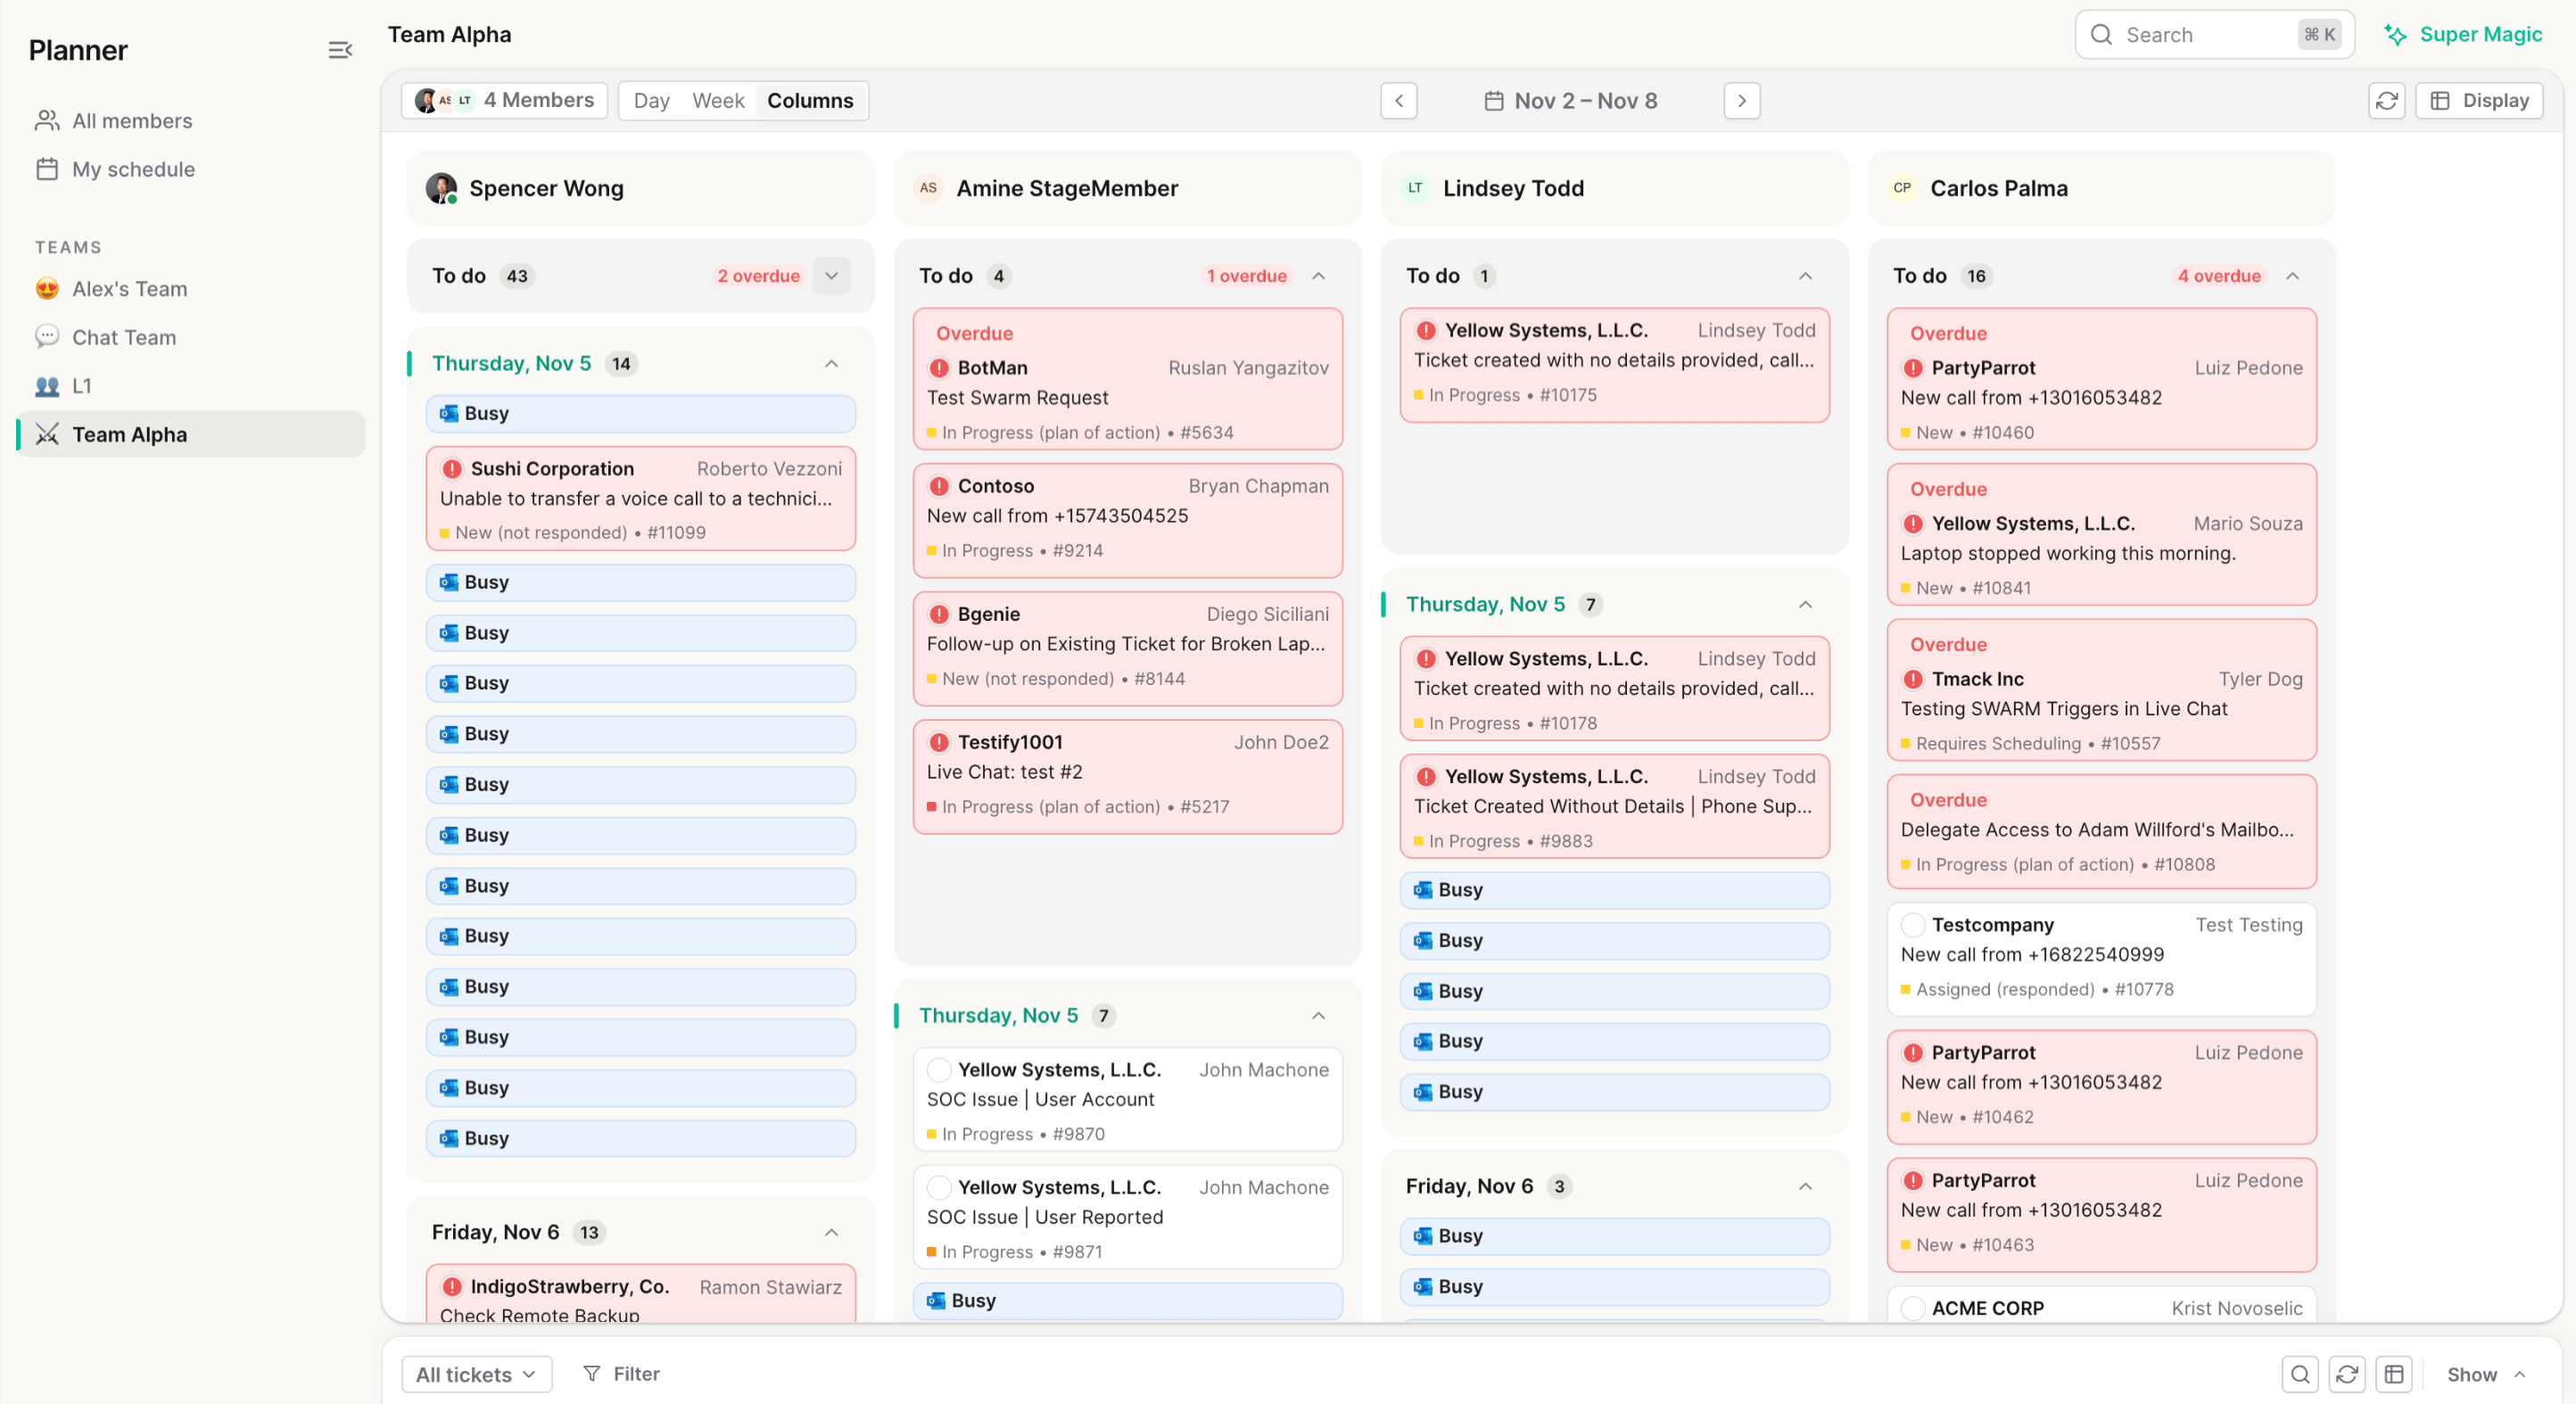
- Columns gives each member a lane with their To do list at the top and the days of the week below it. See The Columns view.
The Columns view
Columns shows the week as a list of cards rather than a time grid, so you can see each member’s open work and upcoming plans at a glance. With several members, each member gets a lane:- To do at the top lists the member’s tickets that have no upcoming plan. The header shows how many there are, and a red tag such as 2 overdue when some are overdue. Overdue tickets come first.
- Below it, one section per day lists that day’s plans and Outlook events, plans without a time first. In the current week, the lane starts at today and runs to Friday, and weekend days appear only when today is a Saturday or Sunday. Other weeks show Monday to Friday.
Use Todo and Triage
The Todo strip
The Todo strip sits under the calendar in Day and Week views. In Columns, the same list is each lane’s To do section. Each member’s cell holds:- Plans for the day you’re viewing that have no start time (Day view only). These show their day as a label, which turns red once the day has passed.
- Tickets the member owns that have no plan for today or later, most recently updated first. A ticket whose plans have all ended without being completed shows a red Overdue tag. Select Show more to load more.
The Triage panel
The Triage panel at the bottom of the page lists tickets you can plan. Choose what it shows from its view menu:- All tickets: active tickets with no assignee.
- Assigned to me: your own tickets.
- When a team is selected, that team’s saved views.
Assign and schedule by drag and drop
Drag any ticket card to a new place. The drop target lights up and names what will happen, for example Drop to assign with the member’s name.The three everyday moves
- Triage to Todo: drag a new ticket onto a member’s Todo. They become the ticket owner, in Thread and in your PSA. No plan is created.
- Todo to the calendar: drag it onto a time slot. Planner creates a 30-minute plan at that time and writes it to your PSA as a schedule entry.
- Triage straight to the calendar: drag it onto someone’s time slot to assign and schedule it in one move.
Who owns the ticket after a drop
A ticket’s owner is its assignee. A secondary resource is a member who has a plan on a ticket they don’t own, for example a second technician on a ConnectWise or Autotask schedule entry. Secondary resources show as their own cards in their own column.
Two cases to keep in mind:
- A card from someone else’s Todo goes to whoever you drop it on. Drag a ticket from one member’s Todo onto another member’s calendar, and the second member becomes the owner.
- Dropping on Triage always removes the owner, even when you drag a secondary resource’s plan.
Change a plan’s time
- Resize: in Day view or the single-member Week view, drag the top or bottom edge of a ticket card. Times snap to 15 minutes.
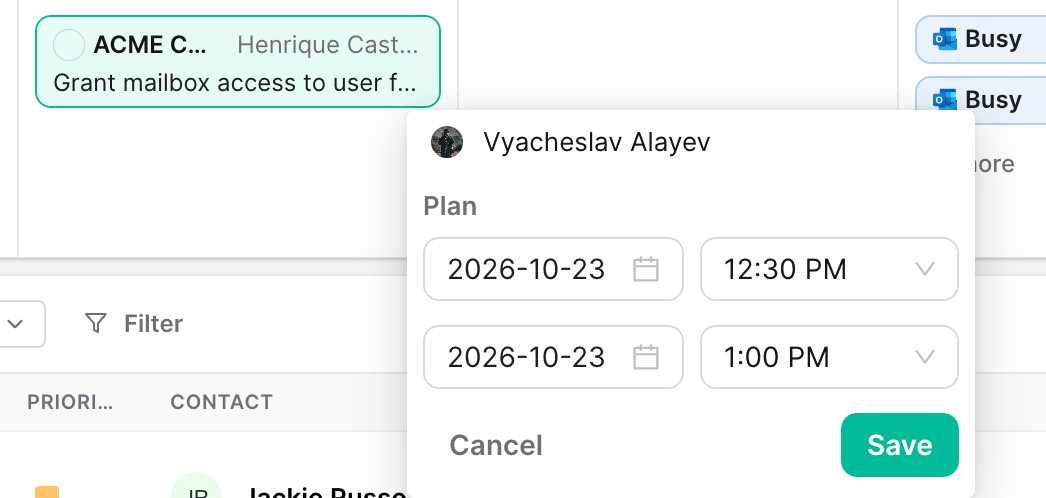
- Set an exact time: hover a card and select Set a time. Choose the member, start and end day, and start and end time, in 15-minute steps, then select Save.
Read the cards
Each plan appears as a card in its member’s column. In Day and Week views, timed cards are sized to their start and end time, and plans that overlap appear side by side.- Ticket plans show the company, contact and ticket summary, and on larger cards the status and ticket number.
- Outlook calendar events appear in blue with the Outlook icon and the event title. See Show Outlook events in Planner.
- Completed plans stay on the calendar, greyed out, so past days show the work that was done. Hover the icon to see Marked as done or Ticket closed.
The icon at the top left of a ticket card shows the XLA timer; hover it to see the time left. The small colored square before the status shows the ticket’s priority.
If your workspace uses Auto-dispatch and a member has a work schedule, the hours outside that member’s working time are shaded in Day view and the single-member Week view. Shading is a visual guide only: you can still plan into those hours. To set working hours, see Create and manage work schedules.
Set up the layout
- Drag the dividers above Todo and above Triage to give either one more room, or collapse them.
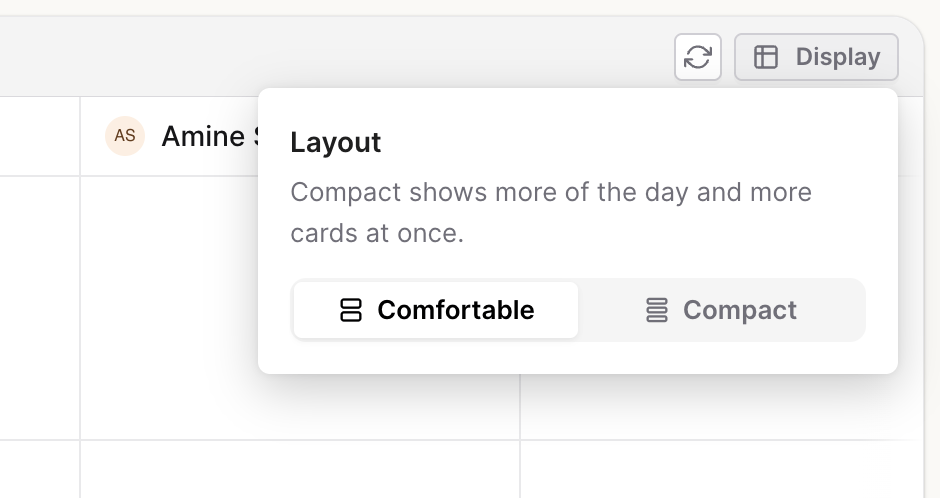
- Layout: select Display in the toolbar and choose Comfortable (default, taller hours and roomier cards) or Compact (more of the day and more cards on screen). In Columns, cards always show full detail, so the layout only changes the text size.
- Per view: All members, My schedule and each team keep their own members, Day, Week or Columns choice, Triage view, and filters. A view you haven’t switched yet opens in the mode you used last. Todo and Triage height, what’s collapsed, and the layout apply to every view.
Keep Planner up to date
Planner updates on its own. When a plan is added, moved, completed or removed, the calendar, Todo and Triage change without reloading the page, including when a teammate made the change. Changes made directly in your PSA reach Planner once Thread next syncs with it. To sync now instead of waiting, select Refresh in the toolbar. For how often each PSA syncs, see How Planner syncs with your PSA.Open a ticket from Planner
Click any ticket card to open the ticket on top of Planner. Reply, add a note, change the status or priority, log time, or run an action, then close it to land back where you were. Use Full view to open the whole ticket. Every plan for the ticket is listed in the Planner card of its Control Panel. From there you can mark a plan done, edit or delete it, or add another with +. Done plans are hidden until you click Show done. A ticket that’s only in someone’s Todo has no plan, so its Planner card shows “No planned events” and its owner appears under Members.Show Outlook events in Planner
Planner has no setting of its own for Outlook events. They appear for every member once an admin connects Outlook Calendar for your workspace: in Admin → Integrations, open the Microsoft integration (for example Microsoft 365, Teams and Outlook Calendar) and connect the Outlook Calendar card. You can also go straight to the Microsoft integrations page in Admin. Events can take up to an hour to appear after you connect. The connection covers the whole workspace, so members don’t connect their own calendars. For the steps and the permissions it needs, see Planner and Outlook calendar integration. Once Outlook is connected:- Each member’s default Outlook calendar shows in their column, so you can see meetings and time off before you plan work.
- To keep a member’s event titles private, an admin opens Manage calendars on the Outlook Calendar card and turns on Hide event titles for that member. Planner then shows Busy in place of the title.
- Outlook events are read-only in Planner. You can’t drag, resize or open them. Changes made in Outlook reach Planner on the next sync.
Dispatch with Super Magic
Super Magic opens next to Planner and can read the same schedule. Ask it, for example, who on your Help Desk team can take a ticket this afternoon. It checks the planner and, when auto-dispatch is set up, who’s available for dispatch, then schedules the ticket, and the plan appears on the calendar. Super Magic can also reschedule a plan, hand it to someone else, mark it done, delete it, or pull the next ticket from a technician’s auto-dispatch queue. Scheduling requires that Super Magic is allowed to make changes for you. See the Super Magic tool reference for the full list.How Planner syncs with your PSA
Planner keeps schedule entries in step with your PSA in both directions. When you create, move, retime, complete, or delete a plan in Thread, that change is pushed to the PSA immediately. Changes made in the PSA flow back into Planner as described below. Only ticket-based plans sync to the PSA. Outlook meetings stay in Planner and are not written to the PSA.
Because Autotask and HaloPSA reject overlaps, planning a ticket over an existing plan for the same member at the same time fails with “A schedule already exists for this member at this date and time.” and the card goes back.
Autotask service calls require a start and end time. When you plan a ticket for a day without a time, Thread sends Autotask a default start of 12:00 am (and a one-hour default window) for that day, so the plan still lands on the schedule.
Planner also works for workspaces without a PSA. Plans are stored in Thread.
TimeZest integration
If you have a TimeZest account, you can book appointments directly from Thread with bidirectional syncing to your PSA. In Admin → Integrations, open TimeZest to add the integration. Once configured, trigger TimeZest from the Actions tab in the composer or with the/timezest slash command; answer a few prompts, and a booking link is generated to send to your customer. When the customer picks a time, the appointment appears in both Thread Inbox and your PSA.
Super Magic can use the same TimeZest connection. Ask it to send a contact a booking link, and it picks the TimeZest appointment type and resource, sends the scheduling request, and can check which requests are still waiting on the customer. This works once TimeZest is connected and its tools are turned on for Super Magic. See the TimeZest tools in the Super Magic tool reference.
For setup details, see Integrating TimeZest with Thread.
Frequently asked questions
Why put a ticket in Todo instead of scheduling it right away?
Why put a ticket in Todo instead of scheduling it right away?
Todo lets you claim work the moment it arrives without committing to a time. The ticket gets an owner in Thread and in your PSA, so it leaves Triage and nobody else picks it up. Drag it onto the calendar when you know when you’ll work it.
If I move a teammate's plan, does the ticket change owner?
If I move a teammate's plan, does the ticket change owner?
Only if the plan belongs to the ticket owner. Move the owner’s plan to another member and that member becomes the owner. Move a secondary resource’s plan and only their plan moves; the owner stays the same. Dropping any card on Triage removes the owner.
What happens when I drag a planned ticket back to Todo or Triage?
What happens when I drag a planned ticket back to Todo or Triage?
Dragging a plan to Todo removes the plan (and the matching PSA entry) and keeps the ticket in Todo. Dragging anything to Triage removes both the plan and the owner. Planner asks you to confirm first, and every change has Undo.
Can I schedule work down to an exact time?
Can I schedule work down to an exact time?
Yes. Drop a card on a half-hour slot in Day view, drag the card’s edges in 15-minute steps, or select Set a time on the card to pick an exact start and end.
Which PSAs does Planner support?
Which PSAs does Planner support?
Planner works with ConnectWise, Autotask, and HaloPSA, and it also works for workspaces that have no PSA connected. Plans sync automatically between Thread and your connected PSA.
Why did Planner reject my plan as a conflict?
Why did Planner reject my plan as a conflict?
Autotask and HaloPSA block overlapping schedule entries for the same member at the same time. If you plan over an existing entry, Thread shows “A schedule already exists for this member at this date and time.” and the card goes back. ConnectWise allows overlaps, so both plans stay on the board side by side.
I use Autotask. How does a plan without a time sync?
I use Autotask. How does a plan without a time sync?
Autotask service calls require a start and end time, so when you plan a ticket for a day without a time, Thread sets the Autotask start to 12:00 am (with a default one-hour window) for that day. The plan still appears on the Autotask schedule.