

 Magic Library
This is a Best Practice guide to ensure communication is consistent across chat and email.
Who is this guide for?
If you use Quick Notification (Notify via “TO”) on Notes in Autotask to email ticket contacts, this guide is for you. Autotask does not permit vendors like Thread from toggling these fields on your replies. If you use this toggle today to send emails to customers and you want your customers to get notified when you reply to a thread in Inbox, then this guide is for you.
How-To Guide
1. Setting up an Email Suppress User-Defined Field (UDF)
We are setting up a workflow to enable closed loop email notifications to your customers on all replies to a ticket. However, we are also using a UDF to enable us to toggle these email notifications off when desired.This way, emails will be off by default for incoming customer chats but can be turned on quickly for all replies by toggling the UDF.
1
Open Autotask as an Administrator
Open Autotask as an Administrator
2
Open User-Defined Fields
Navigate to Admin -> Features & Settings -> Application-Wide (Shared) Features -> and click on User-Defined Fields
3
Go to the Tickets tab
Navigate to the Tickets tab
4
Create the new field
Click New and enter the following information: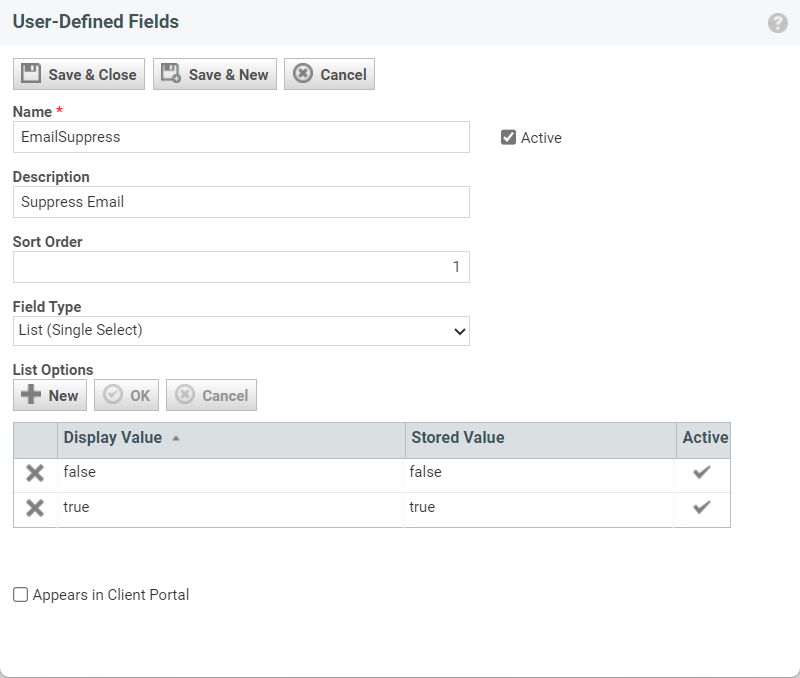
- UDF Type: Ticket
- Field Type: Single Select
- Name: EmailSuppress (True/False)
5
Save the field
Click Save & Close
2. Create a workflow rule to send email notifications
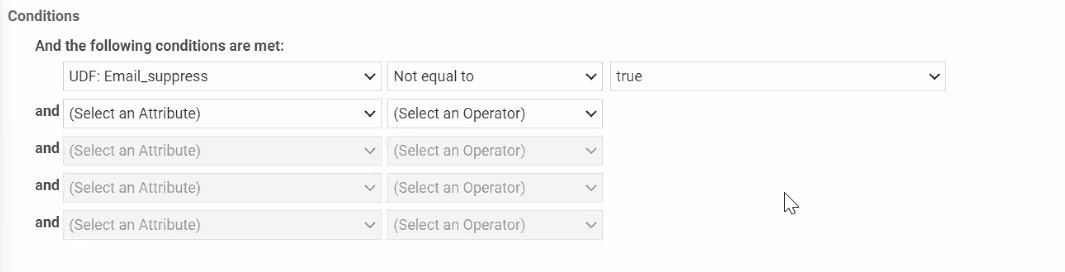
In this step, we set up a workflow rule to enable email notifications to Ticket contacts on reply. We are leveraging the UDF we created in the previous step to only send email when the Email Suppress UDF is NOT checked. This way, email will be sent by default except when the Email Suppress box is checked.1
Open Autotask as an Administrator
Open Autotask as an Administrator
2
Open the Workflow Rules page
Navigate to Admin -> Automation -> Workflow Rules -> open Workflow Rules page
3
Create a new workflow rule
Create a New workflow rule. If you already have a workflow rule to send email to your customers, you can edit it to incorporate the UDF logic.
4
Enter the workflow rule information
Enter in the following information:
- Workflow Rule Name: Email Notification on Note Added by Resource
- Events -> Activity/Accessories -> check the box for Note Added By -> Select Autotask Resource from the drop-down menu
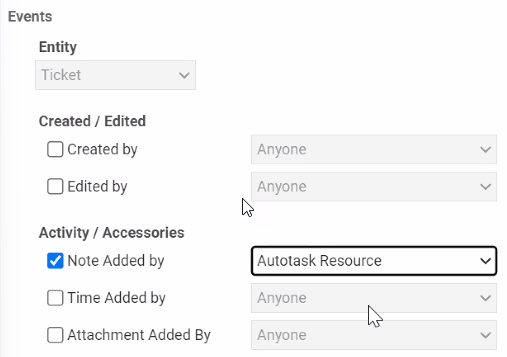
- Add the following Condition: (CHANGE TO NOT EQUAL TO TRUE)
- Navigate to the Notification tab at the top of the window.
- Select the user types you’d like to receive email notifications. We recommend selecting Ticket Contact and Additional Contacts.
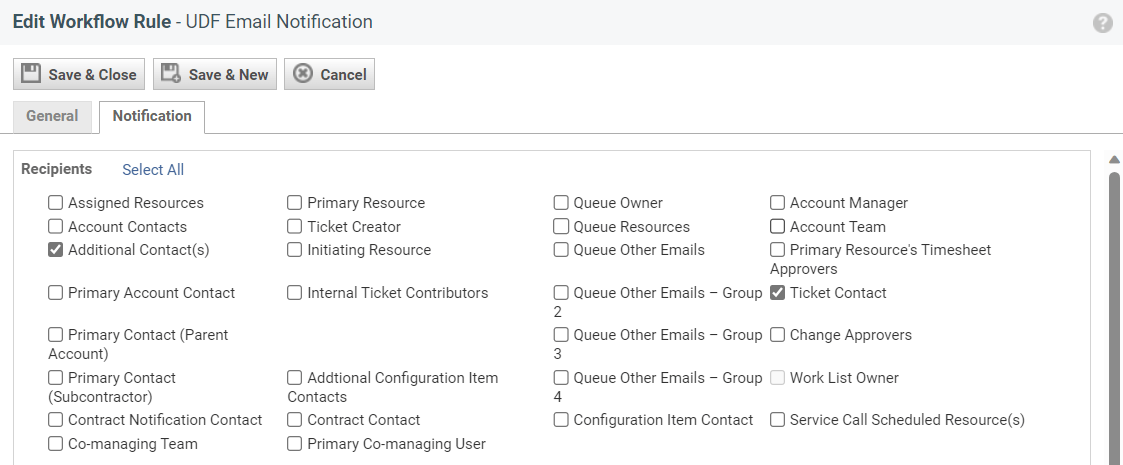
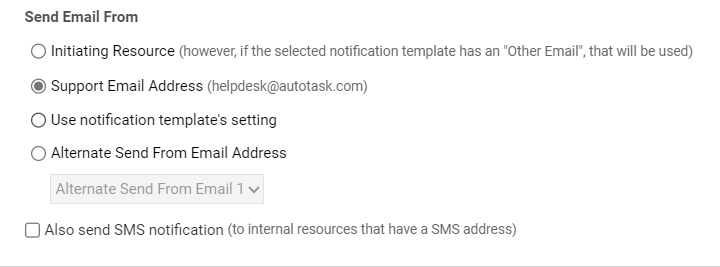
- Select the email address you’d like the email to come from
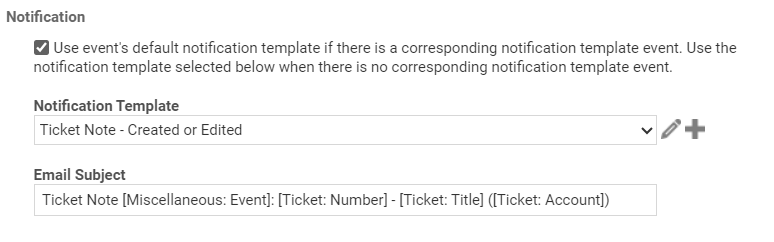
- Select the email notification you’d like to use for the emails. If you’d like to customize or build your own notification templates, you can follow this guide from Autotask.
- Click Save & Close
3. Create a workflow rule to suppress email notifications (UDF) on chats by default
In this step, we set up a workflow rule to suppress customer email notifications by default for chats. This toggles the EmailSuppress UDF on for incoming chats - this ensures email is turned off for chats. Because users are chatting with you, they will receive your replies in the context of their chat - emails might be redundant for them.1
Open Autotask as an Administrator
Open Autotask as an Administrator
2
Open the Workflow Rules page
Navigate to Admin -> Automation -> Workflow Rules -> open Workflow Rules page
3
Create a new workflow rule
Create a New workflow rule
4
Enter the workflow rule information
Enter in the following information:
- Workflow Rule Name: UDF Email Suppression for New Chats
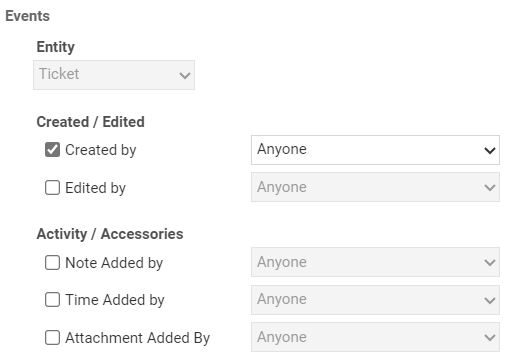
- Events -> Created / Edited -> check the box for Created By -> Select Anyone from the drop-down menu.
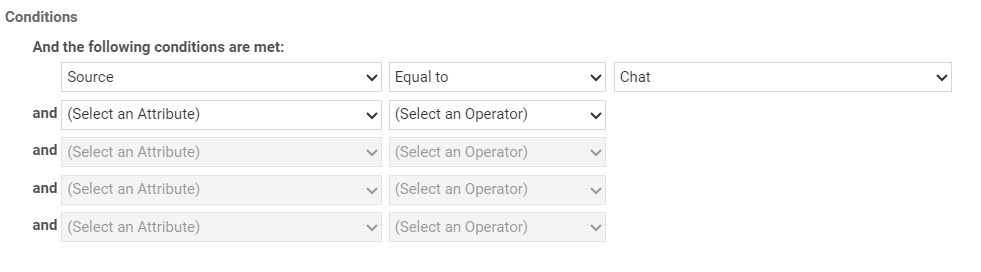
- Add the following Condition:
- Under Updates, add the following settings:
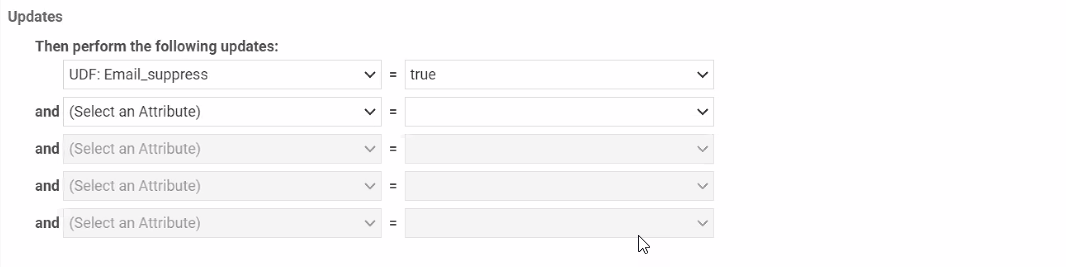
- Click Save & Close