Magic Library
Overview
This guide explains how to set up the HaloPSA Integration in Thread.Set up the integration
1
Step 1: Prepare Your Workspace
If this is your first time setting up your workspace, refer to Create your workspace for detailed instructions.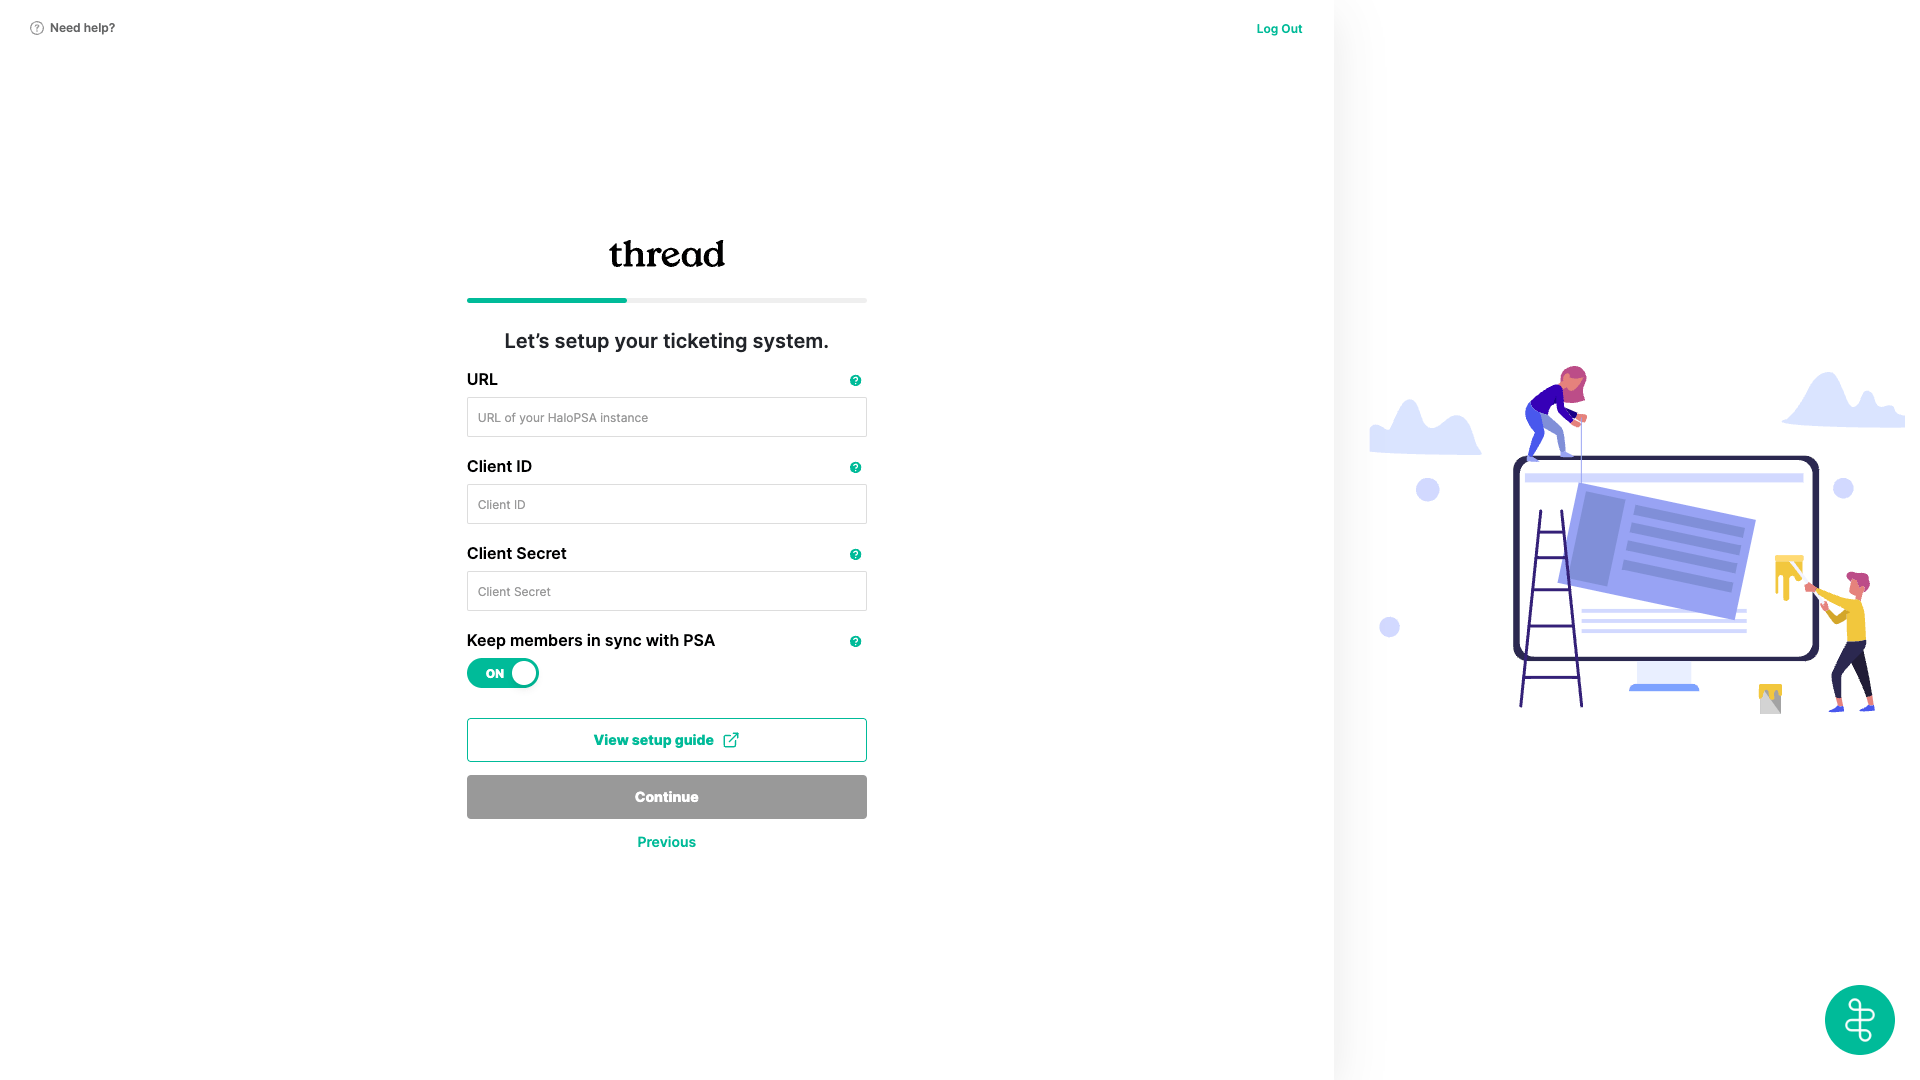
- When you initially set up your workspace in Thread, you will be prompted to configure your ticketing system. If you select HaloPSA, you will be directed to a screen where you must enter your API credentials. Keep this screen open; we will return to it later.
- Open a new browser tab or window to proceed to the next step: Creating an API-Only Agent.
2
Step 2: Creating an API-Only Agent
- Log in to Halo.
- Navigate to the Configuration section.
- Go to Team & Agents → Agents.
- Click New in the top-right corner to create a new agent.
- Give it a username (e.g., Thread API Agent).
- Set the Is an API-only Agent checkbox to selected. API-only agents do not take up a license.
- Select No Default Team under the Default Team dropdown.
- Select Default Working Hours from the dropdown and click save.
- Click the Permissions tab, select the following permissions, and click Save.
- Click the Restrictions tab and set Allow use of all Customers to Yes. Your instance may label this Allow use of all Clients.
- Click Save to save the newly created API-only Agent.
3
Step 3: Creating an Integrator Application
- Navigate to the Configuration section.
- Go to Integrations → HaloPSA API.
- Click View Applications.
- Click New in the top-right corner to create a new application.
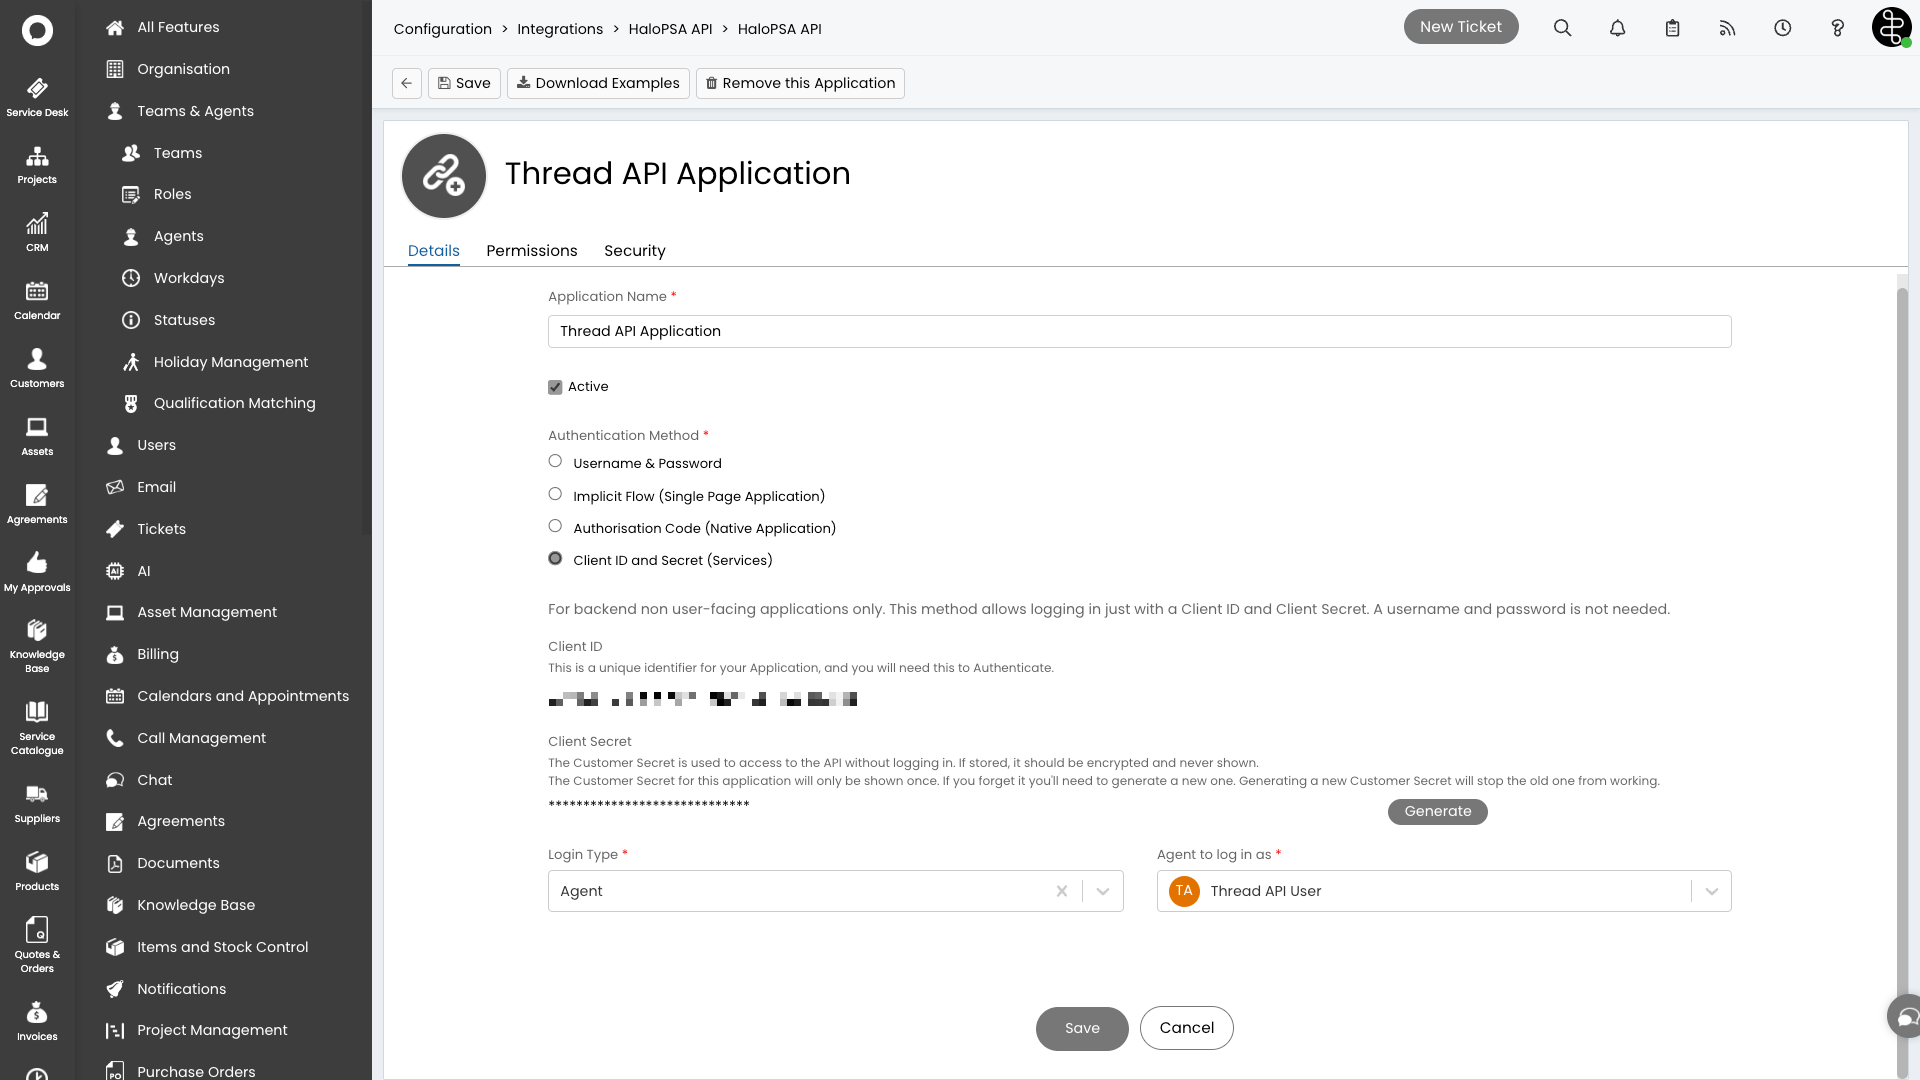
- Enter an application name (e.g., Thread API Application).
- For Authentication Method select Client ID and Client Secret (Services).
- Make sure to keep the Client ID and Client Secret in a safe place for later.
- Login Type should be selected as Agent.
- Select the API-only Agent previously created under Agent to log in as.
-
Click the Permissions tab, select the following permissions, and click Save.
- Click Save to save the newly created application.
4
Step 4: Create Actions for Key Events
To ensure seamless integration between Thread and HaloPSA, you need to map three specific actions in the subsequent steps for the following events:
- Action for sending customer-facing notes
- Action for sending internal notes
- Action for emailing contacts
Action Mapping Configuration with Thread
Configure and map the custom HaloPSA actions Thread needs to sync notes, emails, and messages.
5
Step 5: Continue Your Workspace Setup
- Head back to your other tab from Step 1: Prepare Your Workspace.
- Enter your HaloPSA API Base URL. (e.g., https://threadsandbox.halopsa.com). Important: To ensure full functionality, ensure no trailing ’/’, subdirectory, or parameter is appended to the url.
- Copy and paste the Client ID and Client Secret retrieved from Step 2: Creating an API-Only Agent.
- Click Continue. Next, design your customer chat experience.