

 Magic Library
Overview
The Thread integration lets you seamlessly push data from ConnectWise Automate as messages to your chat platform.Set up the integration
1
Step 1: Creating the User Class for the API User
- Open Automate Control Center and log in as an Administrator.
- Navigate to System > Users and Contacts > User Class Manager
- The User Class Manager screen will pop up, click the + icon at the bottom left corner of this window
- The Add User Class window will pop up, enter whatever you like for class name, we recommend “Thread API User”, click OK
- Back on the User Class Manager window, click on the class you just created to edit it. Stay on the Core tab for now.
- On the Core tab set the appropriate permissions based on the screenshots below. Click Save once you are done checking the appropriate permissions.

- Next, click on the Plugin tab. Set top-level permissions to the ConnectWise Control Plugin and click Save.
- Thats it! You are now ready to assign this User Class to the API User you created.
2
Step 2: Configuring the Automate API User
- Open Automate Control Center and log in as an Administrator.
- Navigate to System > Users and Contacts > Users
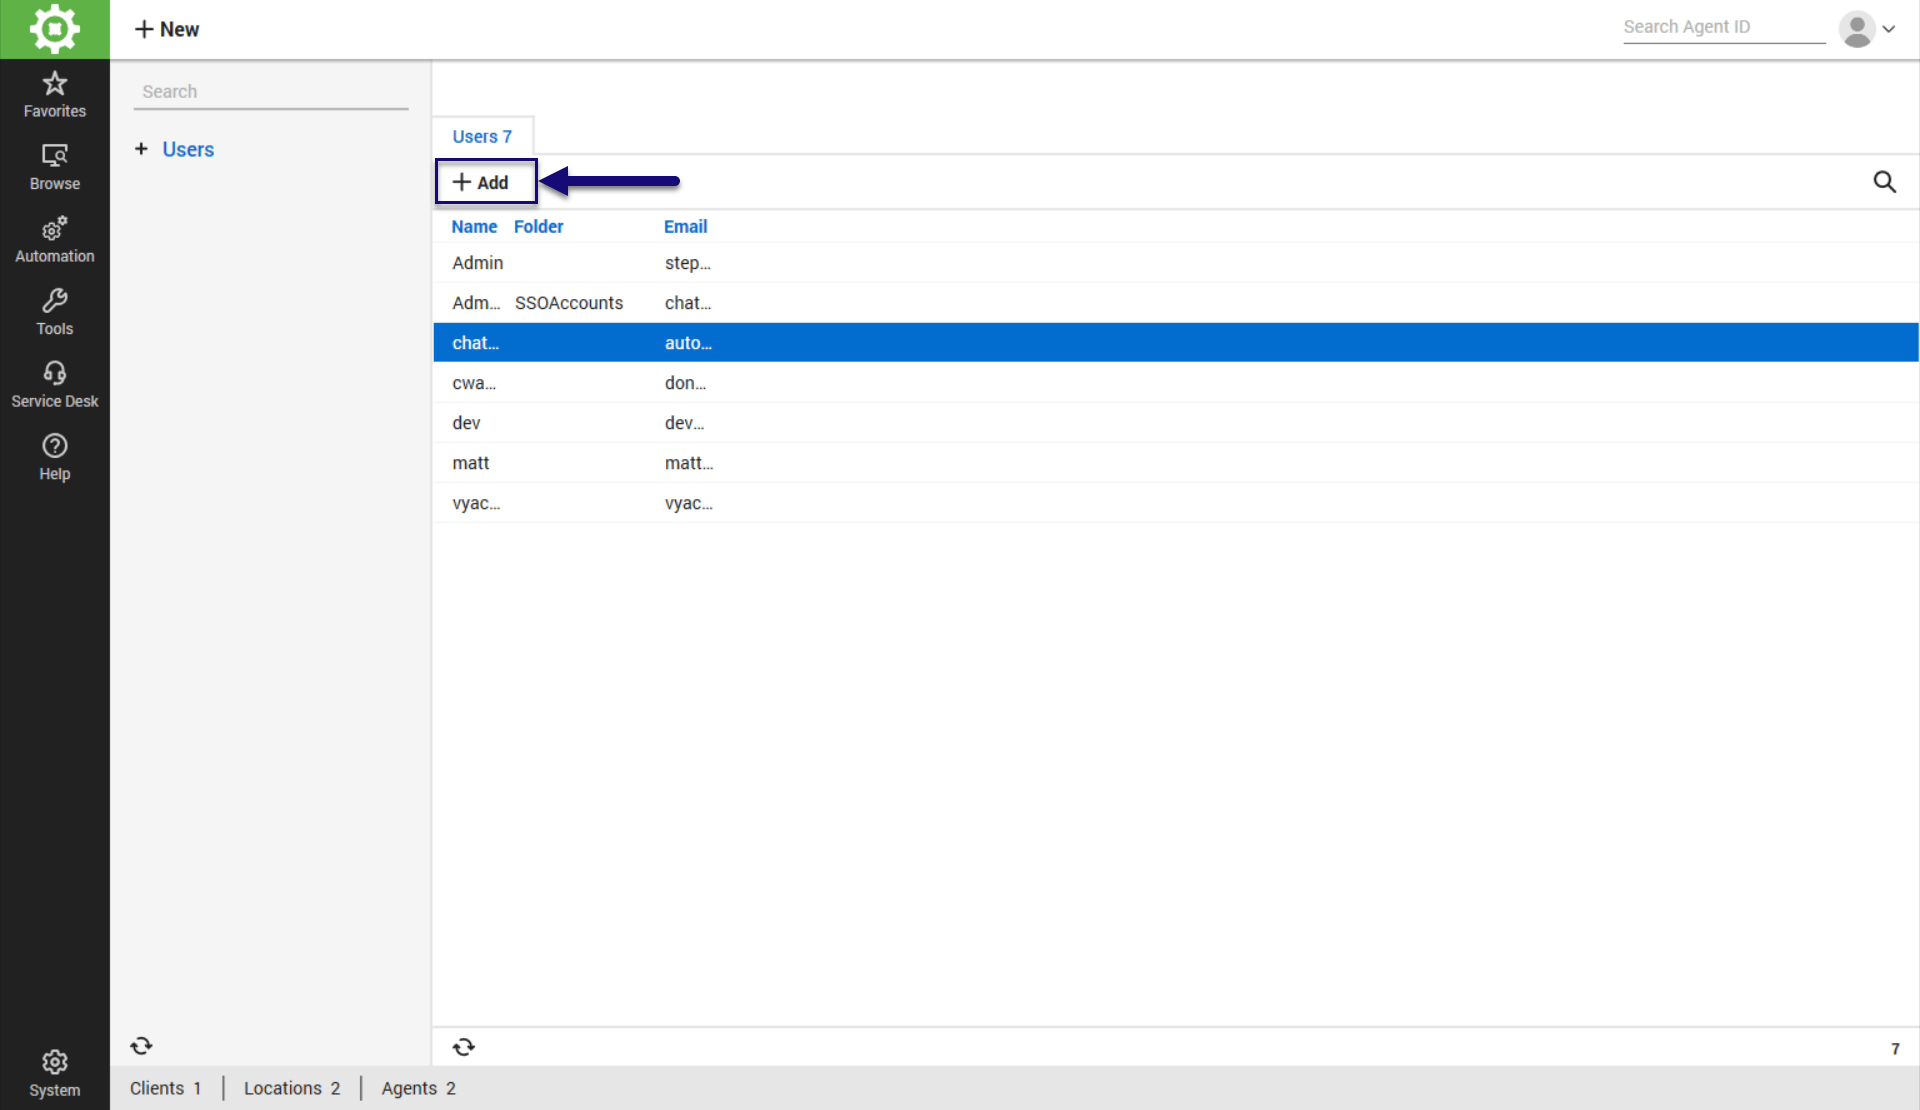
- From the Users screen, click + Add to add a new user.
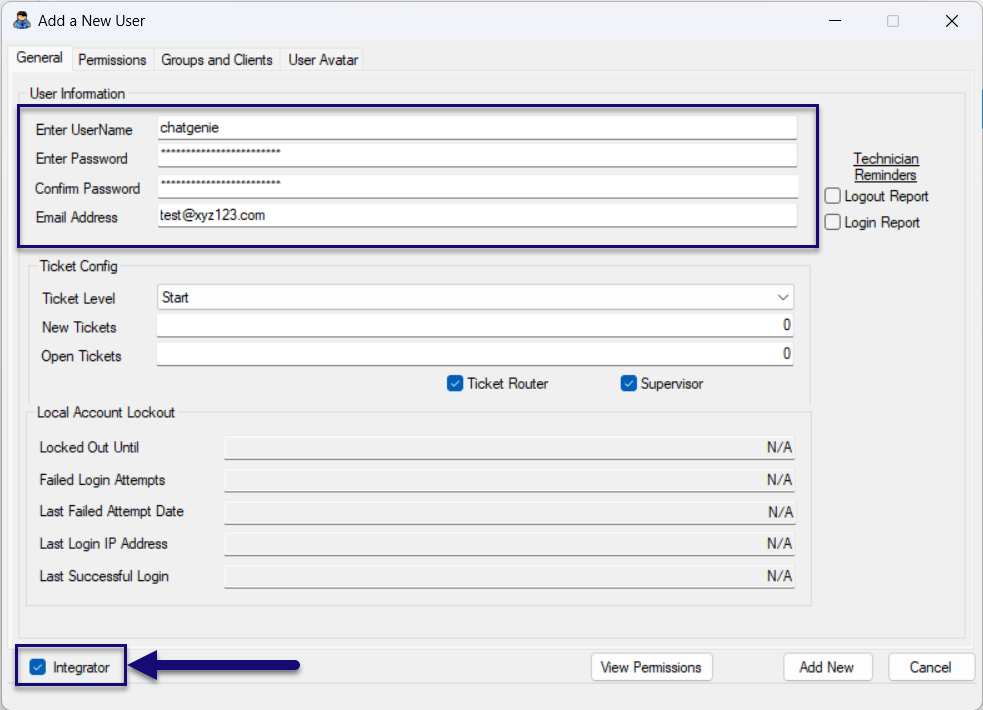
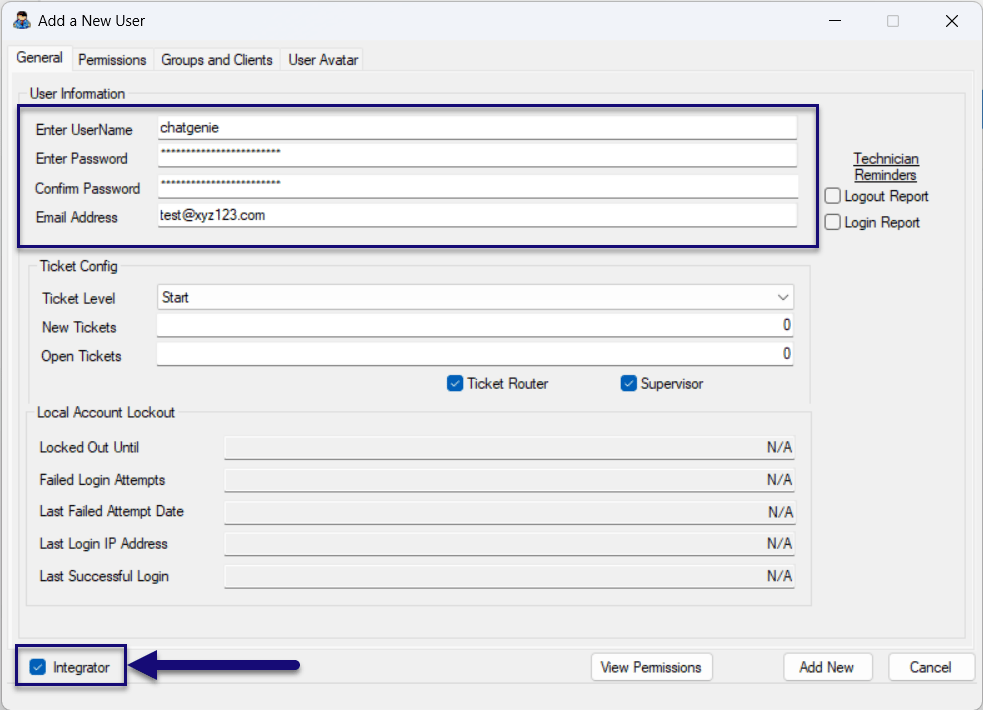
- The Add a New User window will pop up. Configure the following on the General tab:
- Enter Username - save this to your Password vault for later
- Enter Password & Confirm Password - save this to your Password vault for later
- Email Address
- Check the Integrator checkbox. Failure to check the Integrator checkbox will result in the integration failing.
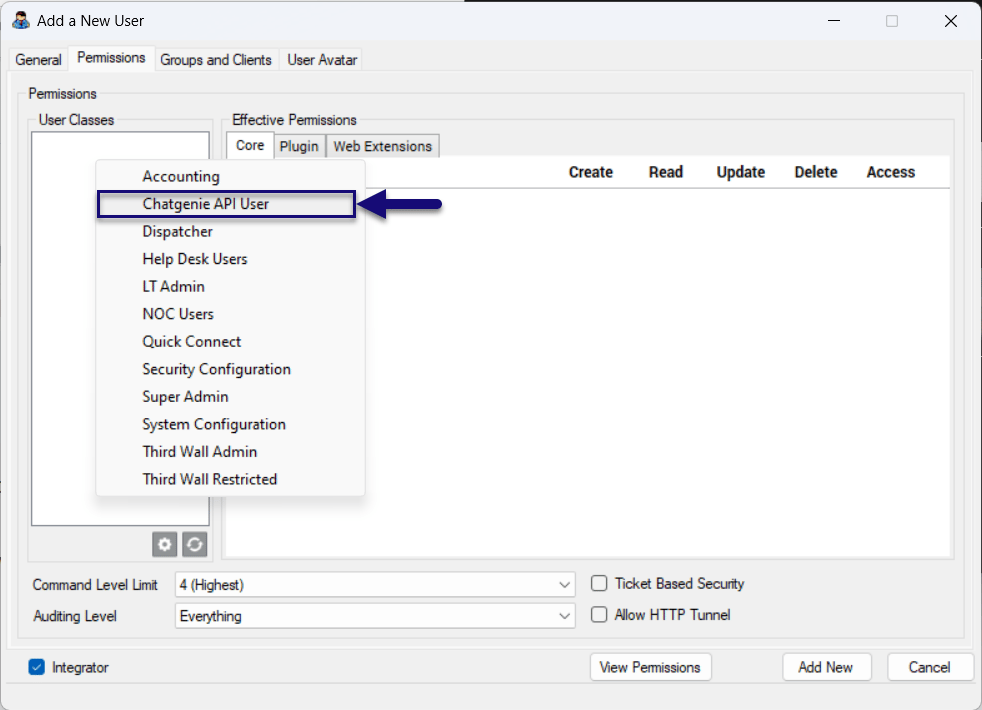
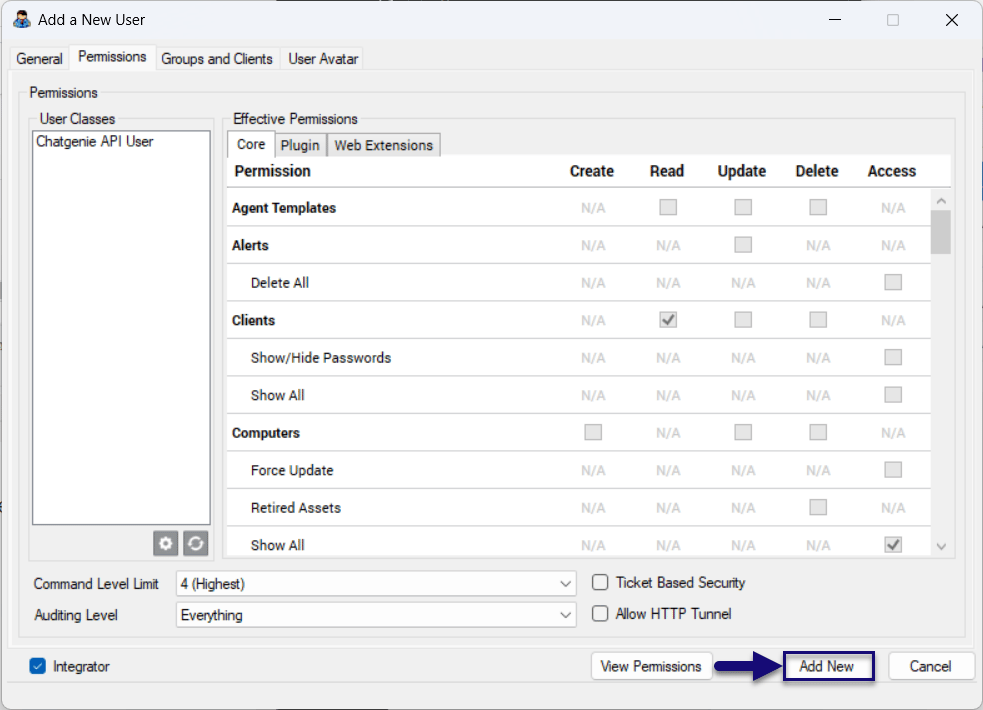
- Next, from the Add a New User window, navigate to the Permissions tab.
- Right-click on User Classes box and select the User Class you created back in Step 1. We named the user class “Thread API User”, so we selected that for this step.
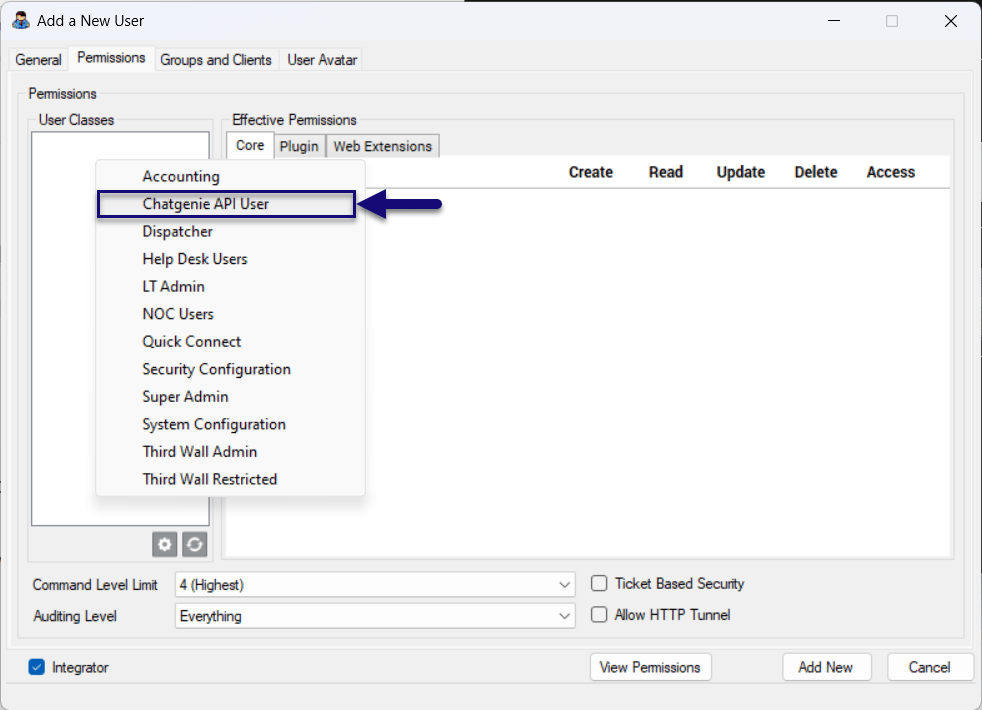
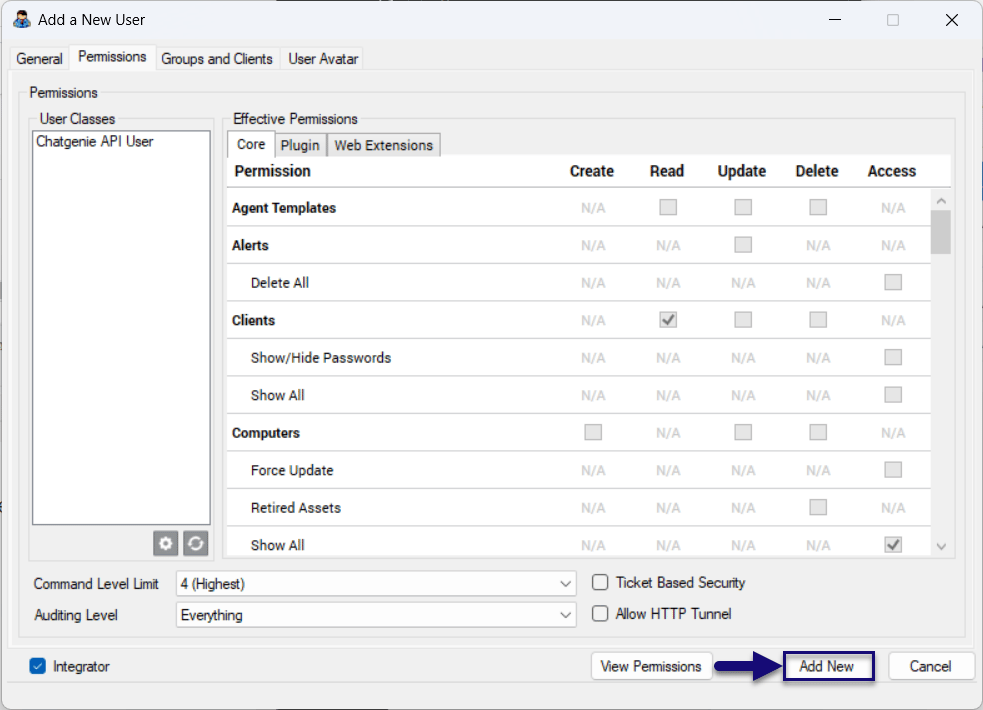
- Once you have granted the new user the appropriate user class permissions, click Add New.
3
Step 3: Set up the Integration in the Admin Panel
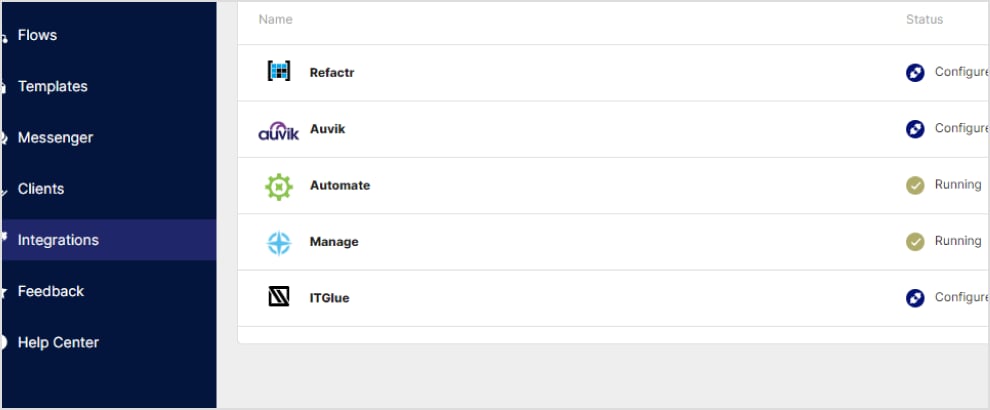
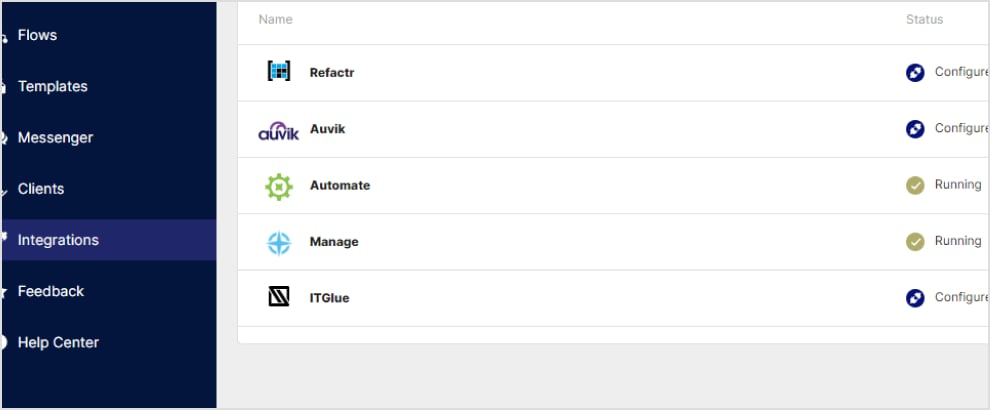
- Your Thread admin panel navigation has a section named Integrations (as shown below).

- In the integrations list you’ll find the Automate option, click on it to configure it.
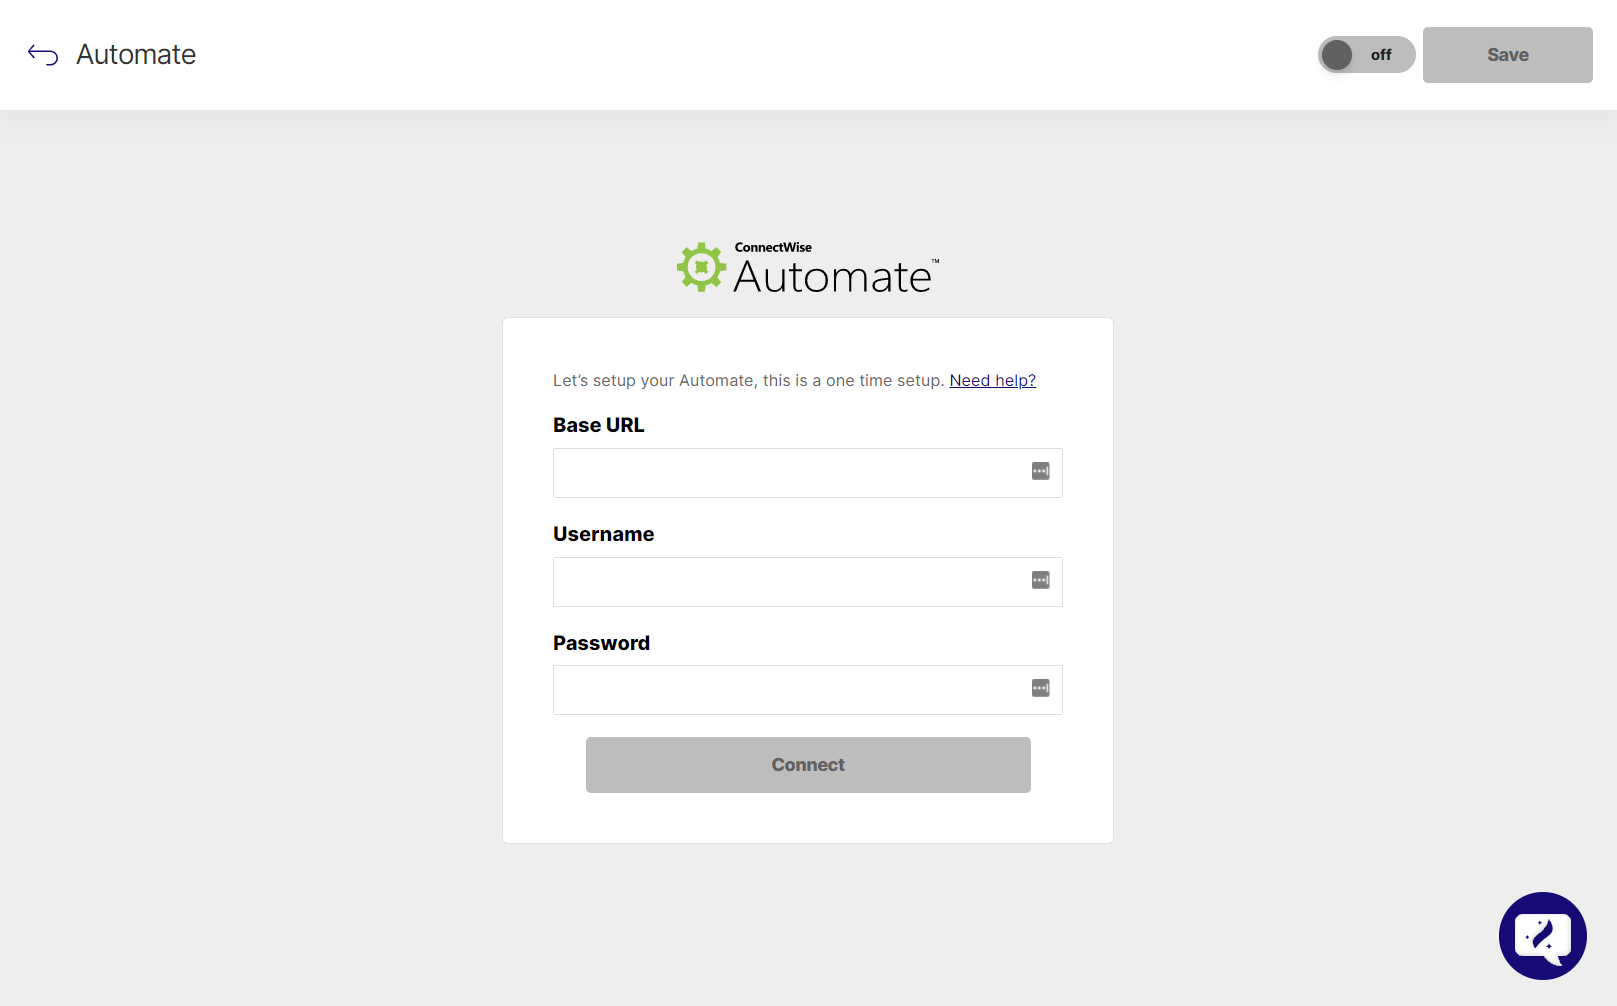
- You’ll need 2 things to configure Automate:
- Base URL: Fill in your base URL (e.g. https://mycompany.hostedrmm.com) for CW Automate followed by ‘/cwa/api/v1/’, so it looks like https://mycompany.hostedrmm.com/cwa/api/v1
- Username and Password: These are the credentials you use to log into your CW Automate dashboard.
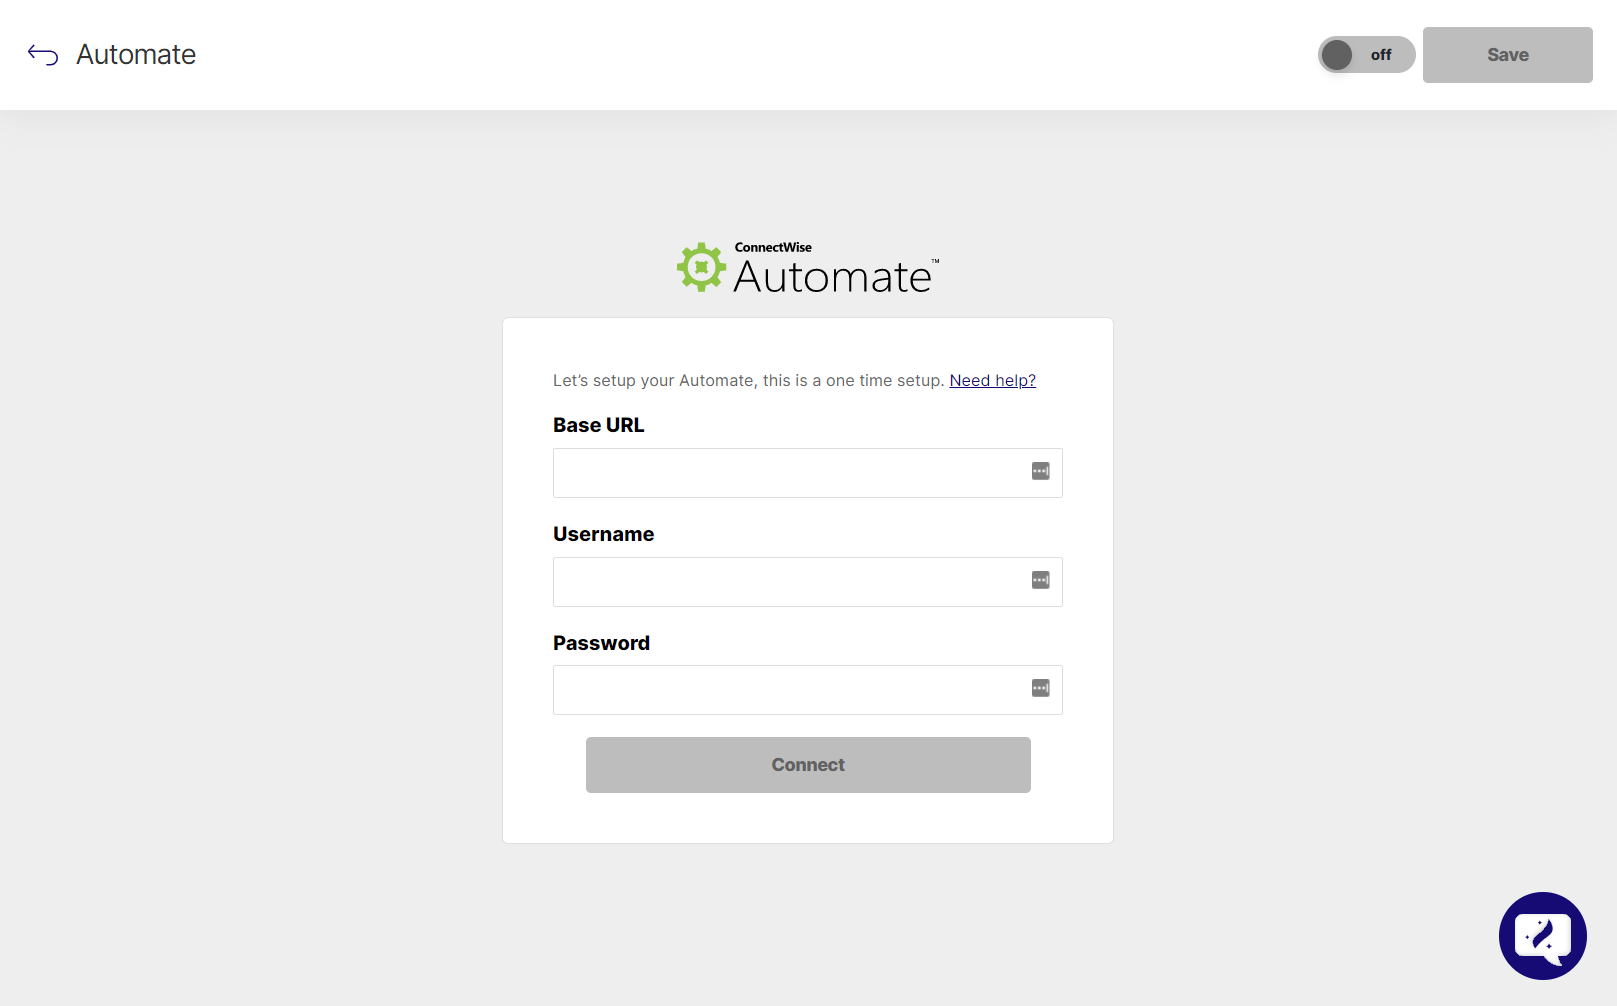
- Enter in the credentials from the API user account you created in Step 2. And click Connect.
- Once the integration has connected successfully, make sure the integration is toggled on and click Save.