Configure Reminder Agent
Reminder Agent is a Magic Agent feature that automatically sends follow-up messages to end users when a thread stalls — and can update the thread to a post-reminder status (e.g., “Closed – No Response”) if no reply is received. It helps reduce backlog, save technician time, and improve visibility across the support experience.
Who should use it?
- Technicians who want to reduce manual follow-ups
- Admins looking to standardize reminder timing and closure rules
- Partners who want consistent, automated thread cleanup without relying on human intervention
How to Enable Reminder Agent
- Go to Admin > Magic AI > Reminder Agent
- Enable Reminder Agent Toggle ON
- Choose whether to run for:
- All managed clients (recommended) or Specific clients
- Choose thread types to run on:
- All chat, email, and phone threads (recommended)
Timing Configuration
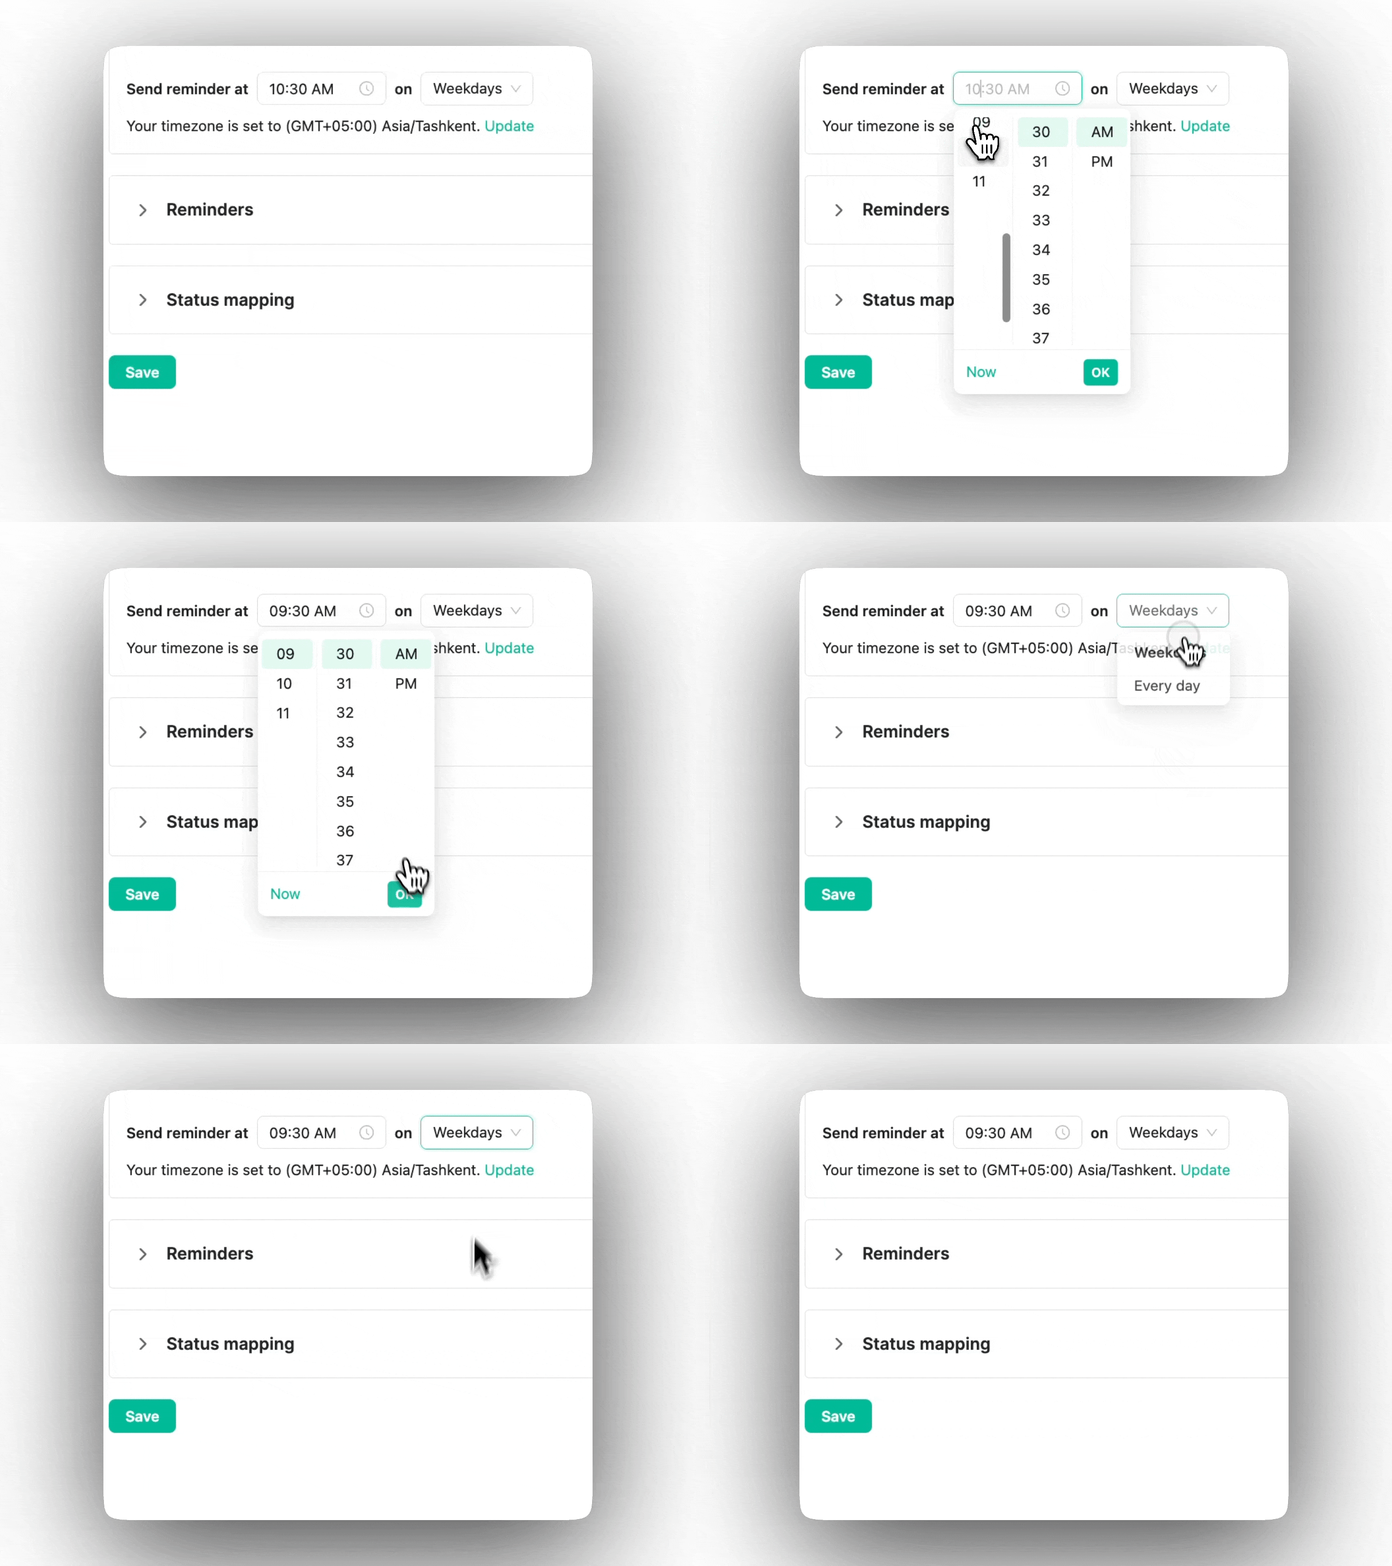
Reminder Agent runs once per day with the following settings:
- Time of day: Click the time field, select the hour, minutes, and AM/PM from the scrollable list, then click OK to confirm.
- Day type: Weekdays or All Days
- Timezone: Pulled from Workspace Preferences
Reminder Agent runs once per day, with the following settings:
Threads must already be in a qualifying status the day before the configured send time to receive a reminder.
Example: If reminders are scheduled for 9:30 AM and the thread status changes to “Waiting for Client” at 9:00 AM, no reminder will be sent that day. The first reminder will go out the following eligible day at 9:30 AM.

Reminder Messages
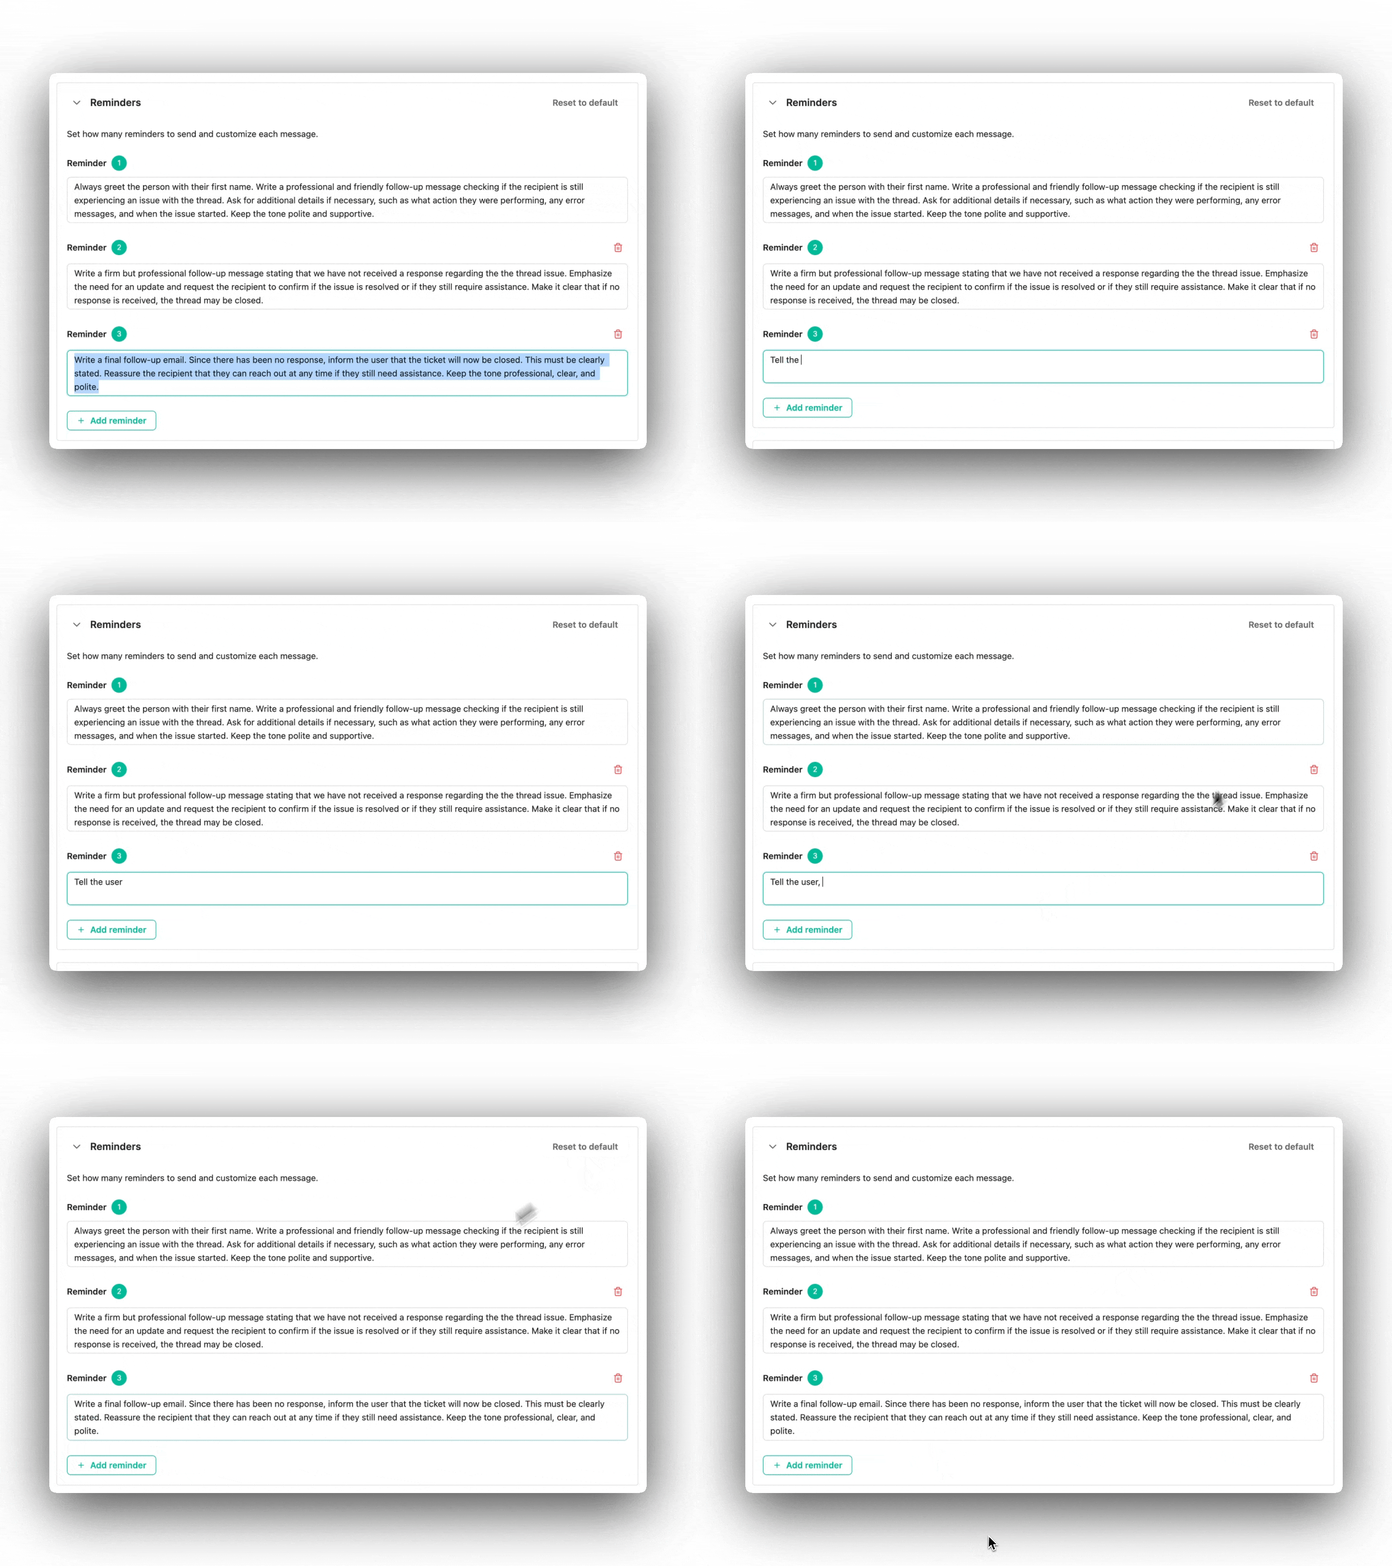
Admins can define how many reminders to send (1–5) and customize the message content for each reminder.
- Three default reminder and prompts are already included — no setup required.
- A friendly check-in, a more direct follow-up, and a final message explaining the thread will be closed.
- Messages can be adjusted to reflect tone, support style, or escalation needs.

Test Your Reminders with Emulator Chat
To preview how reminders will appear in real conversations:
- Use the Preview Chat on the right side of the screen
- Select a real historical thread and click “Run Reminder Agent”
- This will show how each configured reminder will appear in the thread, based on your current tone, text, and settings
This is a great way to fine-tune messages to your exact needs.
Status Mapping
Admins can define which threads are eligible for reminders and what happens after follow-ups:
- Select Board(s) (e.g. Service, Escalations)
- Select Trigger status (e.g. “Waiting for Client”)
- Select Post-reminder status (e.g. “Closed – No Response”)
You can configure multiple boards and statuses.
.gif)
Visibility & Logs
- Reminder logs are visible in Inbox, so techs know when AI has followed up.
- Preview panel shows how messages will appear based on tone and setup.
- Logs include:
- Reminder timestamp
- Status before and after
- Whether the post-reminder status was applied

Filtering Threads by Reminder Status (Inbox Views)
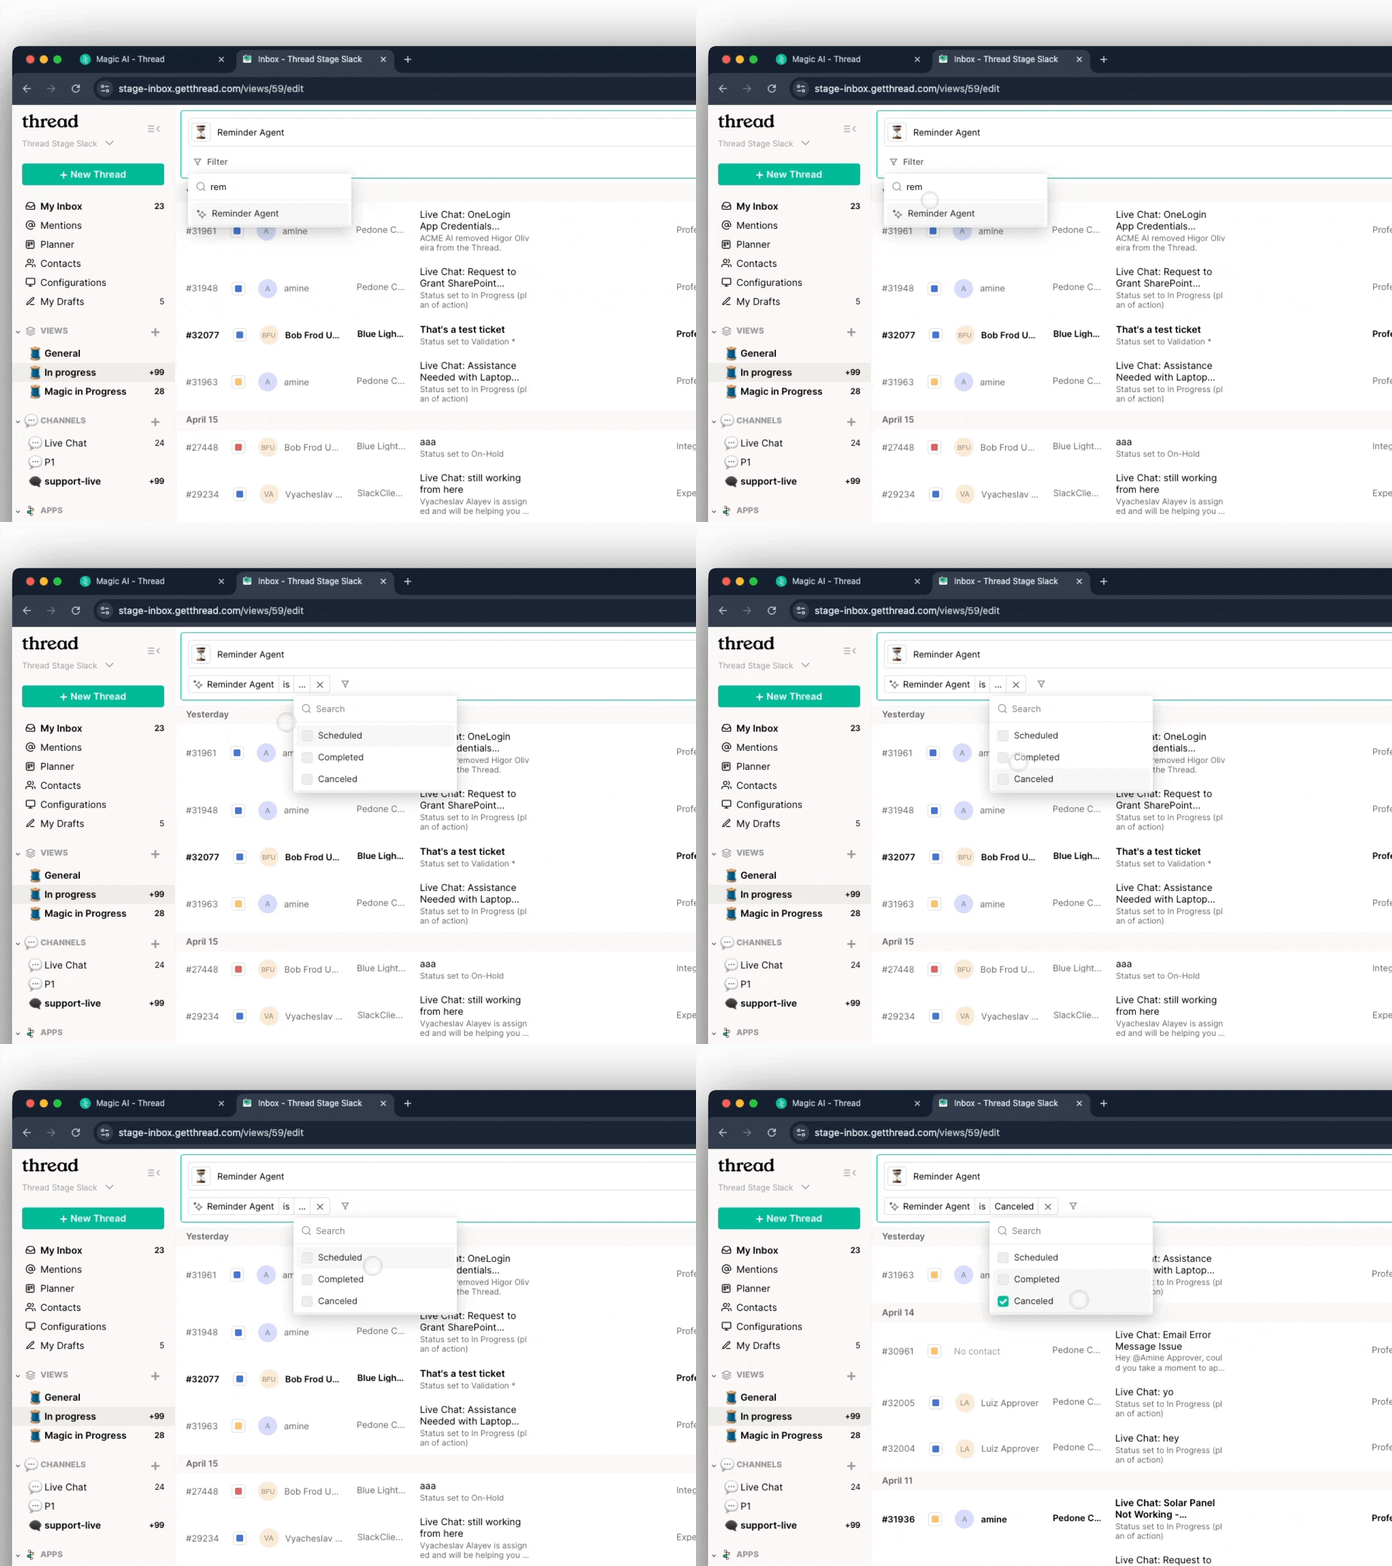
Admins and technicians can now filter threads in Inbox using the new Reminder Agent status filter. This makes it easy to track where each thread stands in the follow-up process.
The filter includes the following states:
- Scheduled – A reminder is scheduled but hasn’t been sent yet (e.g. a reminder is set to go out tomorrow at 9:00 AM).
- Completed – All configured reminders (up to 5) have been sent, and the thread was transitioned into the post-reminder status selected by the partner (e.g. “Closed – No Response”).
- Canceled – The last scheduled reminder was automatically canceled due to a change in status or updated settings in the admin panel.
This filter is useful for:
- Spotting which threads are still pending a reminder
- Verifying whether follow-up logic has fully run its course
- Troubleshooting why a thread did or didn’t get closed
You’ll find this filter option in the Inbox > Views interface.

