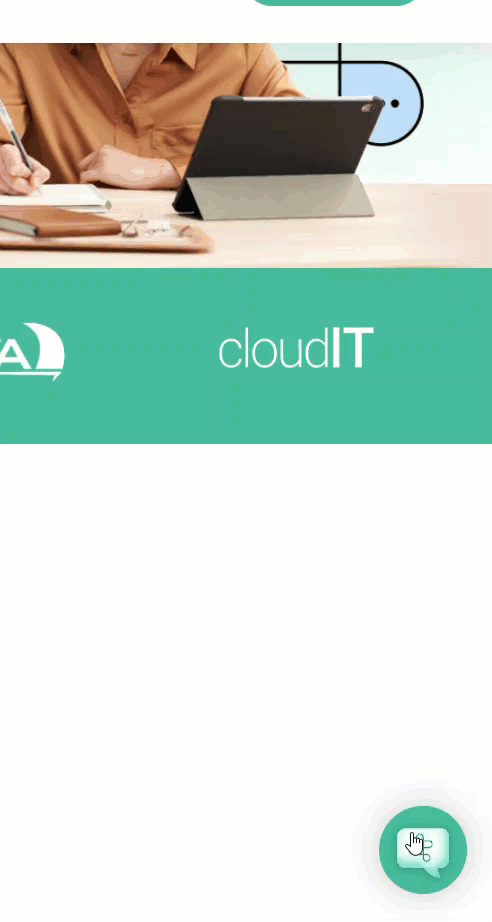
Embedding the Messenger "Chat Bubble" on Your Website

Thread Messenger is designed for simple and flexible deployment—whether on your own website or your customers’ support portals. This guide walks you through embedding the Messenger chat bubble, configuring options, and customizing behavior.
🚀 Before You Begin
Before embedding the Messenger widget, make sure:
⚠️ Important Notes
- By default, the sales flow is disabled when embedding Messenger.
- You can enable the sales flow under Thread admin panel → Messenger → Settings → "Enable chats from sales leads"
- Once enabled, sales requests go to a selected Board, Queue, Team (depending on your ticketing system integration) and prospects can message without authentication.
- End-users selecting “I am already a customer” will authenticate via email a One-Time Passcode (OTP), and their email must match an active contact in your PSA.

How to Embed the Messenger "Chat Bubble" on Your Website
- Navigate to the Thread Admin Panel
- Depending on your deployment type:
- Partner-level (your website):
Go toMessenger → Installation - Client-level (customer’s site):
Go toClients → [Search for client] → Select Client → Installation
- Partner-level (your website):
- Copy the App ID and corresponding HTML snippet provided. The App ID links the widget to the correct branding and settings.
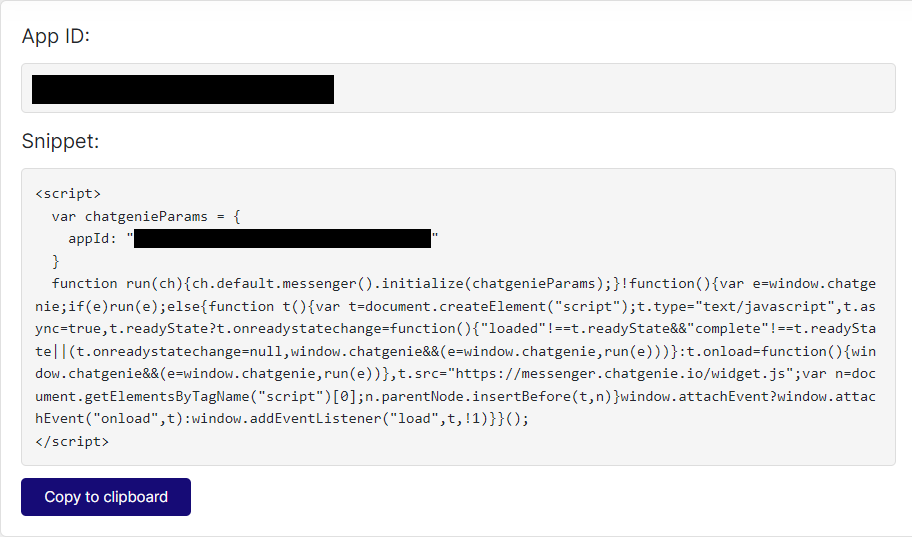
- Navigate to your website where you can edit the HTML code. Paste the code you copied in step 3 here. A sample of the code Paste the code snippet into your website's HTML wherever you want the chat bubble to appear.
<script>
  var chatgenieParams = {
    appId: "YOUR-APP-ID-HERE"
  };
  function run(ch) {
    ch.default.messenger().initialize(chatgenieParams);
  }
  !function(){
    var e = window.chatgenie;
    if (e) run(e);
    else {
      function t() {
        var s = document.createElement("script");
        s.type = "text/javascript";
        s.async = true;
        s.src = "https://messenger.chatgenie.io/widget.js";
        s.onload = function() {
          window.chatgenie && run(window.chatgenie);
        };
        var n = document.getElementsByTagName("script")[0];
        n.parentNode.insertBefore(s, n);
      }
      window.attachEvent ? window.attachEvent("onload", t) : window.addEventListener("load", t, false);
    }
  }();
</script>
- The embedded widget inherits branding from the App ID (Partner or Client-level).
- If needed, override settings under:
Admin Panel → Clients → Select Client → Settings → Override Parent Settings
From there, customize:
- 🧾 Service board, team, or queue
- 🎨 Messenger design
- ⏰ Hours of operation
Optional Parameters & Flags
You can modify the default experience with these parameters:
Parameter | Purpose |
| Skips the sales prompt. Assumes user is an existing customer. |
| Pre-fill user details to reduce friction. |
Flow: Customer Example
<script>
  var chatgenieParams = {
    appId: "YOUR-APP-ID-HERE",
    flow: "customer"
  };
  // ... rest of script same as above
</script>
Auto-fill Contact Info
Use this if you already have customer metadata (e.g., from login or CRM).
<script>
  var chatgenieParams = {
    appId: "YOUR-APP-ID-HERE",
    fullname: "USER_NAME",
    companyName: "USER_COMPANY_NAME",
    email: "USER_EMAIL"
  };
  // ... rest of script same as above
</script>
Embedding Messenger on a Landing Page
👉 Click Here for a step-by-step guide on embedding Messenger on a landing page.