How to Override Messenger Branding and Configuration for a Customer
 Updated
by
Stephen Boss
Updated
by
Stephen Boss
Introduction
Sometimes there are scenarios where you need to deploy Messenger with settings that are specific to a customer. Not only is this possible with Thread, but it is also very easy to accomplish.
Thread uses an App ID as an identifier that is unique to each company.
- Each partner is assigned an App ID, this App ID inherits the Messenger settings, design and hours defined at the parent level of your configuration, e.g. Admin Panel -> Messenger
- All clients are also assigned App IDs, each company App ID inherits any Messenger settings, design and hours defined at the client level where an override is in effect, e.g. Admin Panel -> Clients -> Customer -> Settings/Design/Hours. If no override is set at the client-level, any instance of Messenger deployed with this App ID will inherit the settings, design and hours defined at the parent-level (partner-level).
If no override is set at the client-level, any instance of Messenger deployed with this App ID will inherit the settings, design and hours defined at the parent-level (partner-level).
How to Set Client-level Overrides
- Navigate to Admin Panel -> Clients
- Use the Magnifying Glass to search for the client you want to override the settings, design or hours for. Open that client.
How to override board, status and other settings
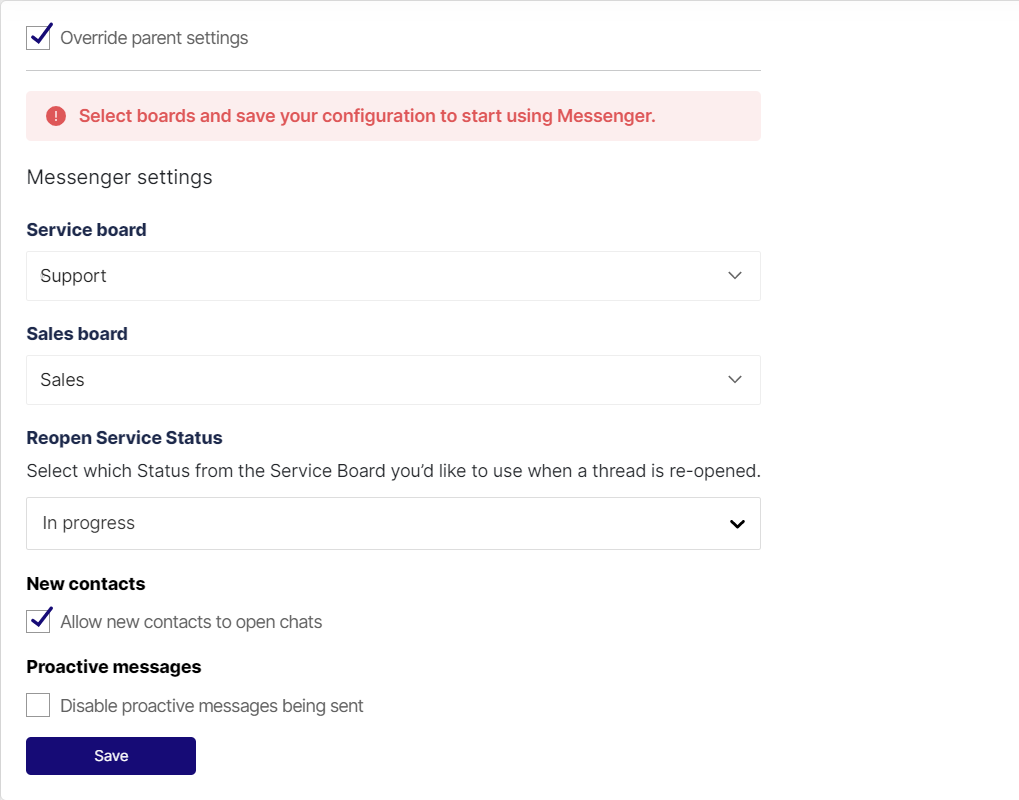
- From the client page in the Admin Panel, navigate to the Settings tab.
- Check Override parent settings.
- Change the applicable settings:
- Service Board - You can override what service board or service queue your service Chats flow to in your ticketing system.
- Sales Board - You can override what sales board or service queue your sales Chats flow to in your ticketing system.
- Reopen Service Status - You can override the reopened ticket status for your boards (this should be the same status on both Sales and Service boards).
- New Contacts - This setting can only be overridden at the client-level. It allows new contacts to open service chats. When Messenger is deployed under a client-level App ID and this override is set:
- Messenger will allow any user to authenticate with any email.
- Thread will create a contact under the company.
- Messenger will allow the contact to raise a service chat.
- Proactive Messages - Checking this will disable proactive messages being sent. These are messages through the Teams and Slack bots designed to bring end users back into the chat even if they have abandoned the chat.
- When done, click Save.
How to Override Design
Overriding design will allow you to define a custom messenger design unique to that client.
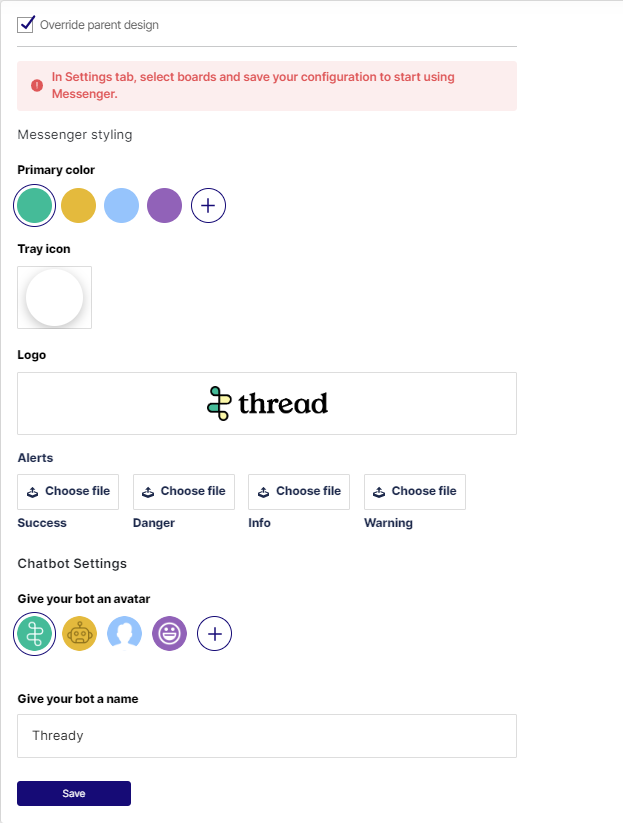
- From the client page in the Admin Panel, navigate to the Design tab.
- Check Override parent settings.
- Change the applicable design configuration.
- When done, click Save.
How to Override Hours
Overriding hours will allow you to set custom hours for a clint where Messenger will be available to accept live chats.
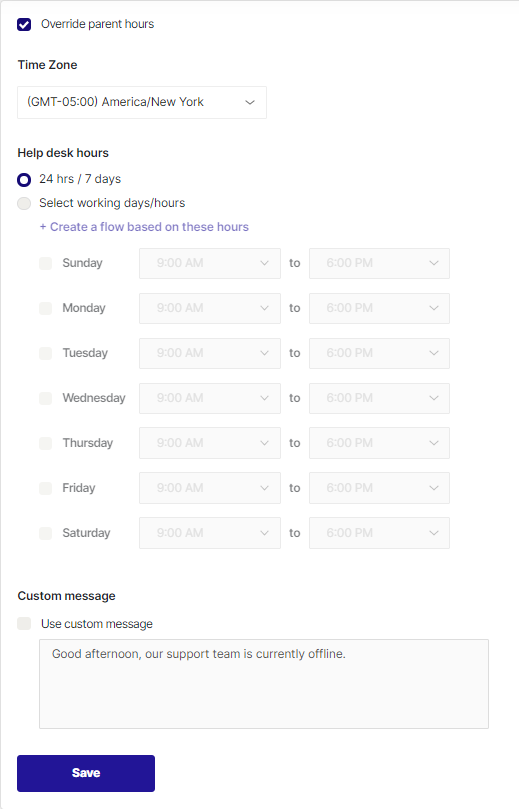
- From the client page in the Admin Panel, navigate to the Hours tab.
- Check Override parent settings.
- Change the applicable hours configuration and Custom Message.
- When done, click Save.
How to Get the Client App ID and Deploy
The client's App ID can be found in the Admin Panel on the Client page under the installation tab.
- Navigate to Admin Panel -> Clients
- Use the Magnifying Glass to search for the client you want to override the settings, design or hours for. Open that client.
- From the client page in the Admin Panel, navigate to the Installation tab.
- Copy the App ID, you will use this for your deployment.
- Follow the deploying messenger guide to deploy to the customer using this App ID.