Configuring Auto Prioritization

Magic Prioritization is an AI-driven feature that automatically sets a thread’s priority based on conditions and custom rules you define in the Thread admin panel. Setting up Auto-Prioritization is done in two steps: Managing Access and Editing Rules.
1. Configure Access
- Navigate to the Admin Panel
- Go to Admin Panel → Assistive AI → Prioritization: Manage Access
- Configure Automation Triggers
Here you will see two sections: Apply when and Apply to.
Currently, the only trigger for Auto-Prioritization is when a thread is created. When toggled on, Prioritization will run when a ticket first reaches Thread.
In Apply to, we can now configure what tickets the above trigger will affect. We can do this by restricting access by Clients, Boards, and Sources.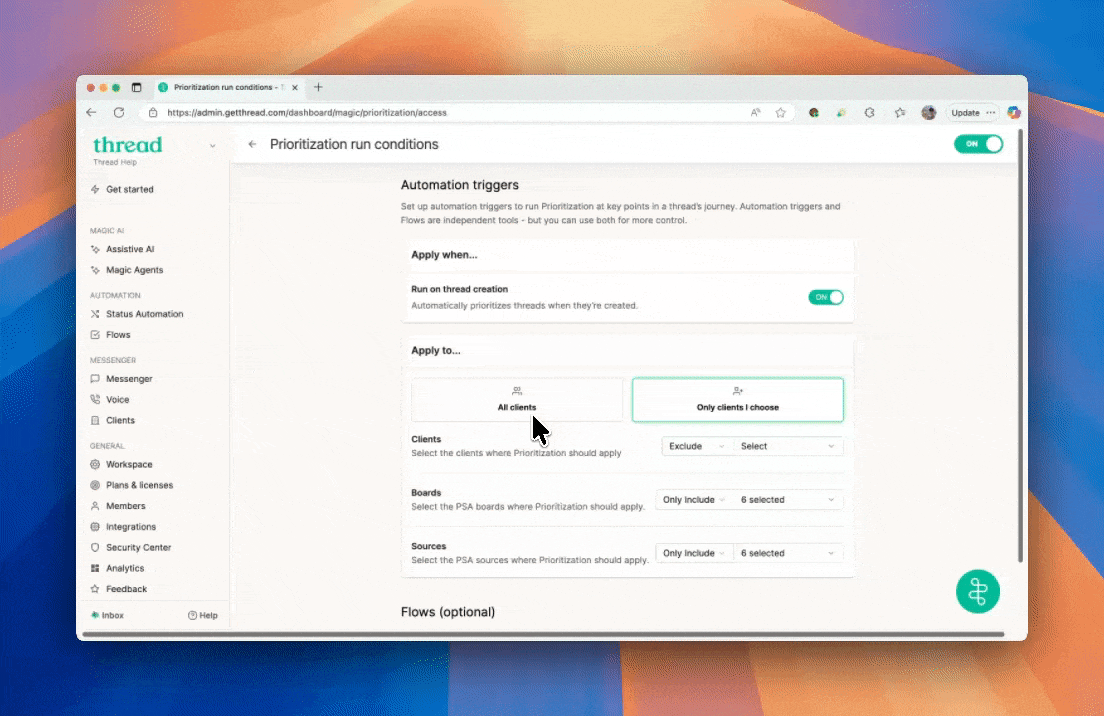 Want to trigger Auto-Prioritization outside of these criteria? Jump to Flows to create powerful workflow automations!
2. Configure Rules
- Navigate to the Admin Panel
- Go to Admin Panel → Assistive AI → Prioritization: Edit
- Configure Presets
Configure the built in Impact, Urgency, and on/offboarding presets to match your companies standards. Any item can be ignored by clicking the check box to the right of the drop down menu.
- Create Custom Rules for Full Customization
Custom Rules give you the flexibility to create prompts or use keywords to prioritize specific requests. This allows you to get creative and have complete control over how tickets are categorized! Give it a try and tailor it to fit your needs!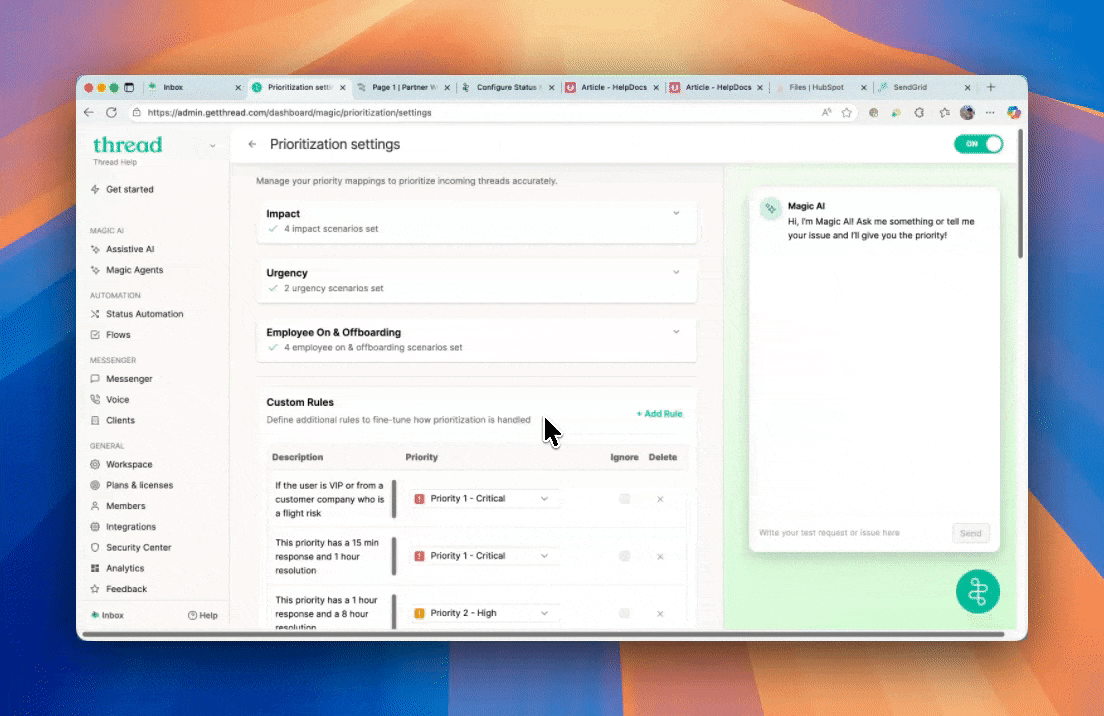
- Test Auto Prioritization using the emulator
After configuring Auto Prioritization, you can test how Magic AI prioritizes tickets using the emulator on the right. Try real-world scenarios like "I need a password reset" or copy and paste descriptions from recent service requests to see firsthand how Magic AI categorizes them.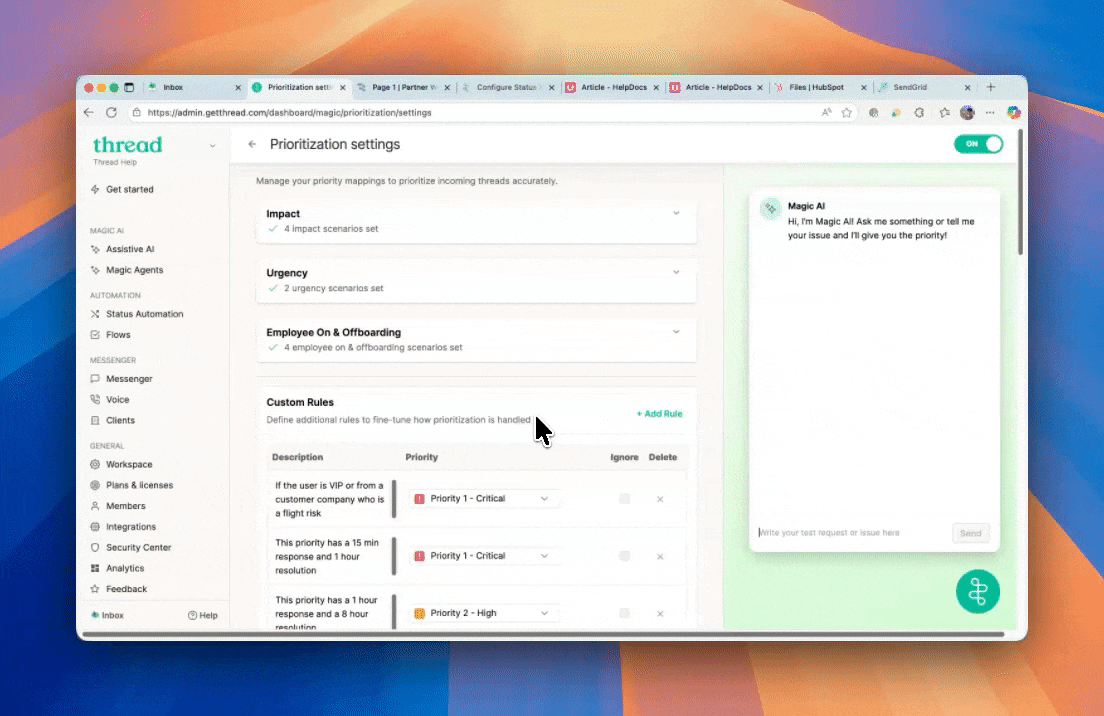
3. Configure a Flow to run Auto-Prioritization (optional)
To run Auto-Prioritization outside of thread creation, follow the steps below. This set up is great for running Auto-Prioritization when a thread is escalated to a new team, a thread is closed, and many more situations. This ensures that all the way through the thread lifecycle, the Prioritization stays true, even when new information is added.
How to Configure the Flow
- Navigate to Flows
- Go to Admin Panel → Flows → Templates -> Auto-Prioritize
- Apply Filters
Apply filters for when and you want the flow to run. For example, you can set the filters to specific types, territories, agreements, and much more! For more Flow examples, see our Flows guide - Ensure Auto Prioritization Action Is Added
The Auto Prioritize action is already included in the template. If you’re building your flow from scratch in the Flow Builder, scroll to the bottom, click +, then select Actions → Magic → Auto Prioritized. - Save and Test
Save the flow changes, then test it by submitting a new service request that matches the ticket criteria you set in the flow.