How to Deploy the Slack Service App to a Customer
 Updated
by
Stephen Boss
Updated
by
Stephen Boss
Thread will help you make a slack app that is branded for your company! Please fill out and submit this form (be sure to select that you plan to deploy Thread to customers using Slack) and we will create a custom slack experience for your customers!
Please allow up to 5 business days for your request to be processed, you will receive a notification from us when your custom app is ready to deploy.
Once your custom slack experience is created you can follow this guide to deploy.
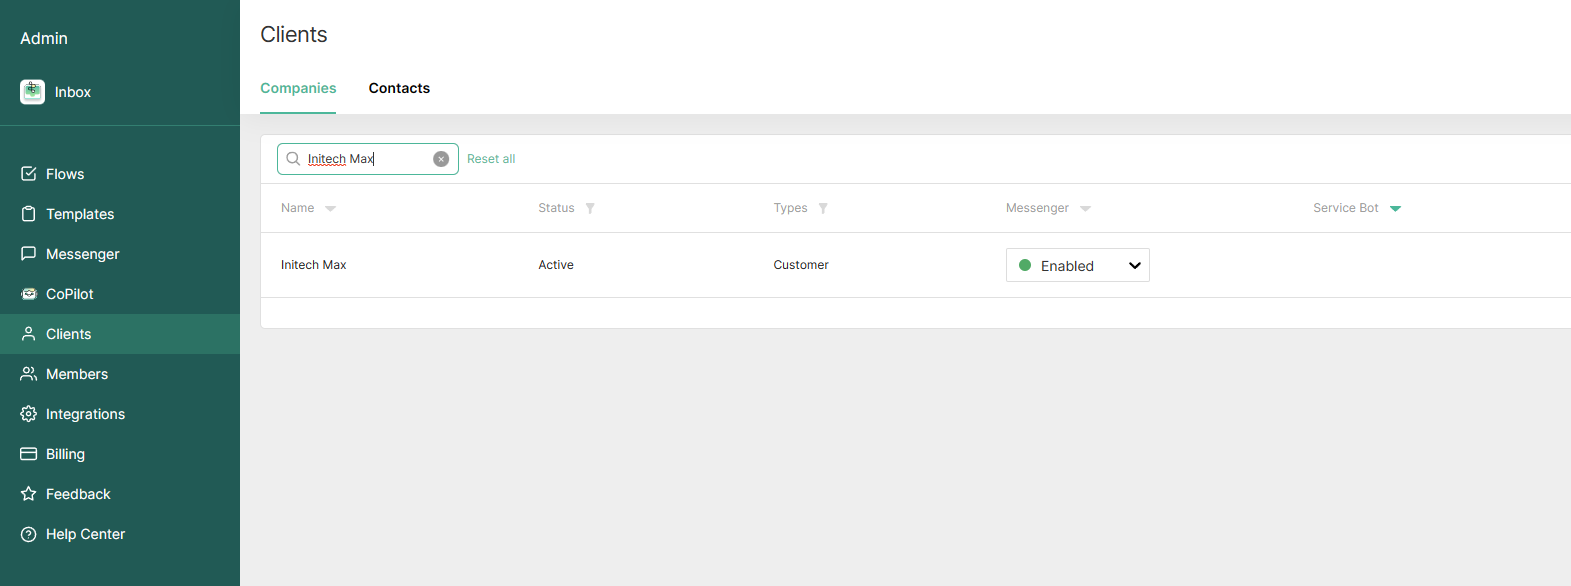
- Navigate to the Thread Admin Panel -> https://admin.getthread.com/
- Click on Clients -> Search for the customer you want to deploy the app to.
- Make sure you are on the Teams/Slack Connect tab -> Select slack -> Click Continue.
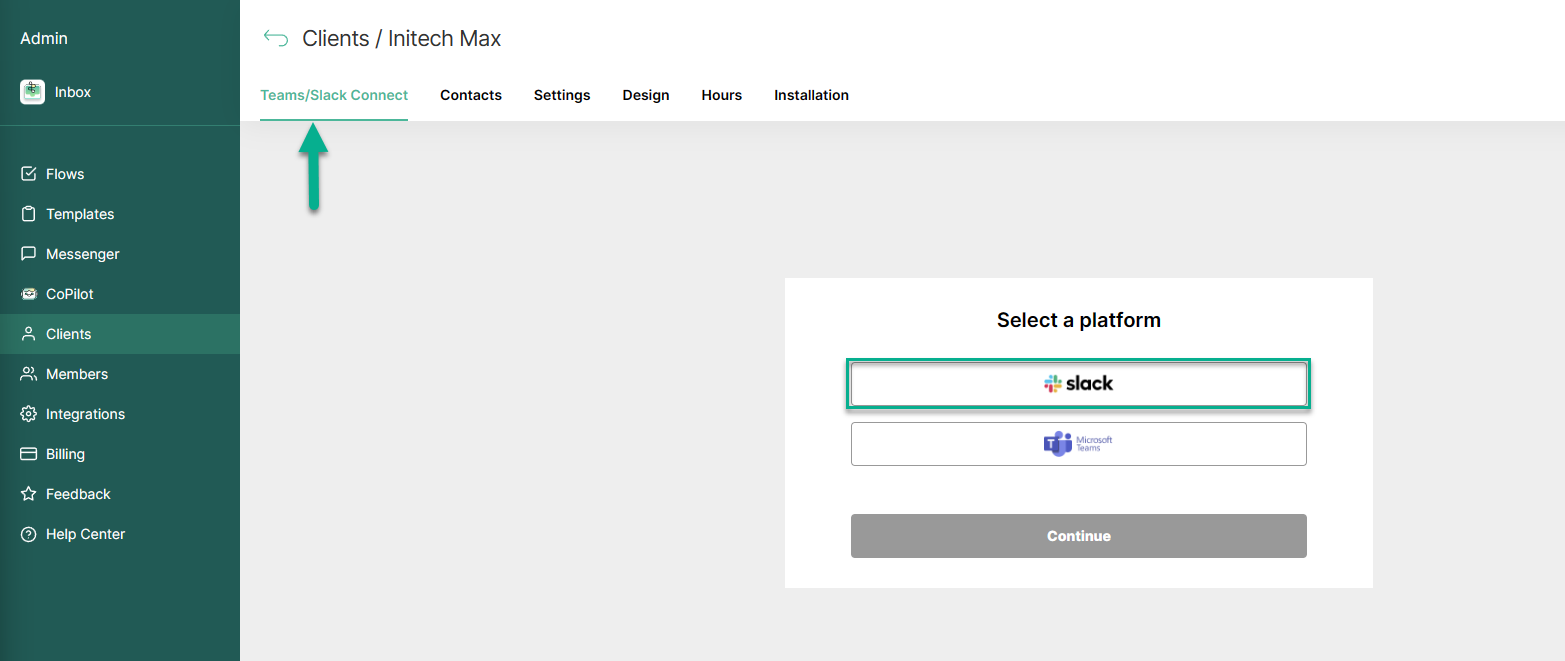
- There are 2 ways to deploy the Slack app to your customer.
- Inviting the admin of your client via email
- Using the link to install the app for your client
a. Inviting the admin of your client via email
Select the contact that has admin access to Teams in the dropdown. Start typing their name to see it. We recommend creating a service admin account for this process. The account that adds the app will be added to all channels made as well as maintain the functionality of the app.
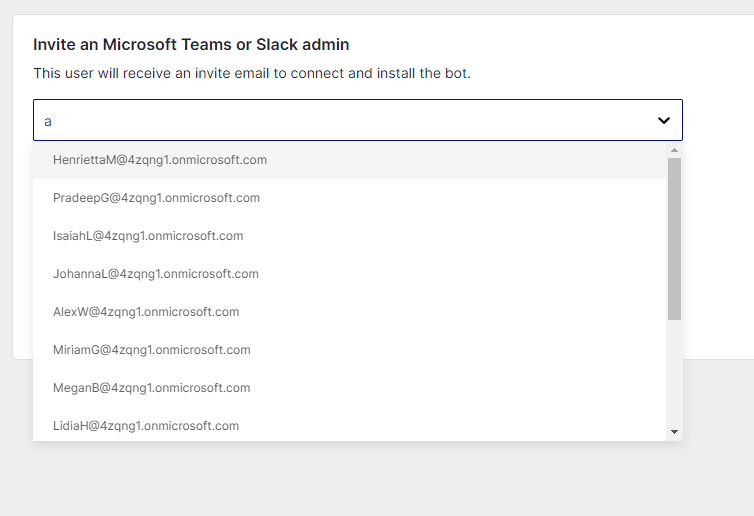
This person will get an email to link their chat.
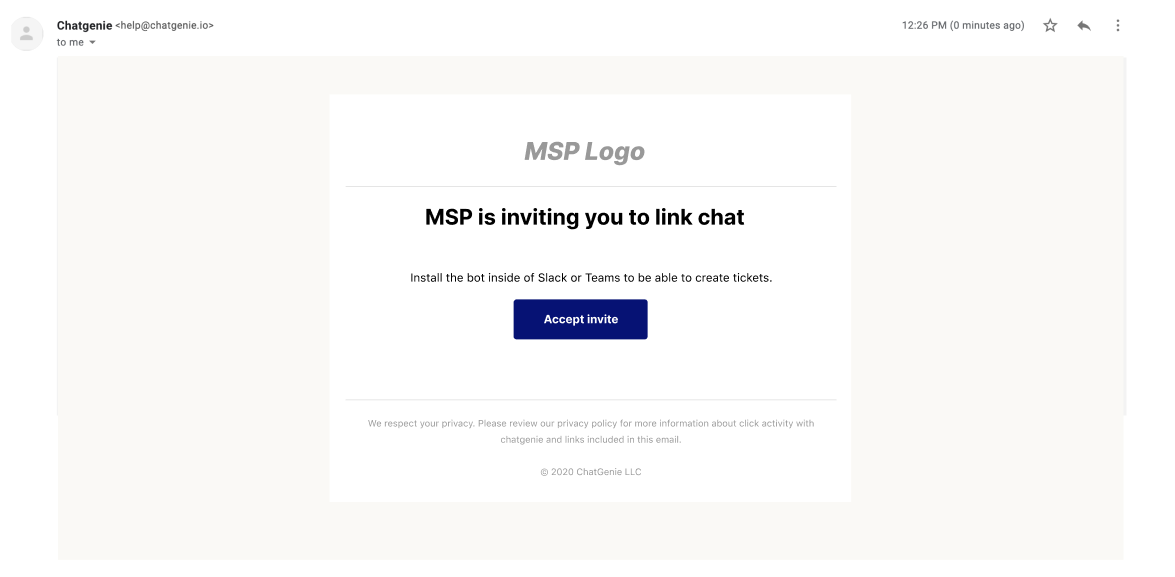
The receiver of the email will need to follow the same steps as outlined below, with the exception of copying the link.
b. Using the link to install the app for your client
- Copy the Magic Link and paste it in a new browser session, where you are logged into that Slack account.
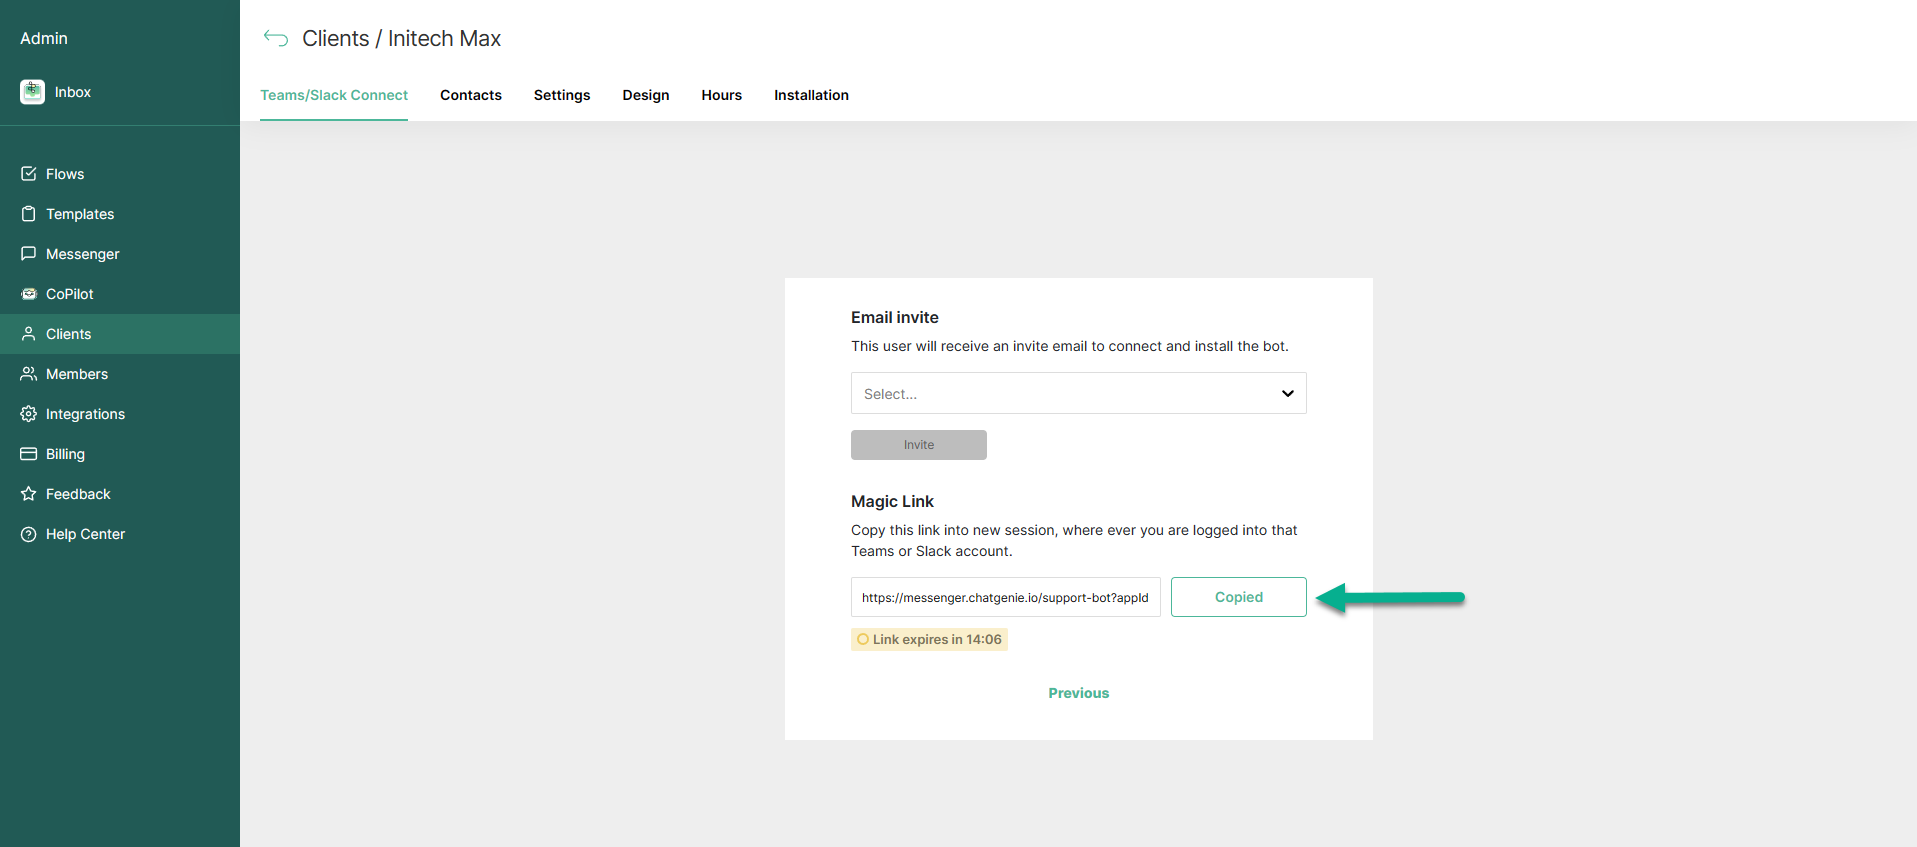
- Make sure this is the correct workspace and click Allow.

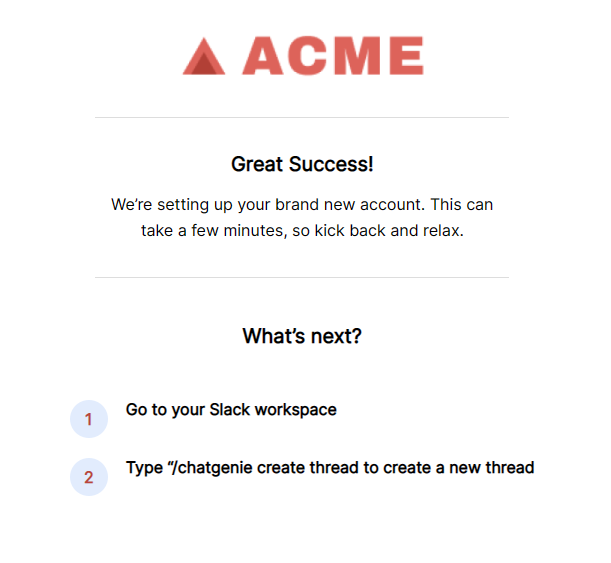
- Once the app installs successfully, you should see a success message.
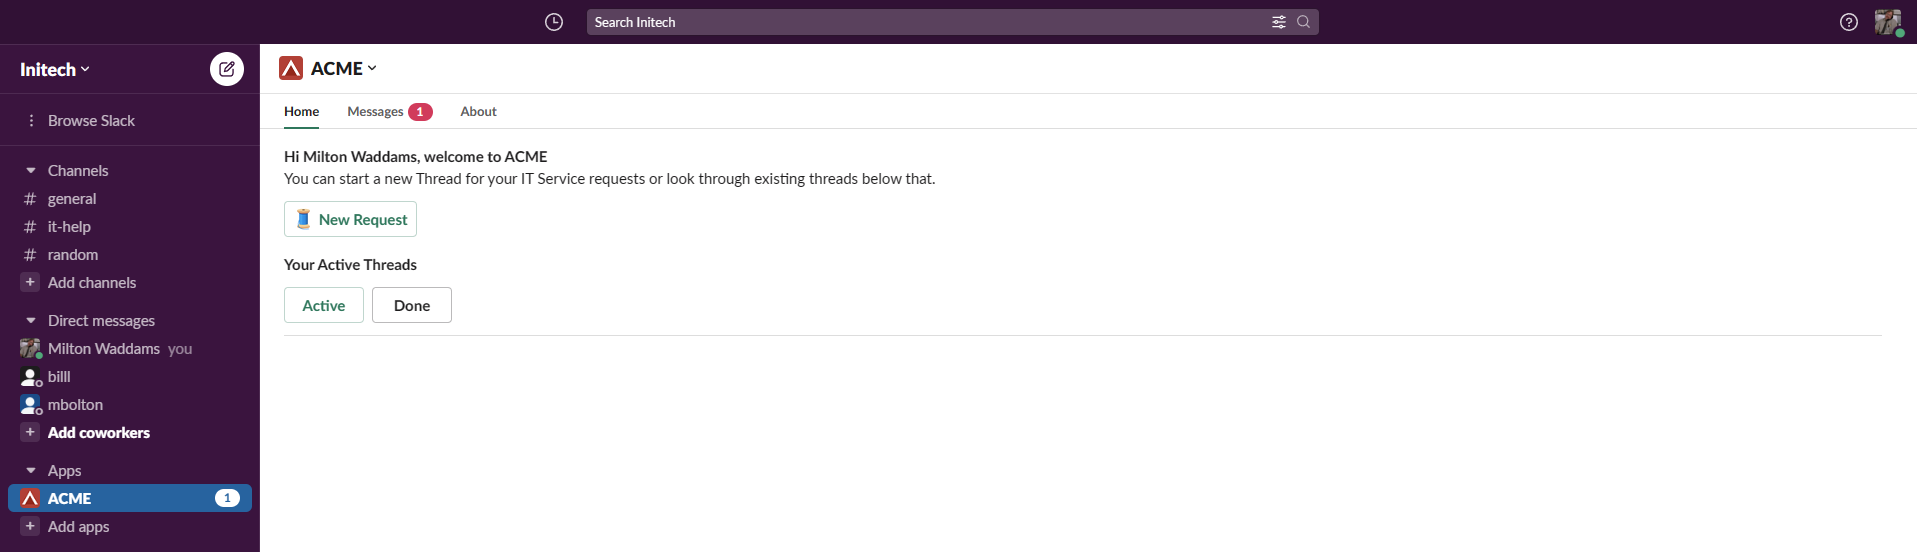
- This should install the bot in the Slack workspace. Navigate to app.slack.com to log into that slack workspace and view your app.
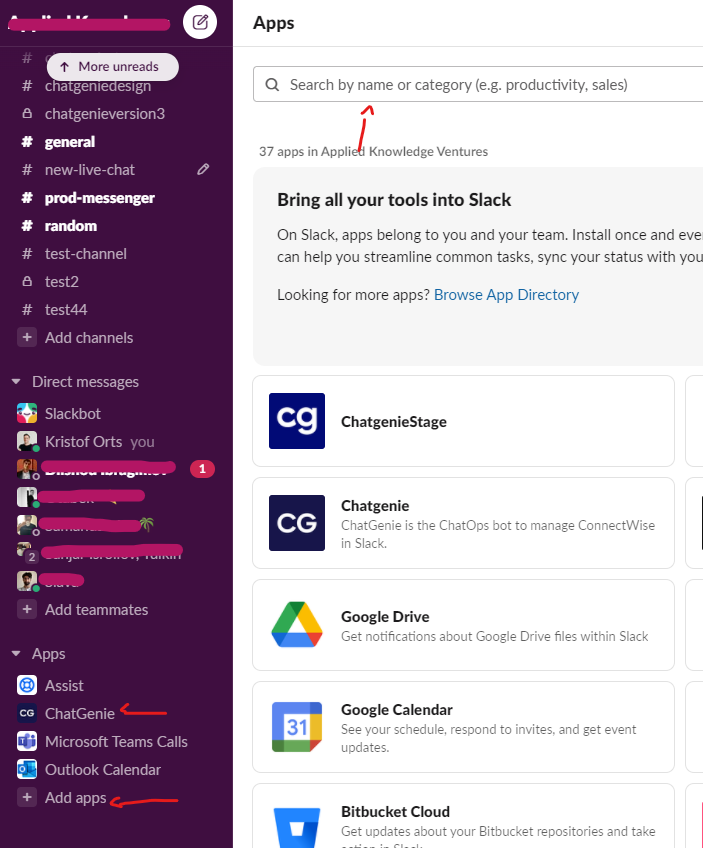
- If the app does not show in the list of apps, go to Add app and search for your custom app's name to add it manually.
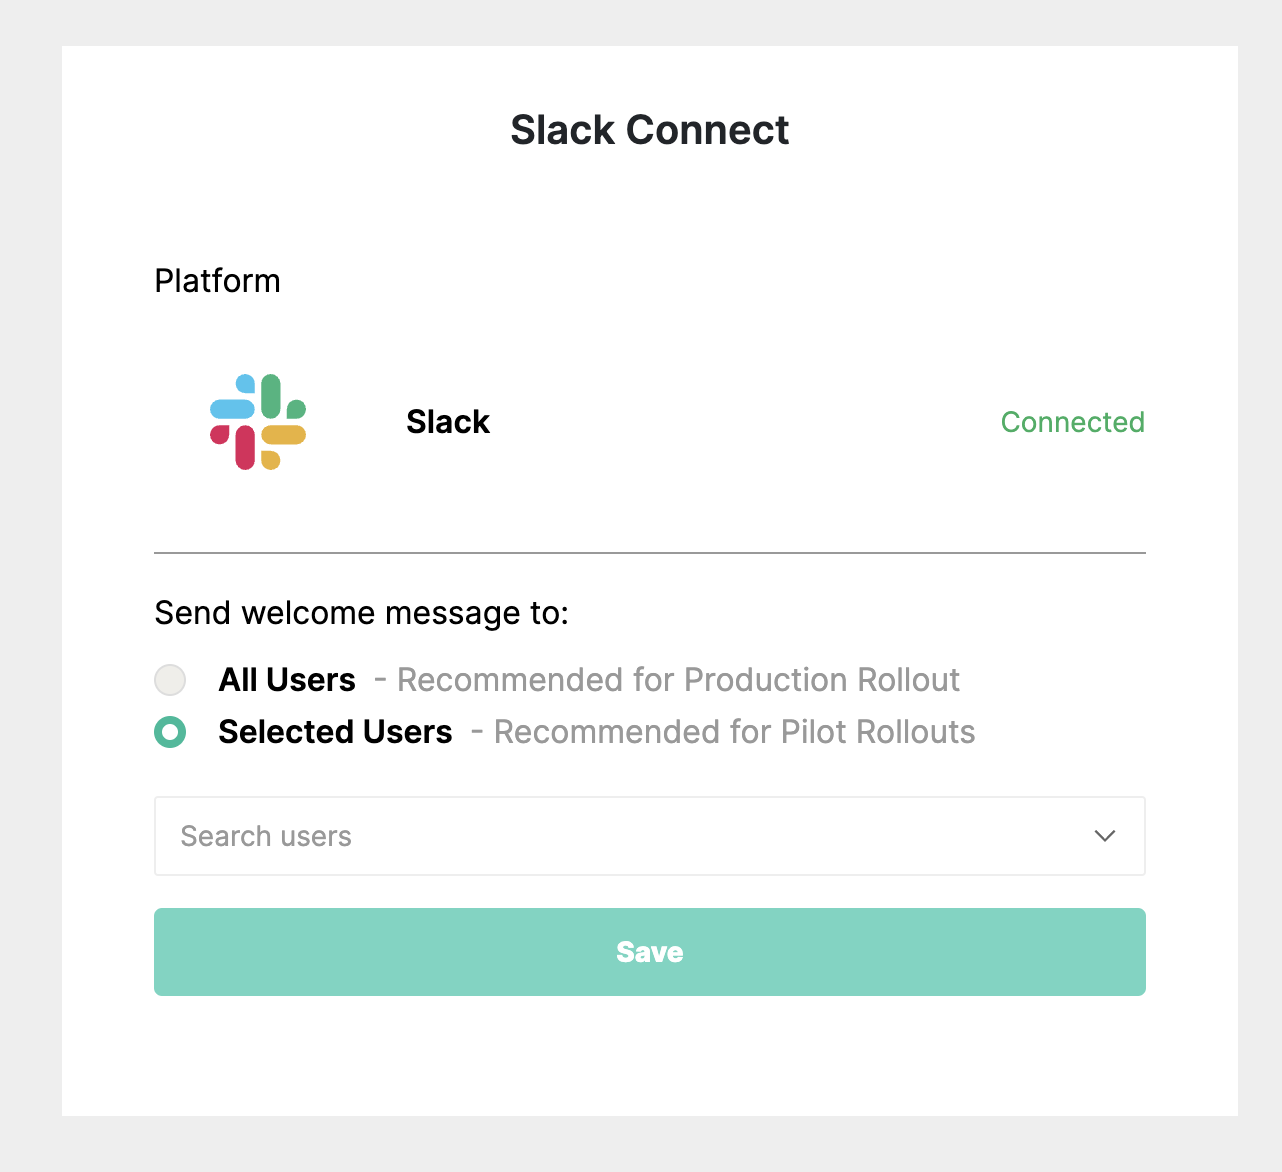
Sending out the Welcome Message
Aafter the customer accepts the invite, refresh your admin panel and go back to the customer. You will now see that is successfully Connected. Below you can press "Selected Users" and select the users you want to greet. Once you have approval to roll out to everyone, come back here and press "All Users".
Service App Notifications
Customers will receive a Slack notification whenever there is a new thread or reply to a thread is sent.
To learn about the Slack Companion App (For MSP's), click here