Action Mapping Configuration with Thread

Customizing Actions in Halo for Thread Integration
Actions in Halo are customizable buttons that let technicians perform specific tasks on tickets, helping streamline workflows and tailor HaloPSA to your business processes. To sync conversations from Thread into HaloPSA, we require the following actions:
- Action for sending customer-facing notes
- Action for sending internal notes ("private notes")
- Action for emailing contacts
- Action for receiving customer messages
Important Notes Before You Begin
Required Fields
Adding any required fields to actions will disrupt the mapped events, making those actions unusable, as we do not currently support required or additional action fields.
Allowed Values
Ensure the actions mapped are set as 'Allowed values' on all ticket types in Halo. If they aren't, conversations won't sync back to the associated ticket in Halo. For more details, please click here.
Workflow Restrictions
Although we suggest marking actions as "actions visible outside of workflows", you may encounter issues where conversations do not sync from Thread to HaloPSA due to workflow restrictions. We recommend adding these custom actions to all workflows in HaloPSA to avoid any issues. Note: we suggest hiding these custom actions from the HaloPSA ticket view. For more details, please click here.
Action Fields
These custom actions are to ensure conversations from Thread sync into Halo. You can keep your existing actions without disrupting your current setup, but here's what the following action "fields" do in Halo:
- Private Note action field: Sends an internal note in Thread.
- Note action field: Sends a public note in Thread (e.g., sends a chat reply to the customer in Thread Messenger or service apps).
- Email action field: Sends an email and replies to the customer in Thread Messenger or service app.
Custom Actions to Create
These are the custom actions we will create in the steps below:
- Thread Private Note: Used for sending internal notes visible only to your team.
- Thread Public Note: Used for sending notes visible to external contacts.
- Thread Email User: Used for sending emails to contacts associated with the thread or ticket.
- Thread Customer Replied: Used for tracking customer replies with the thread or ticket.
Configuring Actions in HaloPSA
Follow these steps to set up and configure actions in HaloPSA to work seamlessly with Thread. These custom actions are necessary for conversations to sync from Thread to HaloPSA
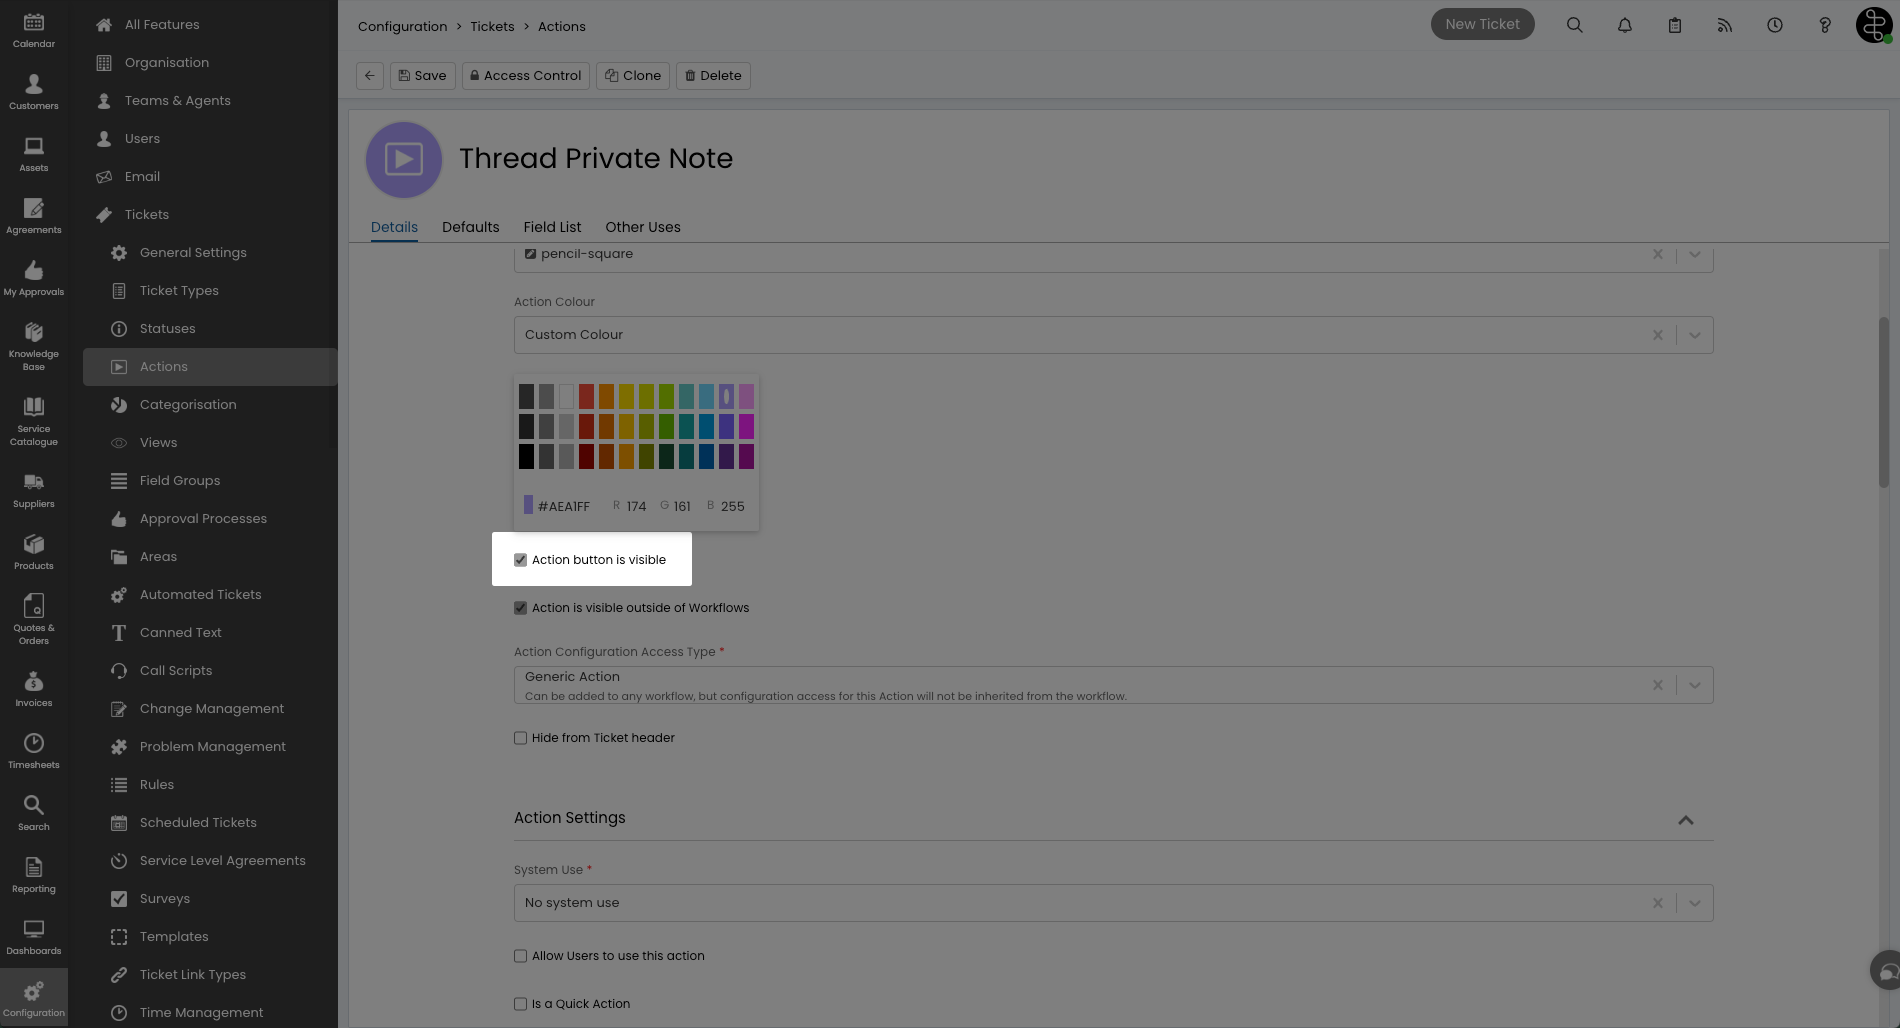
Create "Thread Private Note" Action
- Login to HaloPSA.
- Navigate to Configuration → Tickets → Actions.
- Click New.
- Enter the following details:
- Outcome Description: Thread Private Note
- Button Name: Thread Private Note
- Click Edit.
- Enable the checkboxes under Details tab:
- Action button is visible
- Action is visible outside of Workflows
- Hide from Ticket Header (hides these actions from the HaloPSA ticket view to avoid interfering with your current setup and actions)
- Hide from User
- Under the Field List tab:
- Add the Private Note field.
- Click Save.
- Click Save.
Create "Thread Public Note" Action
- Clone the Thread Private Note action created above:
- Select Thread Private Note from the Actions list.
- Click Clone.
- Enter the following details:
- Outcome Description: Thread Public Note
- Button Name: Thread Public Note
- Click Edit.
- Under the details tab:
- Uncheck the hide from user
- Under the Field List tab:
- Delete the Private Note field.
- Add the Note field.
- Click Save.
- Click Save.
Create "Thread Email User" Action
- Clone the Thread Public Note action create above:
- Select Thread Public Note from the Actions list.
- Click Clone.
- Enter the following details:
- Outcome Description: Thread Email User
- Button Name: Thread Email User
- Click Edit.
- Set the following under Defaults tab:
- Send an Email: Yes
- Under the Field List tab:
- Add Mailbox
- Click Save.
Create "Thread Customer Replied" Action
- Clone the Thread Public Note action create above:
- Select Thread Public Note from the Actions list.
- Click Clone.
- Enter the following details:
- Outcome Description: Thread Customer Replied
- Button Name: Thread Customer Replied
- Click Edit.
- Click Save.
- Now that you've created these custom actions, make sure they are allowed on all ticket types by following the steps below 👇.
Allow Actions on All Ticket Types
To ensure smooth integration between Thread and Halo, any actions mapped within the Thread admin panel need to be set as 'Allowed values' on all ticket types you wish to use in Thread. If these actions are not allowed on certain ticket types, Thread will be unable to sync conversation events (e.g., private notes, public notes, and emails) back to the associated ticket in Halo.
How to Add Actions to Ticket Types
- Log in to HaloPSA.
- Navigate to Configurations → Tickets → Ticket Types.
- Select a Ticket Type and go to the Allowed Values tab.
- Here, you can either allow all actions or restrict actions on the ticket type. Ensure that all actions or the specific actions mapped in Thread are set as allowed values for this ticket type, as shown below.
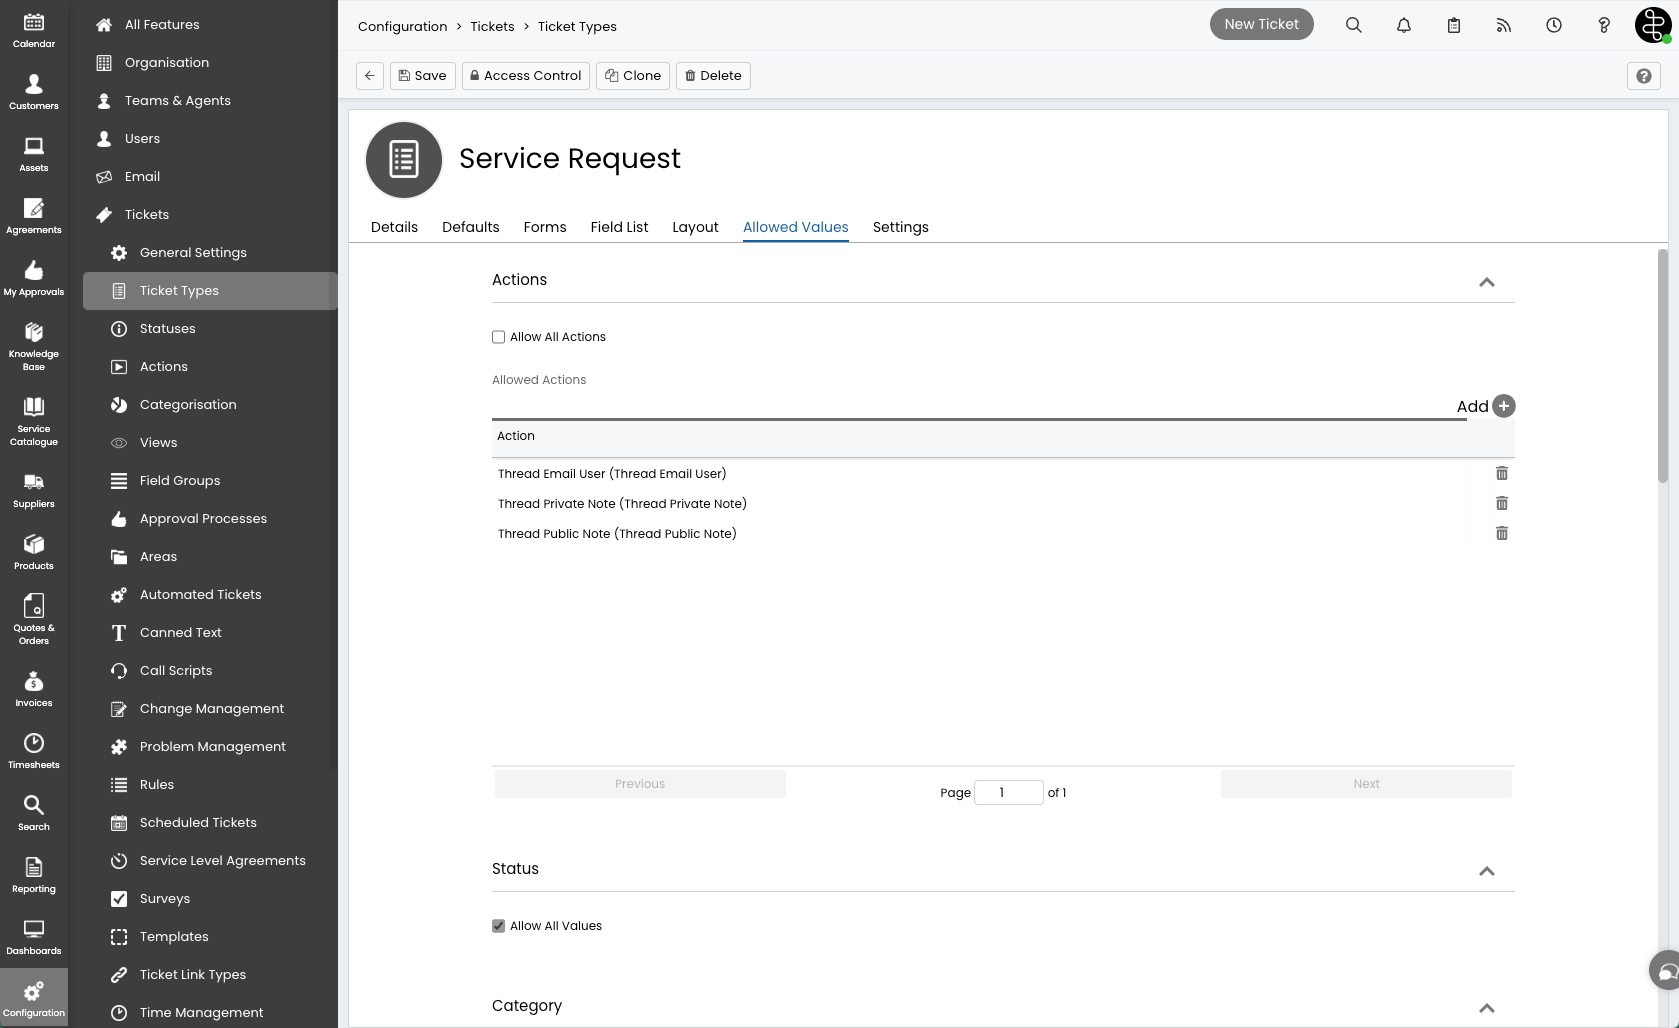
- Click Save.
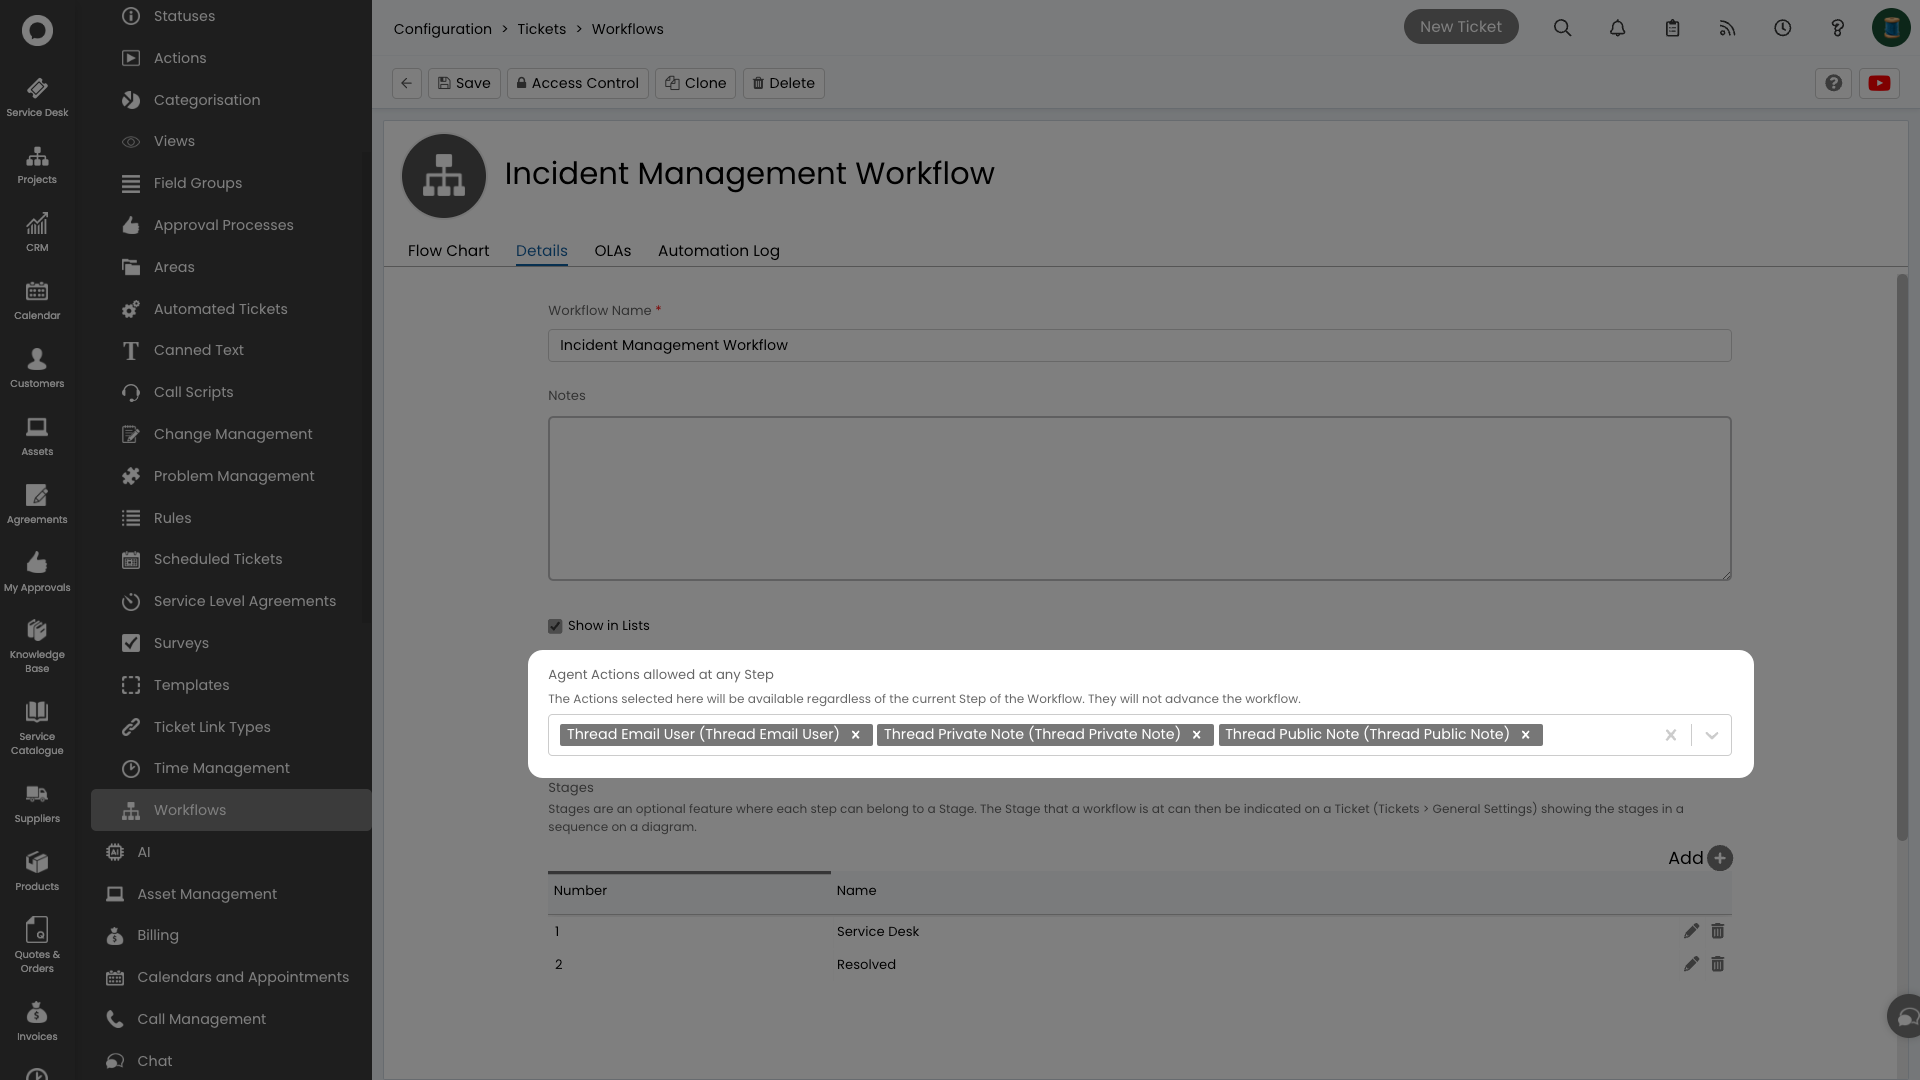
Allow Actions on All Workflows
Actions mapped within the Thread admin panel need to be added to all workflows under 'Agent Actions allowed at any Step' to avoid any disruptions with syncing conversations from Thread to HaloPSA. Note that we've set the custom actions created above to be hidden from the ticket header, so these custom actions will not interfere with your ticket types, actions, or workflows.
How to Add Actions to Workflows
- Log in to HaloPSA.
- Navigate to Configurations → Tickets → Workflows.
- Select a Workflow and go to the Details tab.
- Click Edit.
- Add the custom actions created above under 'Agent Actions allowed at any Step'.
- Click Save.
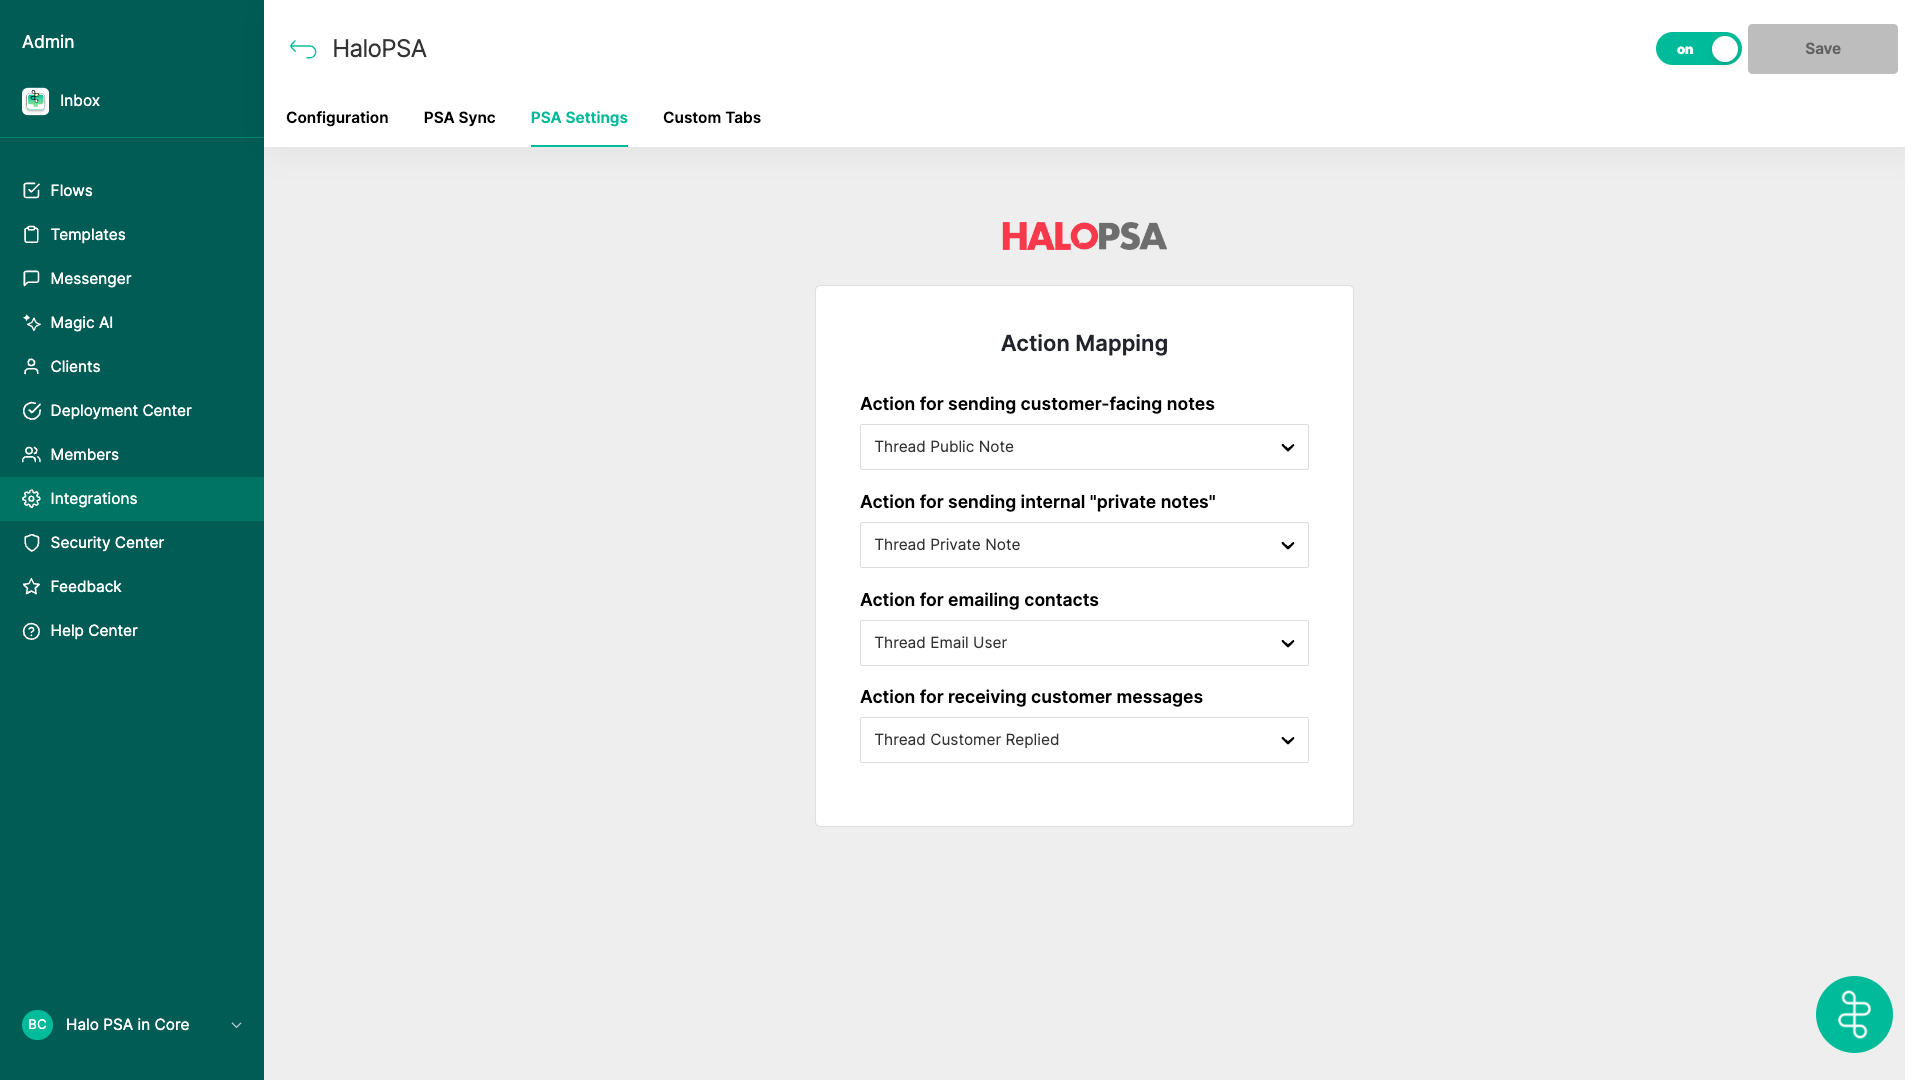
Mapping Actions in Thread
Thread Admin Panel
- Login to Thread Admin Panel.
- Navigate to Integrations → HaloPSA → PSA Settings.
- Select actions from the dropdown to map them. The selections will be saved automatically.
Troubleshooting: Created Actions Not Visible
If new actions are not visible, please ensure you have set "Action button is visible" on the action in HaloPSA:
- Login to HaloPSA.
- Navigate to Configuration → Tickets → Actions.
- Find and select the action from the list.
- Click Edit.
- Check the box for "Action button is visible".
- Click Save.
- Head back to the Thread admin panel to map the action (Thread admin panel → Integrations → HaloPSA → PSA Settings), and the action should show up immediately for you to map.
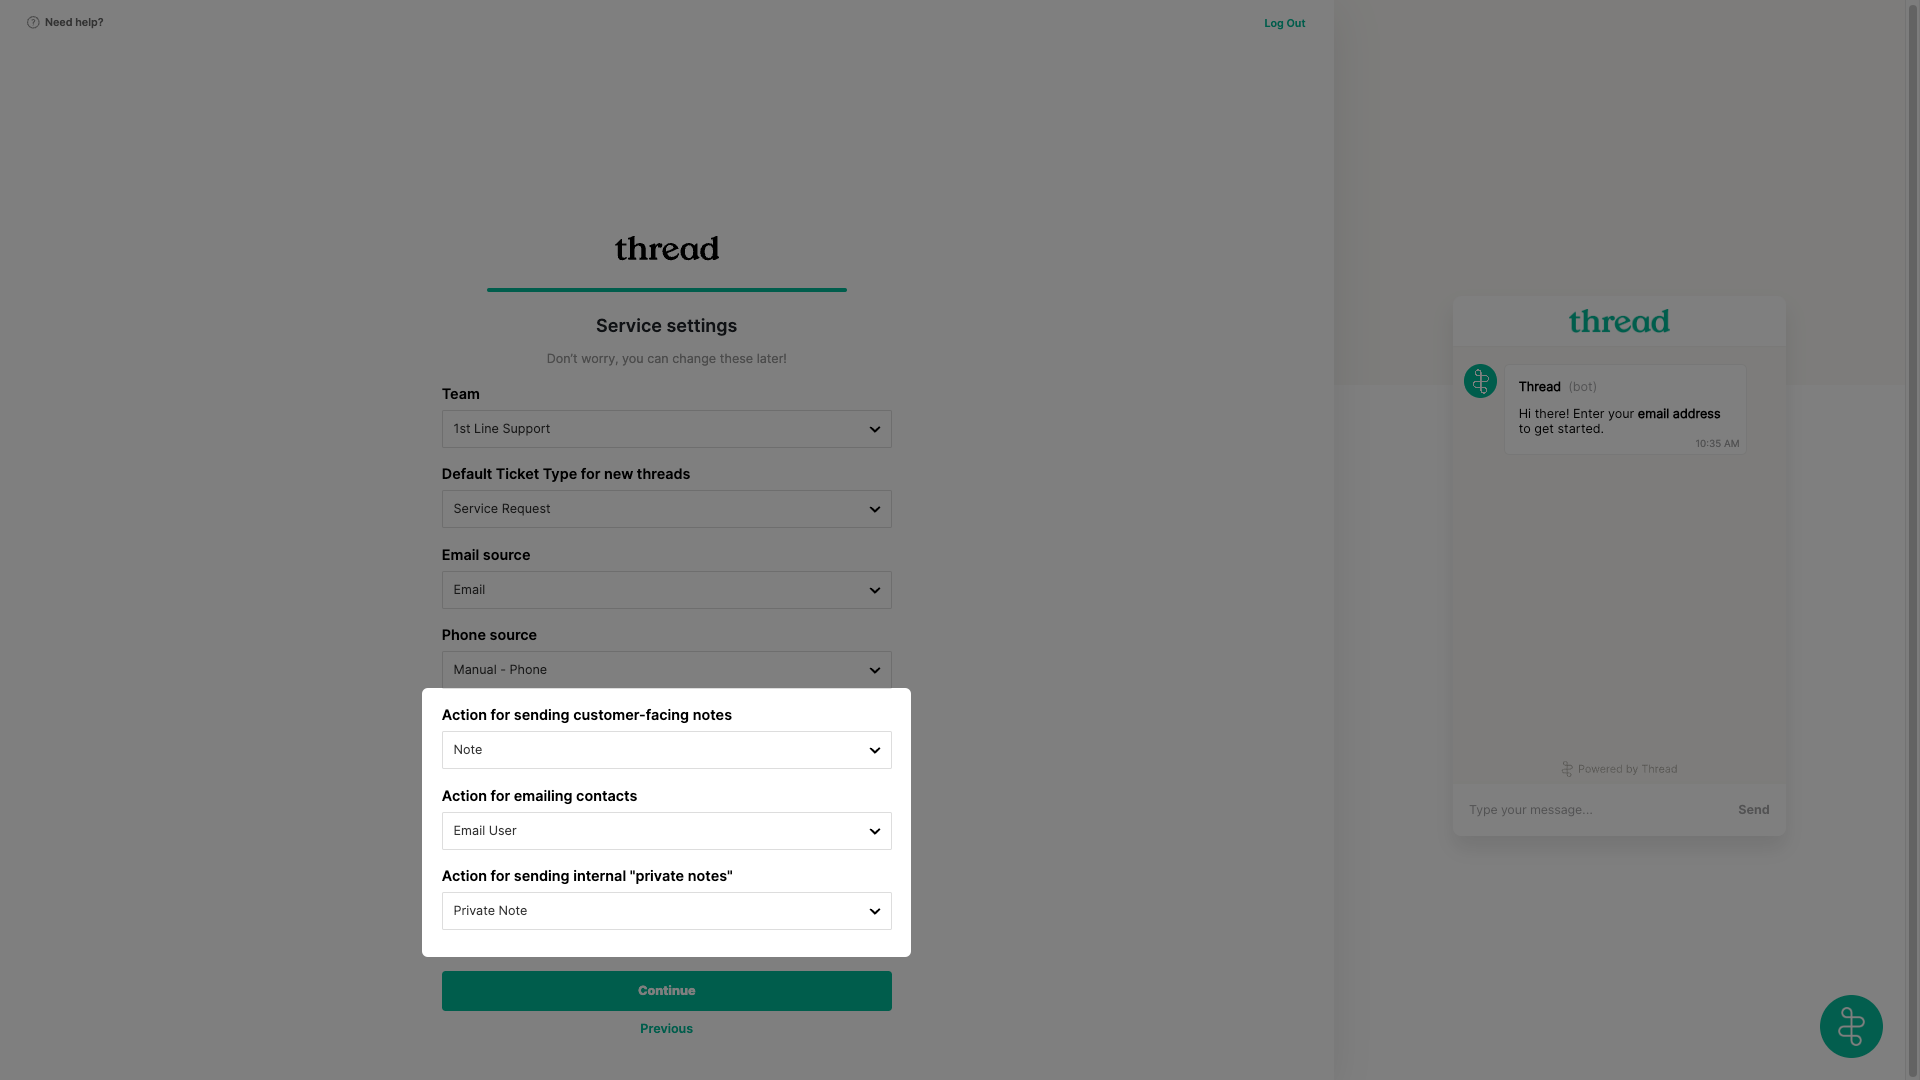
New Workspace Setup
- If you haven't set up your workspace, follow this setup guide.
- Upon connecting with HaloPSA, map the actions under Service Settings in the setup wizard.