Handling Service Threads in Slack
 Updated
by
Kristof Orts
Updated
by
Kristof Orts
A Live Chat ticket will render as a Chatgenie Ticket card in your live-chat channel (as pictured below); users will know that there is a new chat request or an update to a chat ticket when the channel highlights in bold:
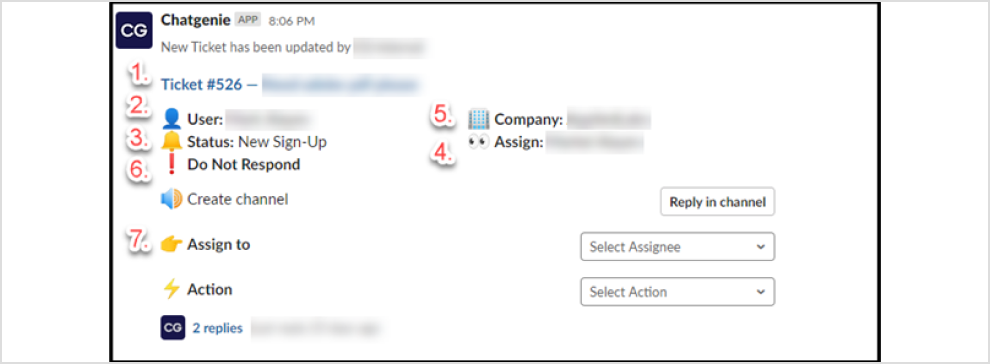
There are 8 pieces of information delivered by the Ticket card, which are the keys to appropriately actioning a ticket
1. Ticket Summary: This is the information provided by the customer when creating a ticket.
2. User: This is the user who created the ticket.
3. Status: This is the current status of the ticket.
4. Assignment: This is the resource currently assigned to the ticket.
5. Company: This is the Company the user belongs to.
6. Priority: This is the priority level of the ticket.
7. Action Bar: These are actions in Manage and other integrated systems available to the technician from Slack.
8. Ticket Card Thread: This is the communications hub for the live chat ticket. Items 1-6 are self explanatory for ConnectWise PSA Service Ticket users, so we’ll zoom into 7 & 8 specifically in the next section.
How do I use Actions on the Chatgenie Ticket Card Action Bar?
There are three main areas of navigation from the Action Bar (Item 7 as pictured above):
Reply in Channel
Clicking this button will create a channel dedicated to the ticket in Slack; all actions taken against the Ticket Card and communications to the customer should then be performed from that dedicated channel.
Please Note: All communications in the dedicated channel will default as Internal Notes under the Ticket in ConnectWise PSA; if you desire that the message be entered as an External Note to the Discussion and transmitted to the Ticket Contact, please include the following command at the end of your sentence (also shown below): !send

Assign To
Clicking the Assign To button will display the Members of the Slack that can be assigned to the ticket (as shown below).
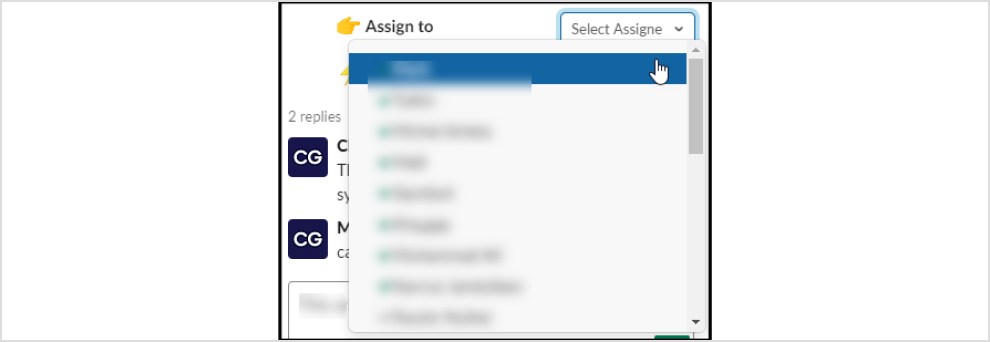
Assigning a User: When you select a User from the list, that User will be added as the Assigned Resource for the Ticket in ConnectWise PSA. When the process is completed successfully, the Assigned Resource will be updated on the Ticket Card as the Assigned Resource (Item 4 as shown in the Ticket Card section above).
⚡ Action
Clicking the Action button will expose the Actions that can be taken in progressing the Ticket in ConnectWise PSA:
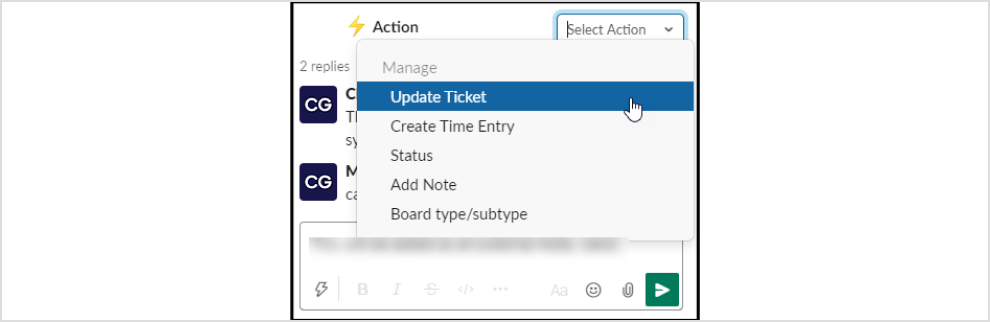
ConnectWise PSA Actions
1. Update Ticket. The Update Ticket function enables you to update the Description of the Ticket (as shown below)

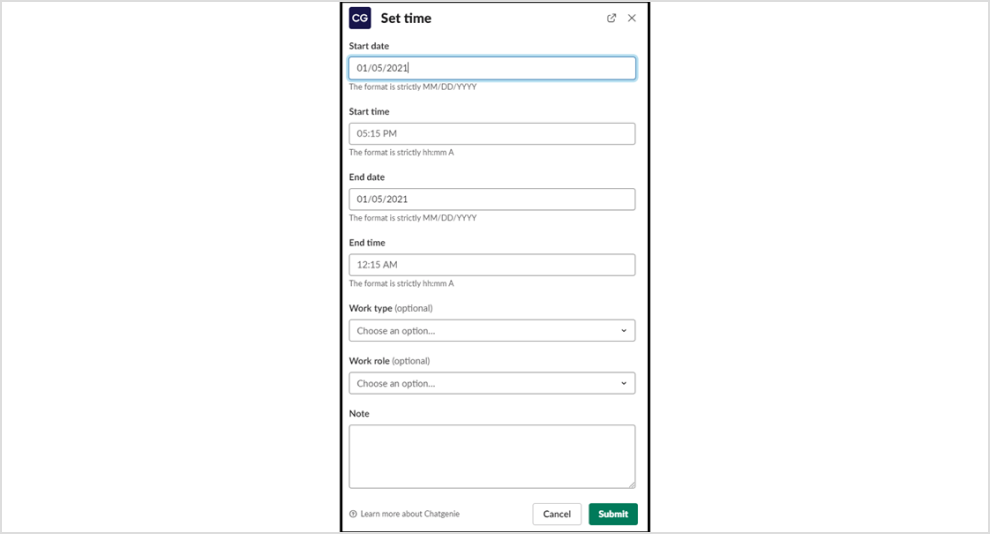
2. Create Time Entry
The Create Time Entry function enables you to put a Time Entry in directly from Slack
3. Status
The Status function enables you to change the Ticket Status directly from the Ticket Card in Teams (as shown below). When the change is made in Manage, the updated Status will be presented on the Ticket Card in Teams.

4. Add Note
The Add Note function enables you to add an Internal, Discussion, or Resolution Note to the Ticket from Teams.

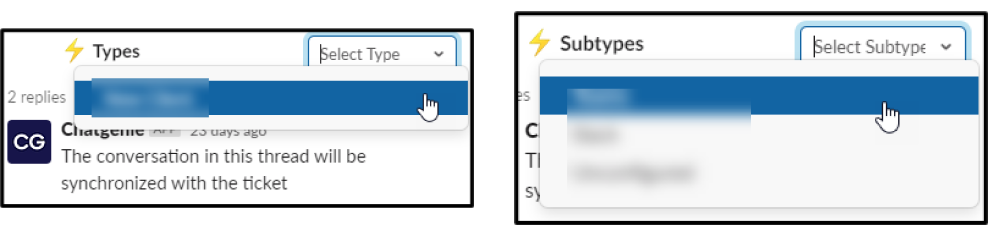
5. Board type/subtype
The Board Type / Subtype function enables you to change the Service Ticket Type or Subtype from Teams: