All Categories
>
>
How to Set Up the Kaseya BMS Ticketing Integration
How to Set Up the Kaseya BMS Ticketing Integration
Updated
by
Stephen Boss
This guide explains how to set up the Kaseya BMS Integration in the platform.
During the initial setup of your account in the platform, you are prompted to set up your ticketing system. Following the prompts for Kaseya BMS will lead you to the following screen asking you to enter API credentials.
Leave this screen open, we will come back to it later.
Open a new browser tab or window to continue to the next step, configuring the API user.
1. Configure the Security Role for the API User
Sign into your Kaseya BMS account.
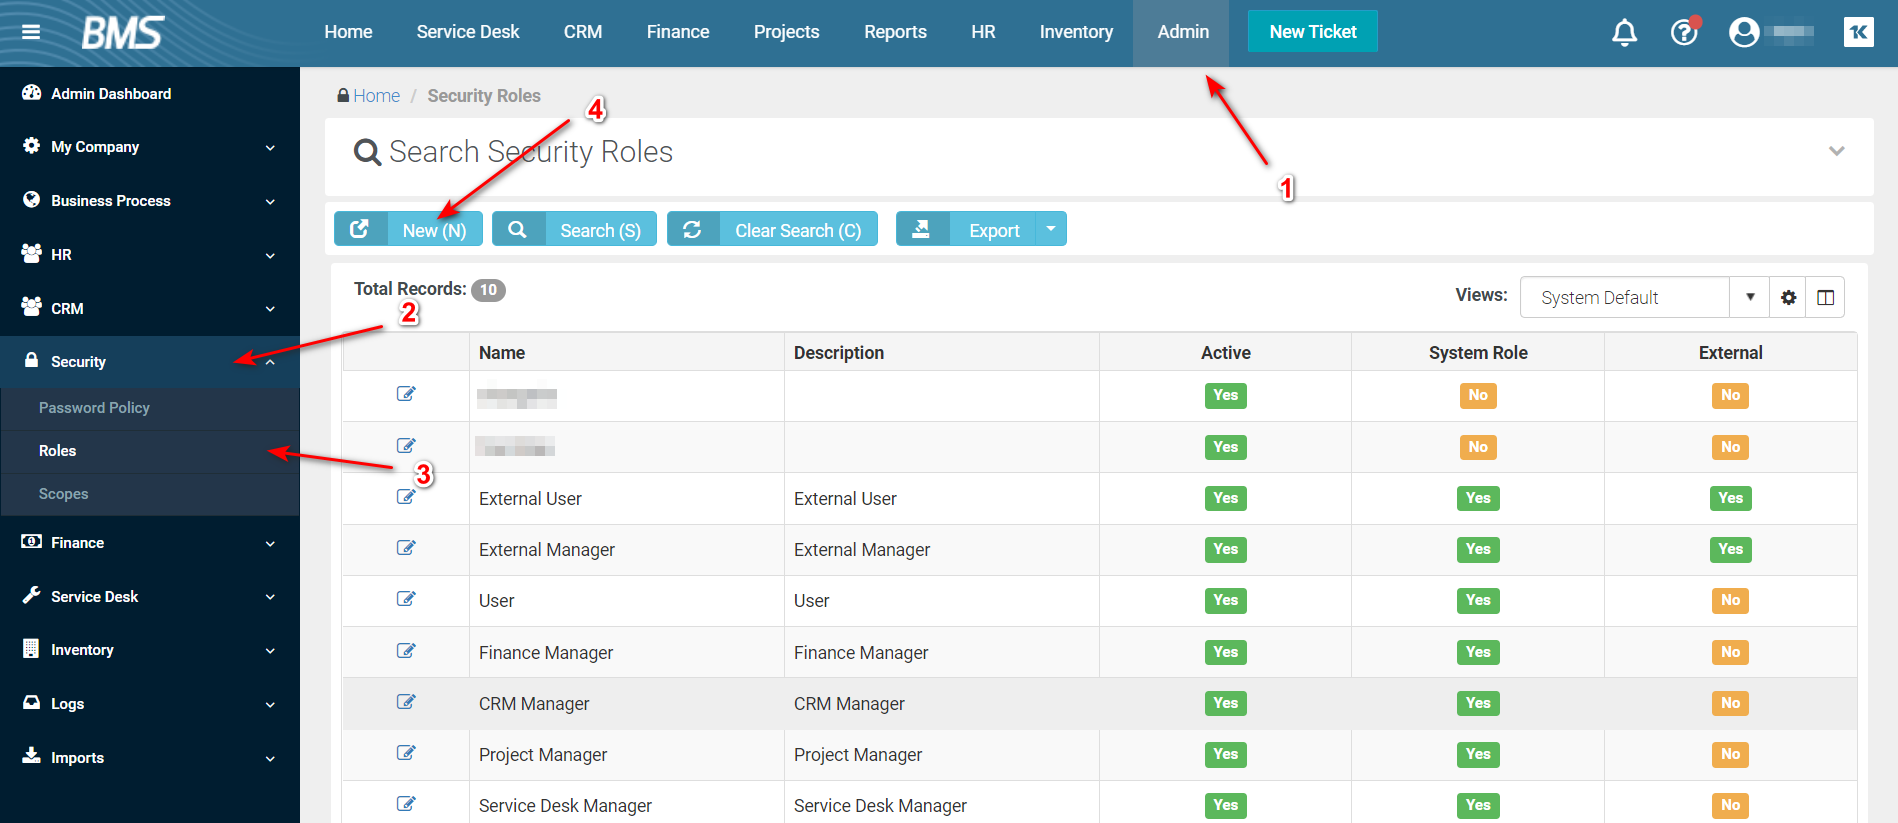
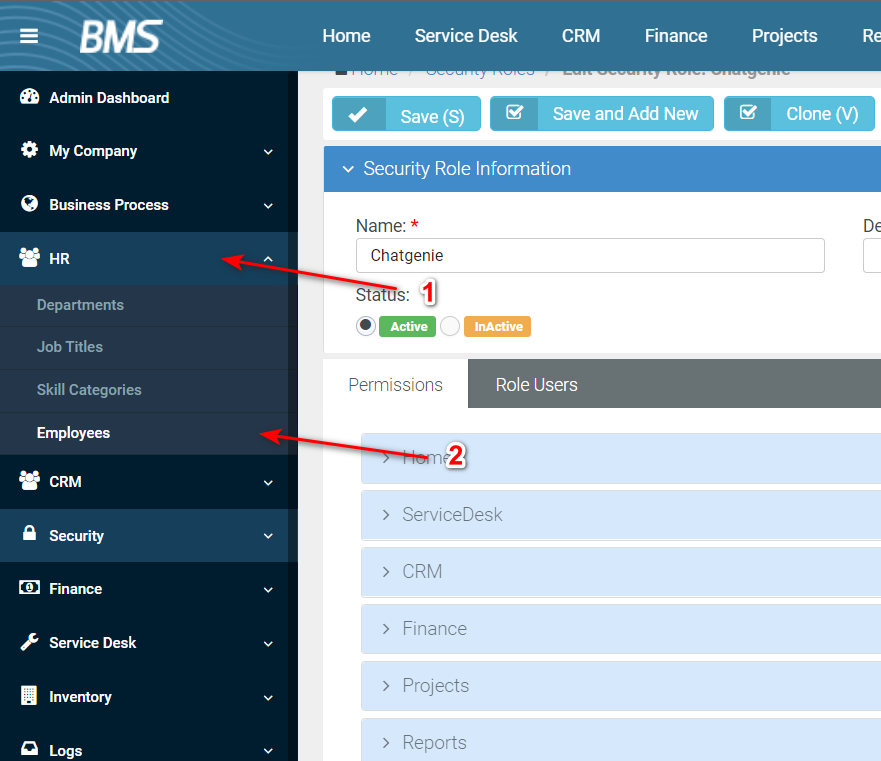
Go to the Admin page from the top menu. Then click Security item from the sidebar menu. Select Roles page and click the New button.
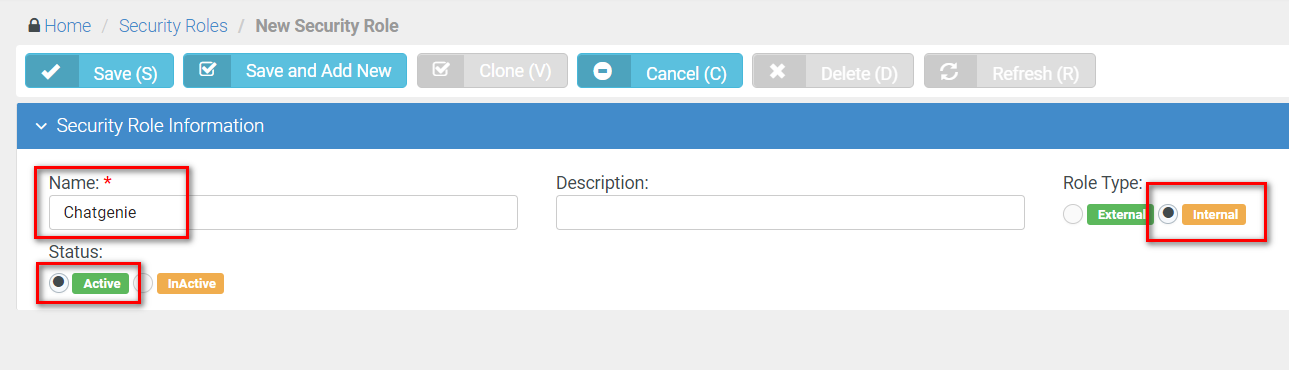
Type "Thread" (or some other self-explanatory text) in the Name field. Select Internal for the Role type. And select the Active in the Status field. Then Save.
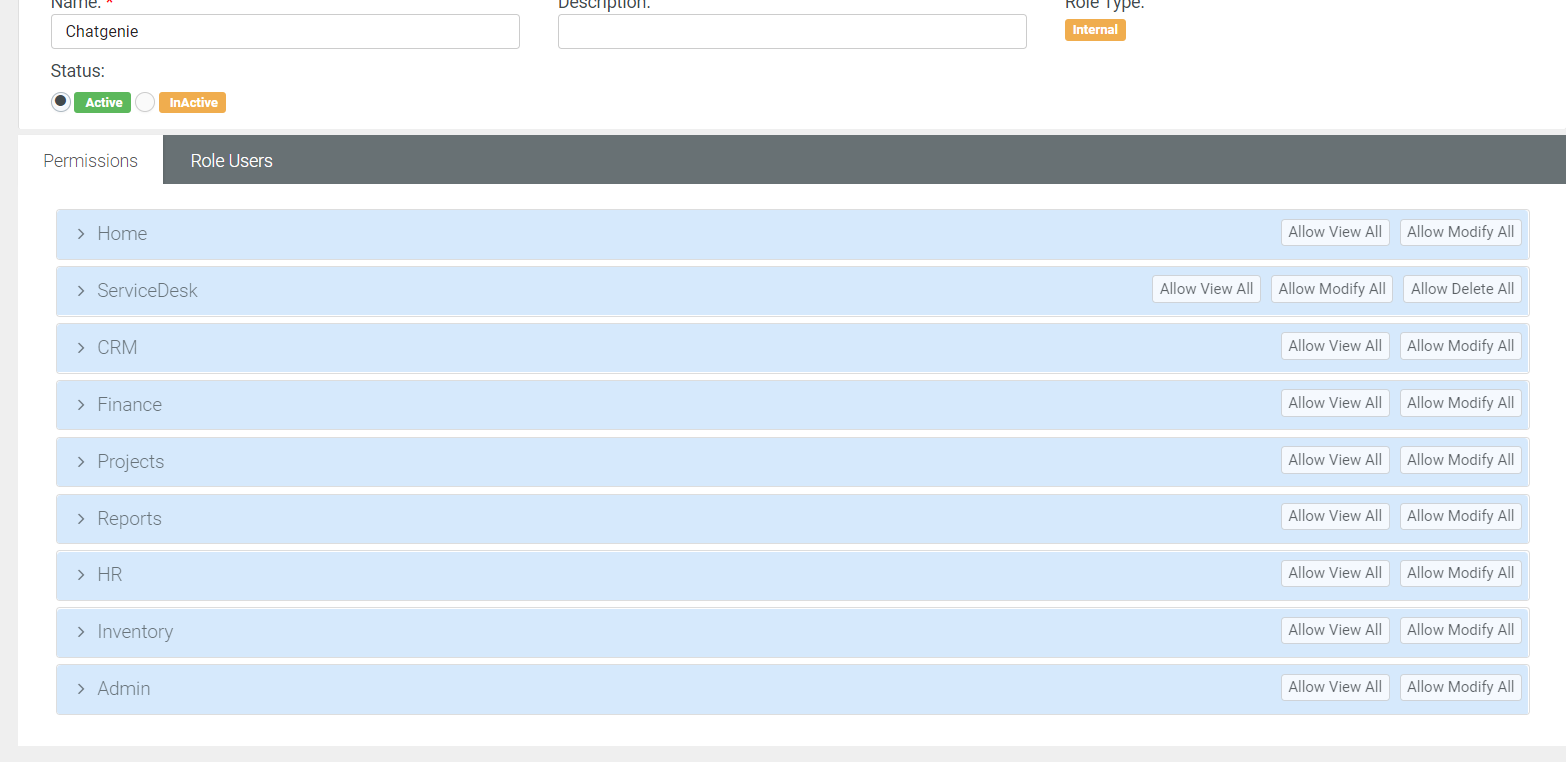
After that you will see the Permissions and Role Users tabs appear at the bottom.
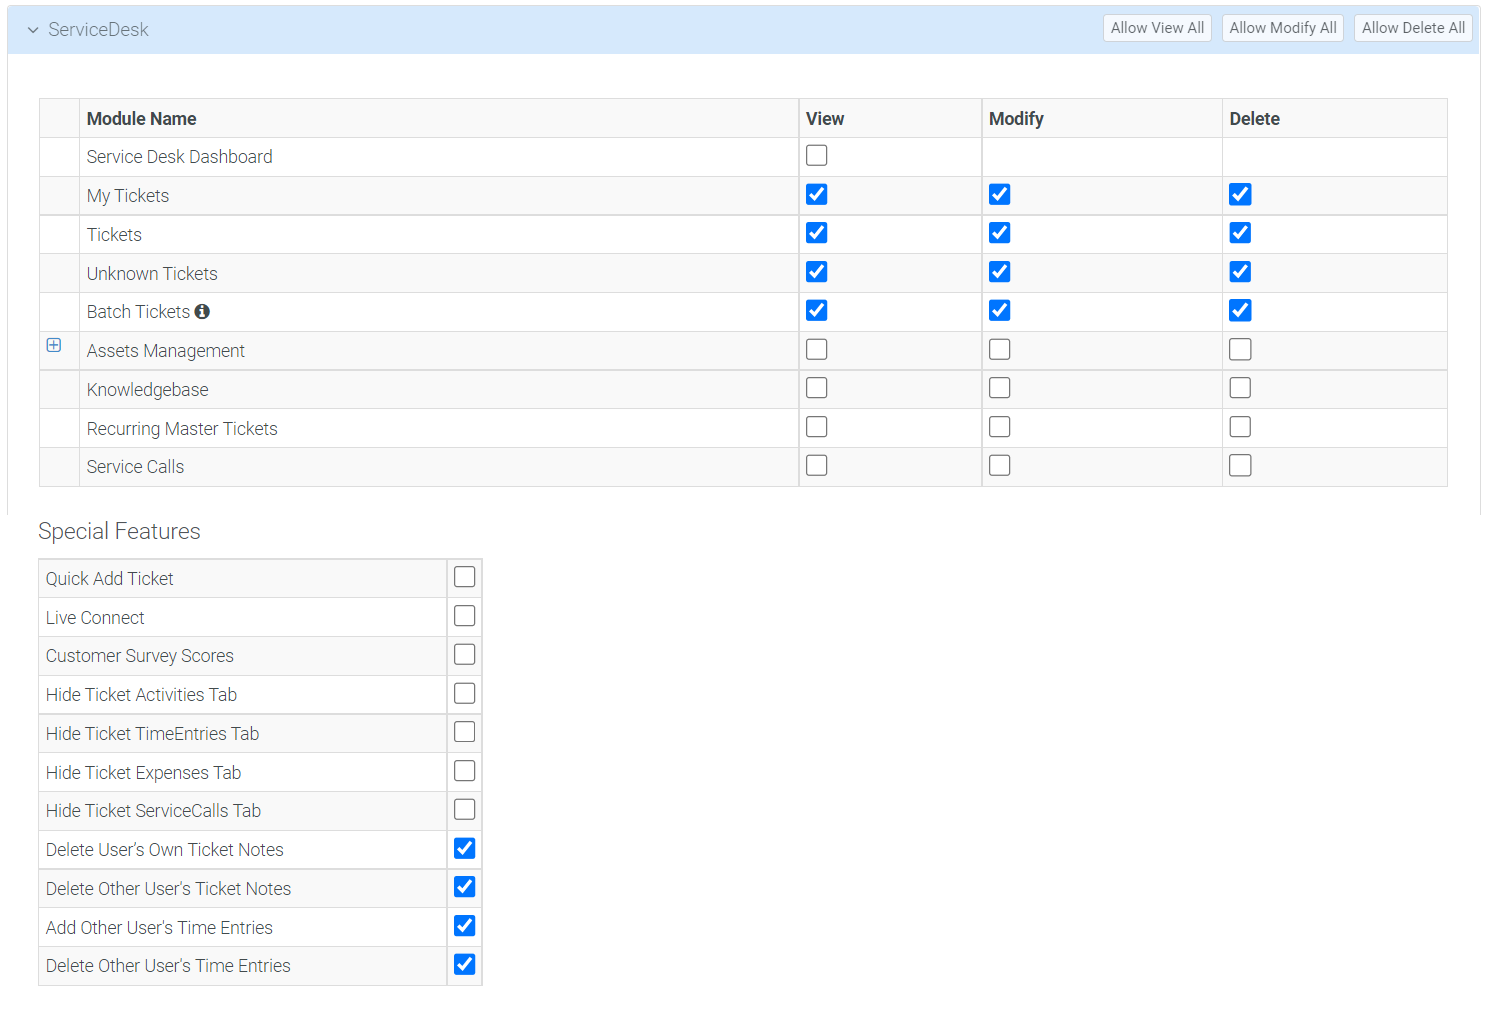
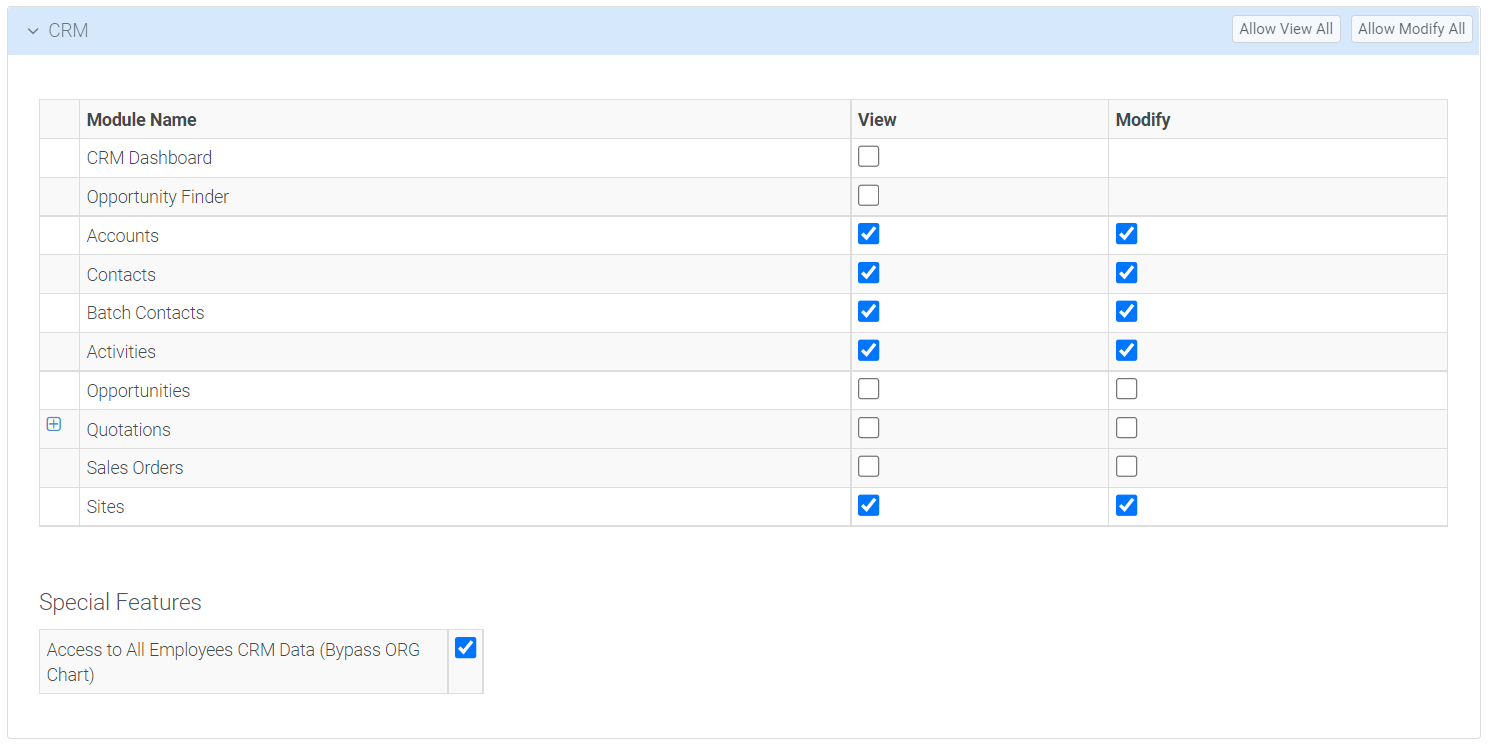
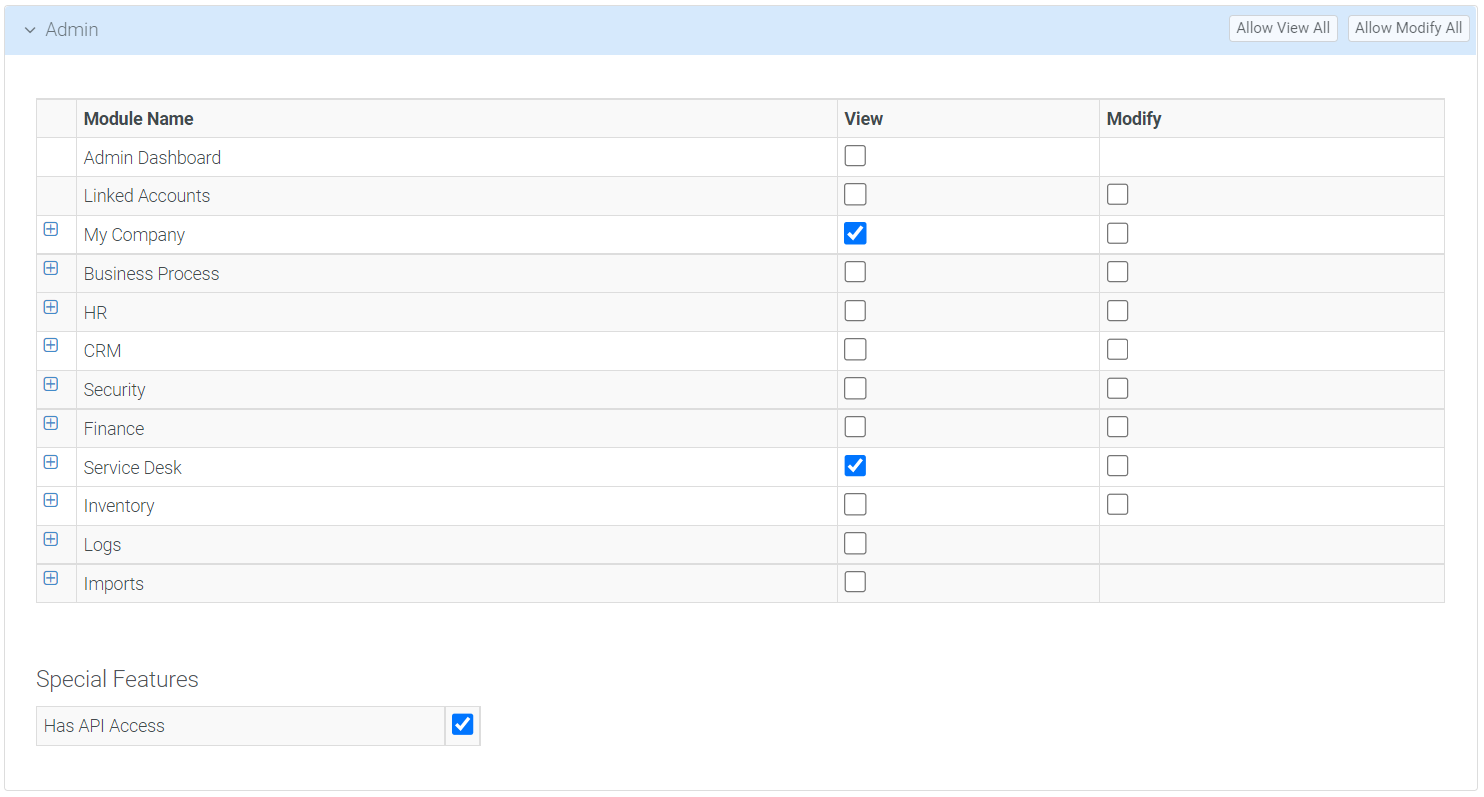
From the Permissions tab, enable permissions as shown at the following table: Service Desk:CRM:HR:Admin:
Click Save to save changes.
2. Create the API User
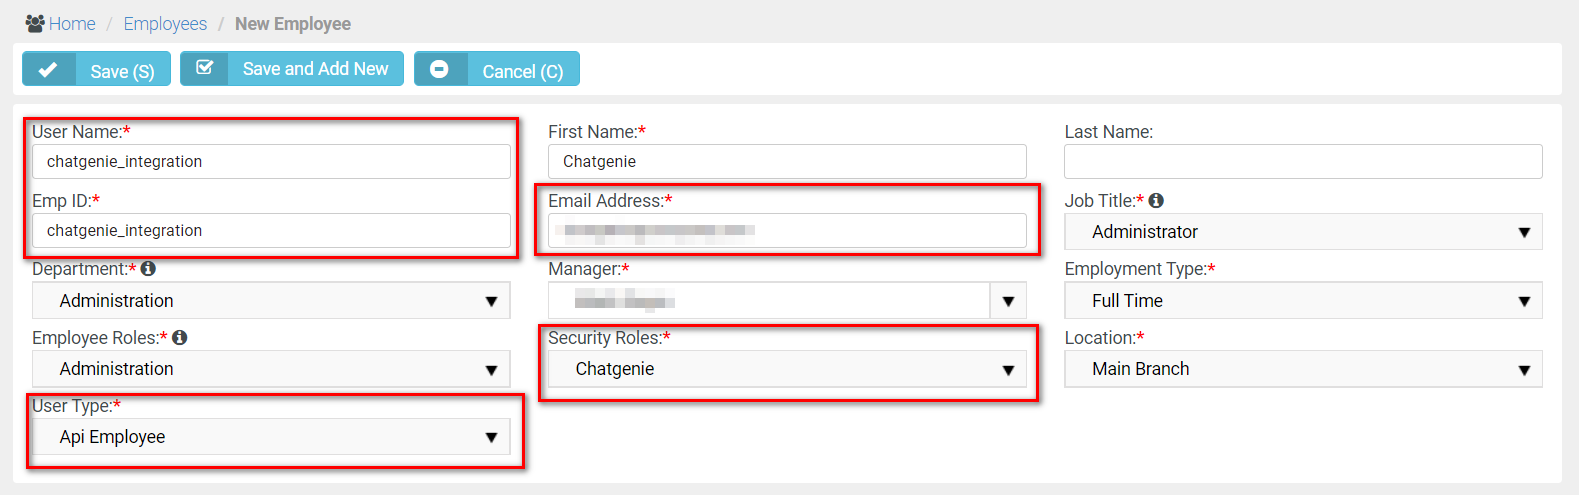
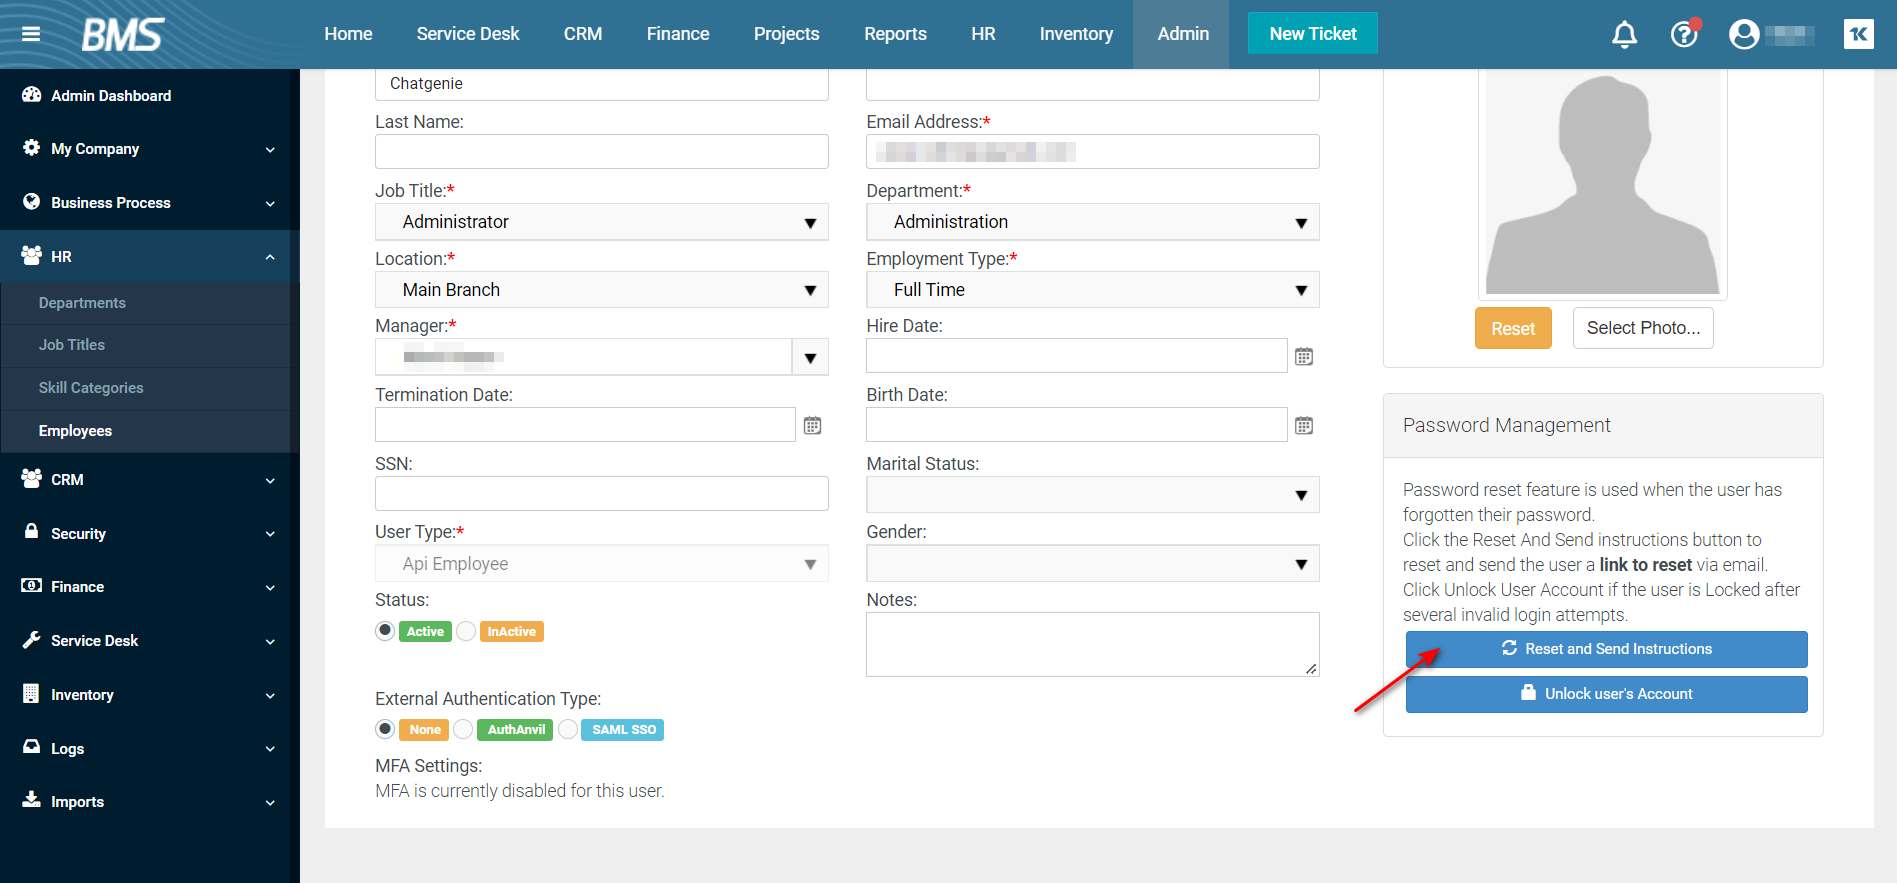
Then go to Employees page from HR section of the sidebar menu and begin creating a new API Employee.
Fill all required * input fields.
User Name* - "thread_integration", or whatever name you prefer
Emp ID* - "thread_integration", or whatever you prefer
Department* - pick a top-level Department to assign the user.
Employee Roles* - Administration
User Type* - Select Api Employee
First Name* - Enter "Thread", or whatever name you prefer.
Email Address* - Enter in a valid email as you will be asked to reset your password in a later step.
Manager* - Select whatever you prefer here.
Security Roles* - Enter the name of the security role you created in step 1.3 Configure the Security Role for the API User
Job Title* - Select whatever you prefer here.
Employment Type* - Select whatever you prefer here.
Location* - Select a top-level location or whatever you prefer.
If you already have an API user, make sure it has user type API Employee (HR -> Employees). If it doesn't then you will need to create a new one.
Then click Save to create the API account.
From the opened page, select Reset and Send Instructions button on Password Management section. And confirm the action by clicking Yes on confirmation window.
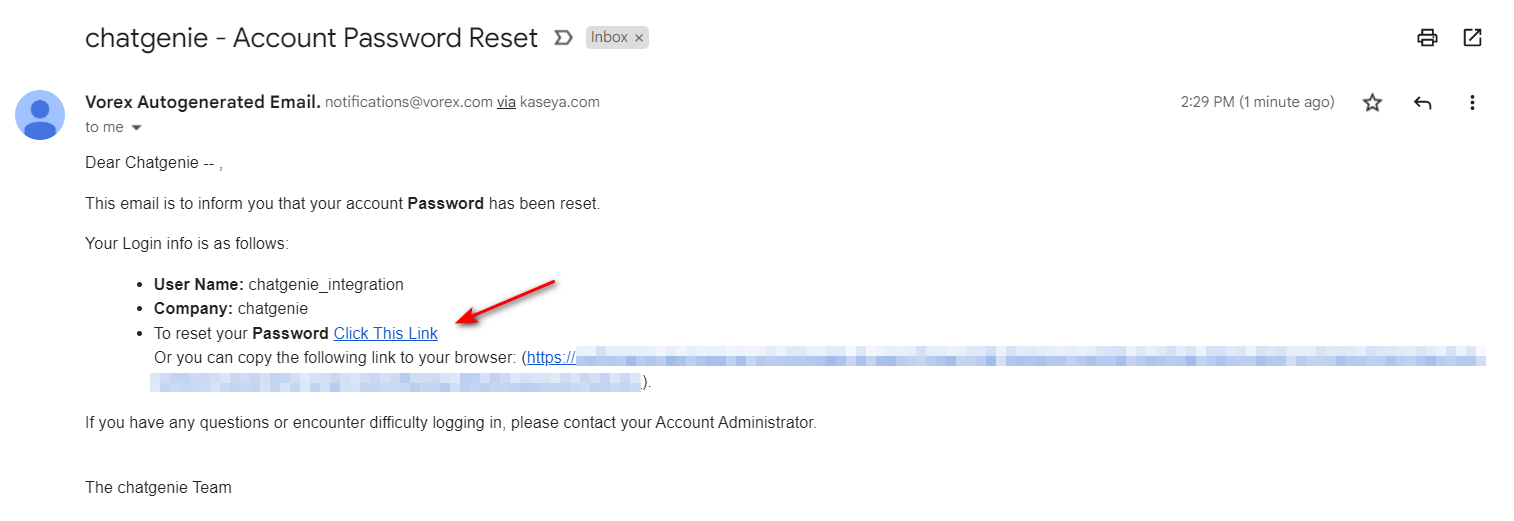
After that check your email inbox and look for an Account Password Reset email. Be sure to save the User Name and Company values from the received email (you will need them later).
Follow the link provided in the email to reset your password.
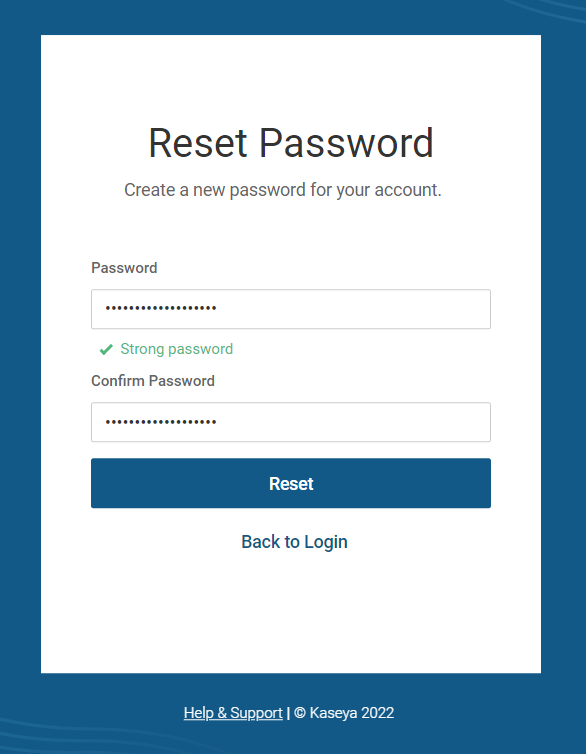
On the opened page create a new strong password and click Reset button. Make sure to save the new password with previous two values (User Name, Company) as they will be used for integration.
3. Configure Thread with the API Information
Now that you've set up your API keys, it's time to integrate Kaseya BMS with Thread! It's time to take the information you saved in the previous steps and enter it into the web form.
Host - Enter in the base URL you use to access Kaseya BMS, e.g. https://company.bms.kaseya.com
API Host - Each BMS environment has a dedicated API Host based on region, select the appropriate API Host for your region. If you aren't sure, consult your Kaseya BMS documentation.
Company Name - Enter in the Company Name you saved in step 2.5 Create the API User.
Username - Enter in the Username you saved in step 2.5 Create the API User.
Password - Enter in the Password you saved in step 2.6 Create the API User.
 Updated
by
Stephen Boss
Updated
by
Stephen Boss