Pia Integration

Integrating Thread with Pia (SmartForms)
Overview
This integration connects Thread with Pia to automate complex workflows directly within the chat interface. By linking these platforms, you can trigger Pia SmartForms (such as User Onboarding, Password Resets, or Access Requests) immediately when a user expresses a specific intent.
What the user sees: Instead of being redirected to a portal, the user receives an interactive "Open Form" button directly in the chat. When clicked, a branded form appears over the chat window, allowing them to submit data instantly.
Once a SmartForm is sent, the Triage Agent stays active and follows up automatically based on the form outcome — confirming submission, handling cancellations, and closing or escalating the ticket based on your intent configuration.
Prerequisites
Before you begin, ensure the following are in place:
- PSA Connection: Your PSA (Autotask, ConnectWise, or Halo) must be successfully connected and active in Pia → Integrations.

- Admin Access: You will need administrator access to both Thread and PIA to exchange API keys.
- Microsoft Graph: The specific client must have authorized the Microsoft Graph API within PIA.
Configuration Guide
Step 1: Connect Thread to Pia
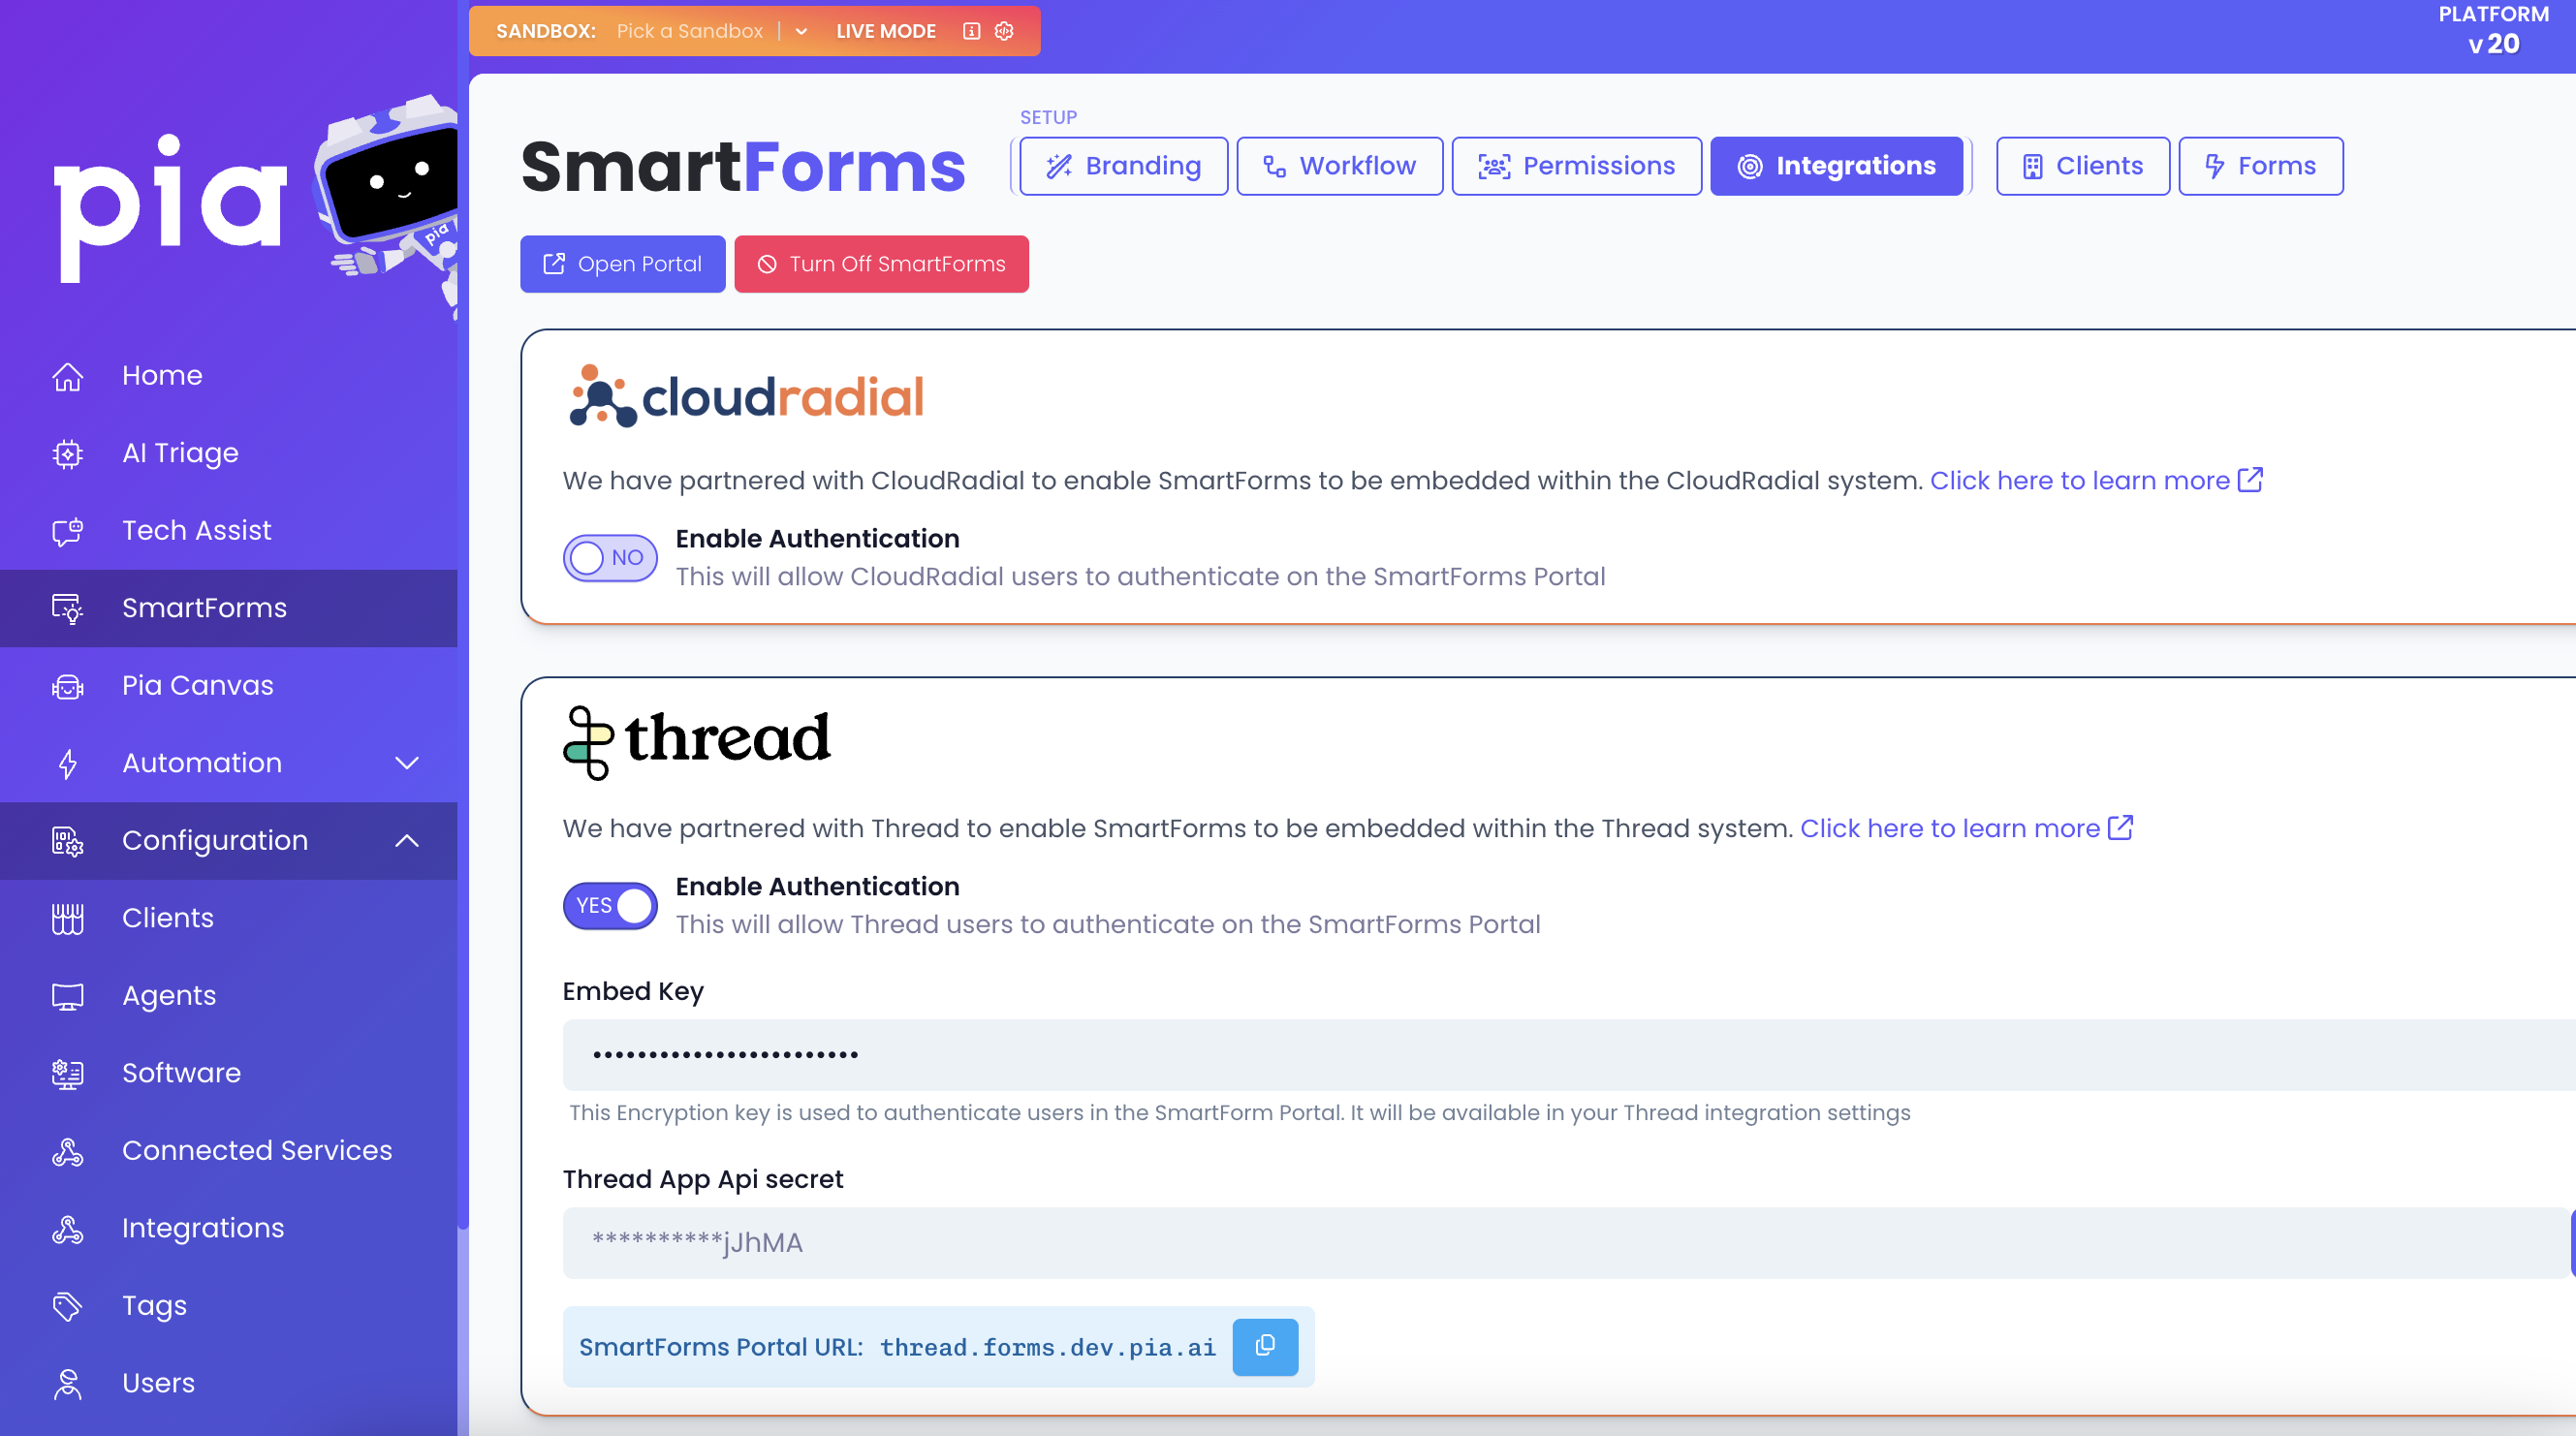
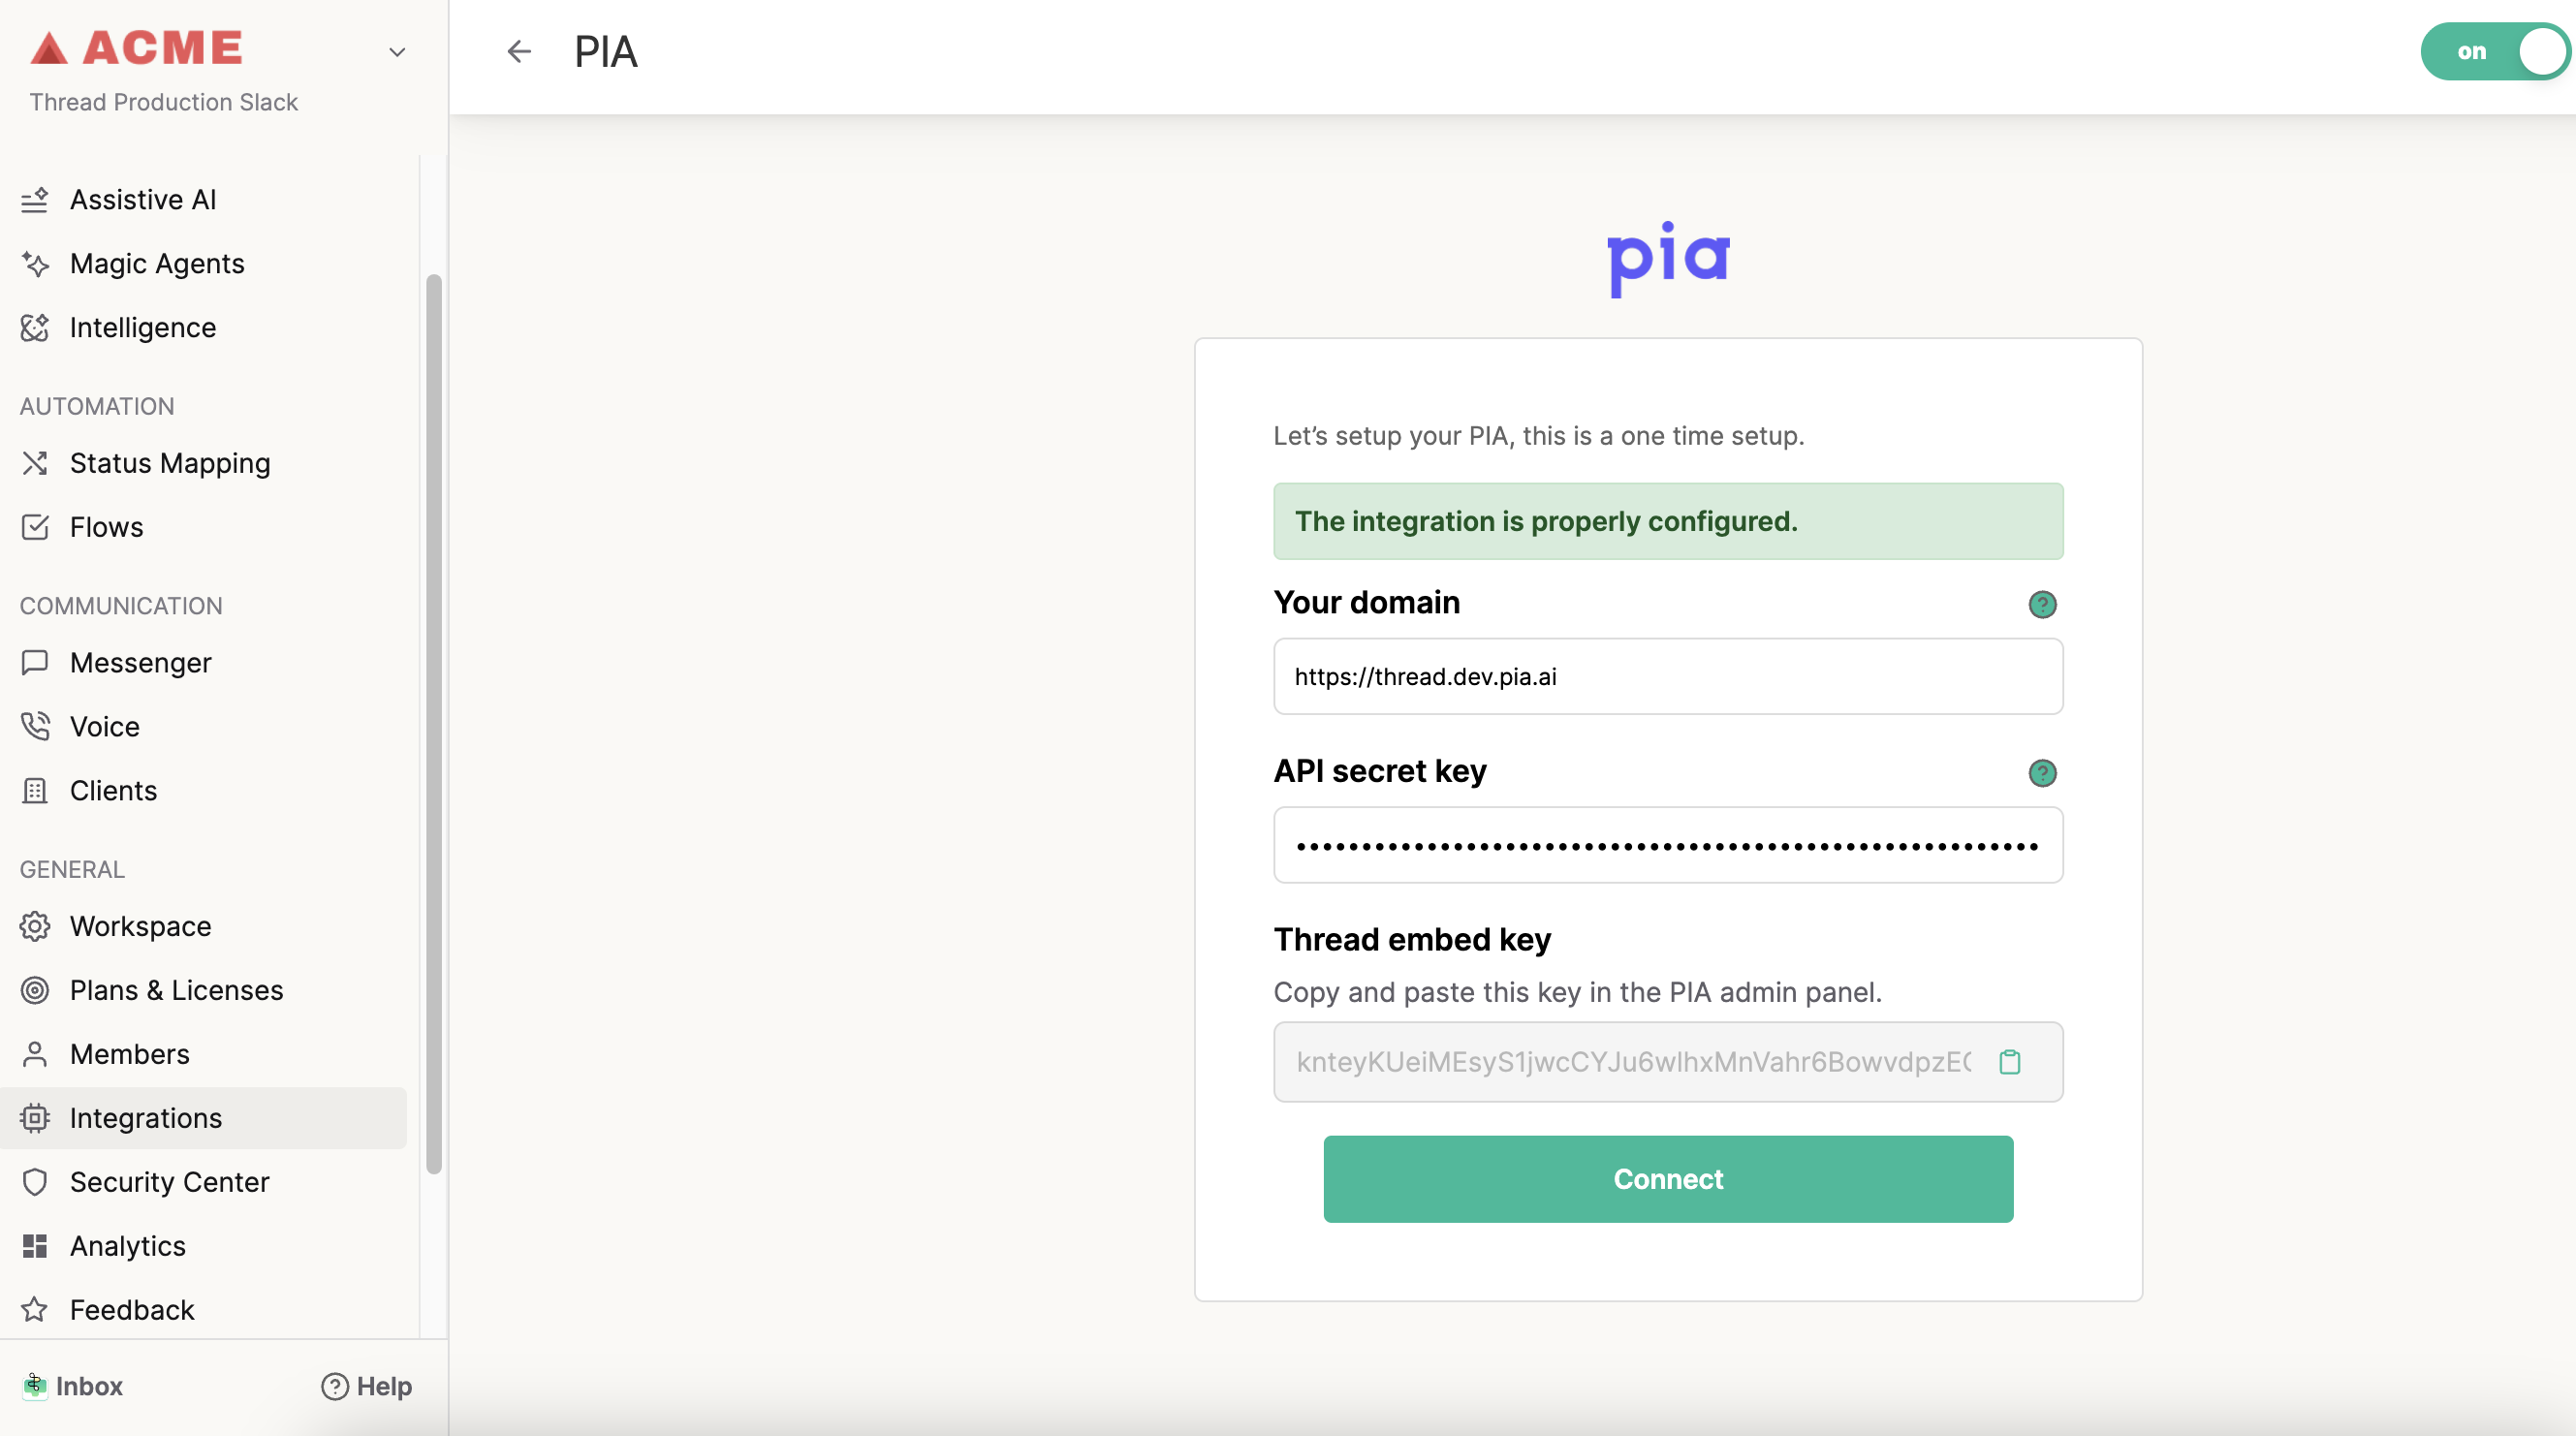
To establish a secure connection, you will need to copy distinct keys between the two platforms. Open two tabs: one for Thread Admin and one for Pia.
- Navigate to Thread → Admin → Integrations → Pia.
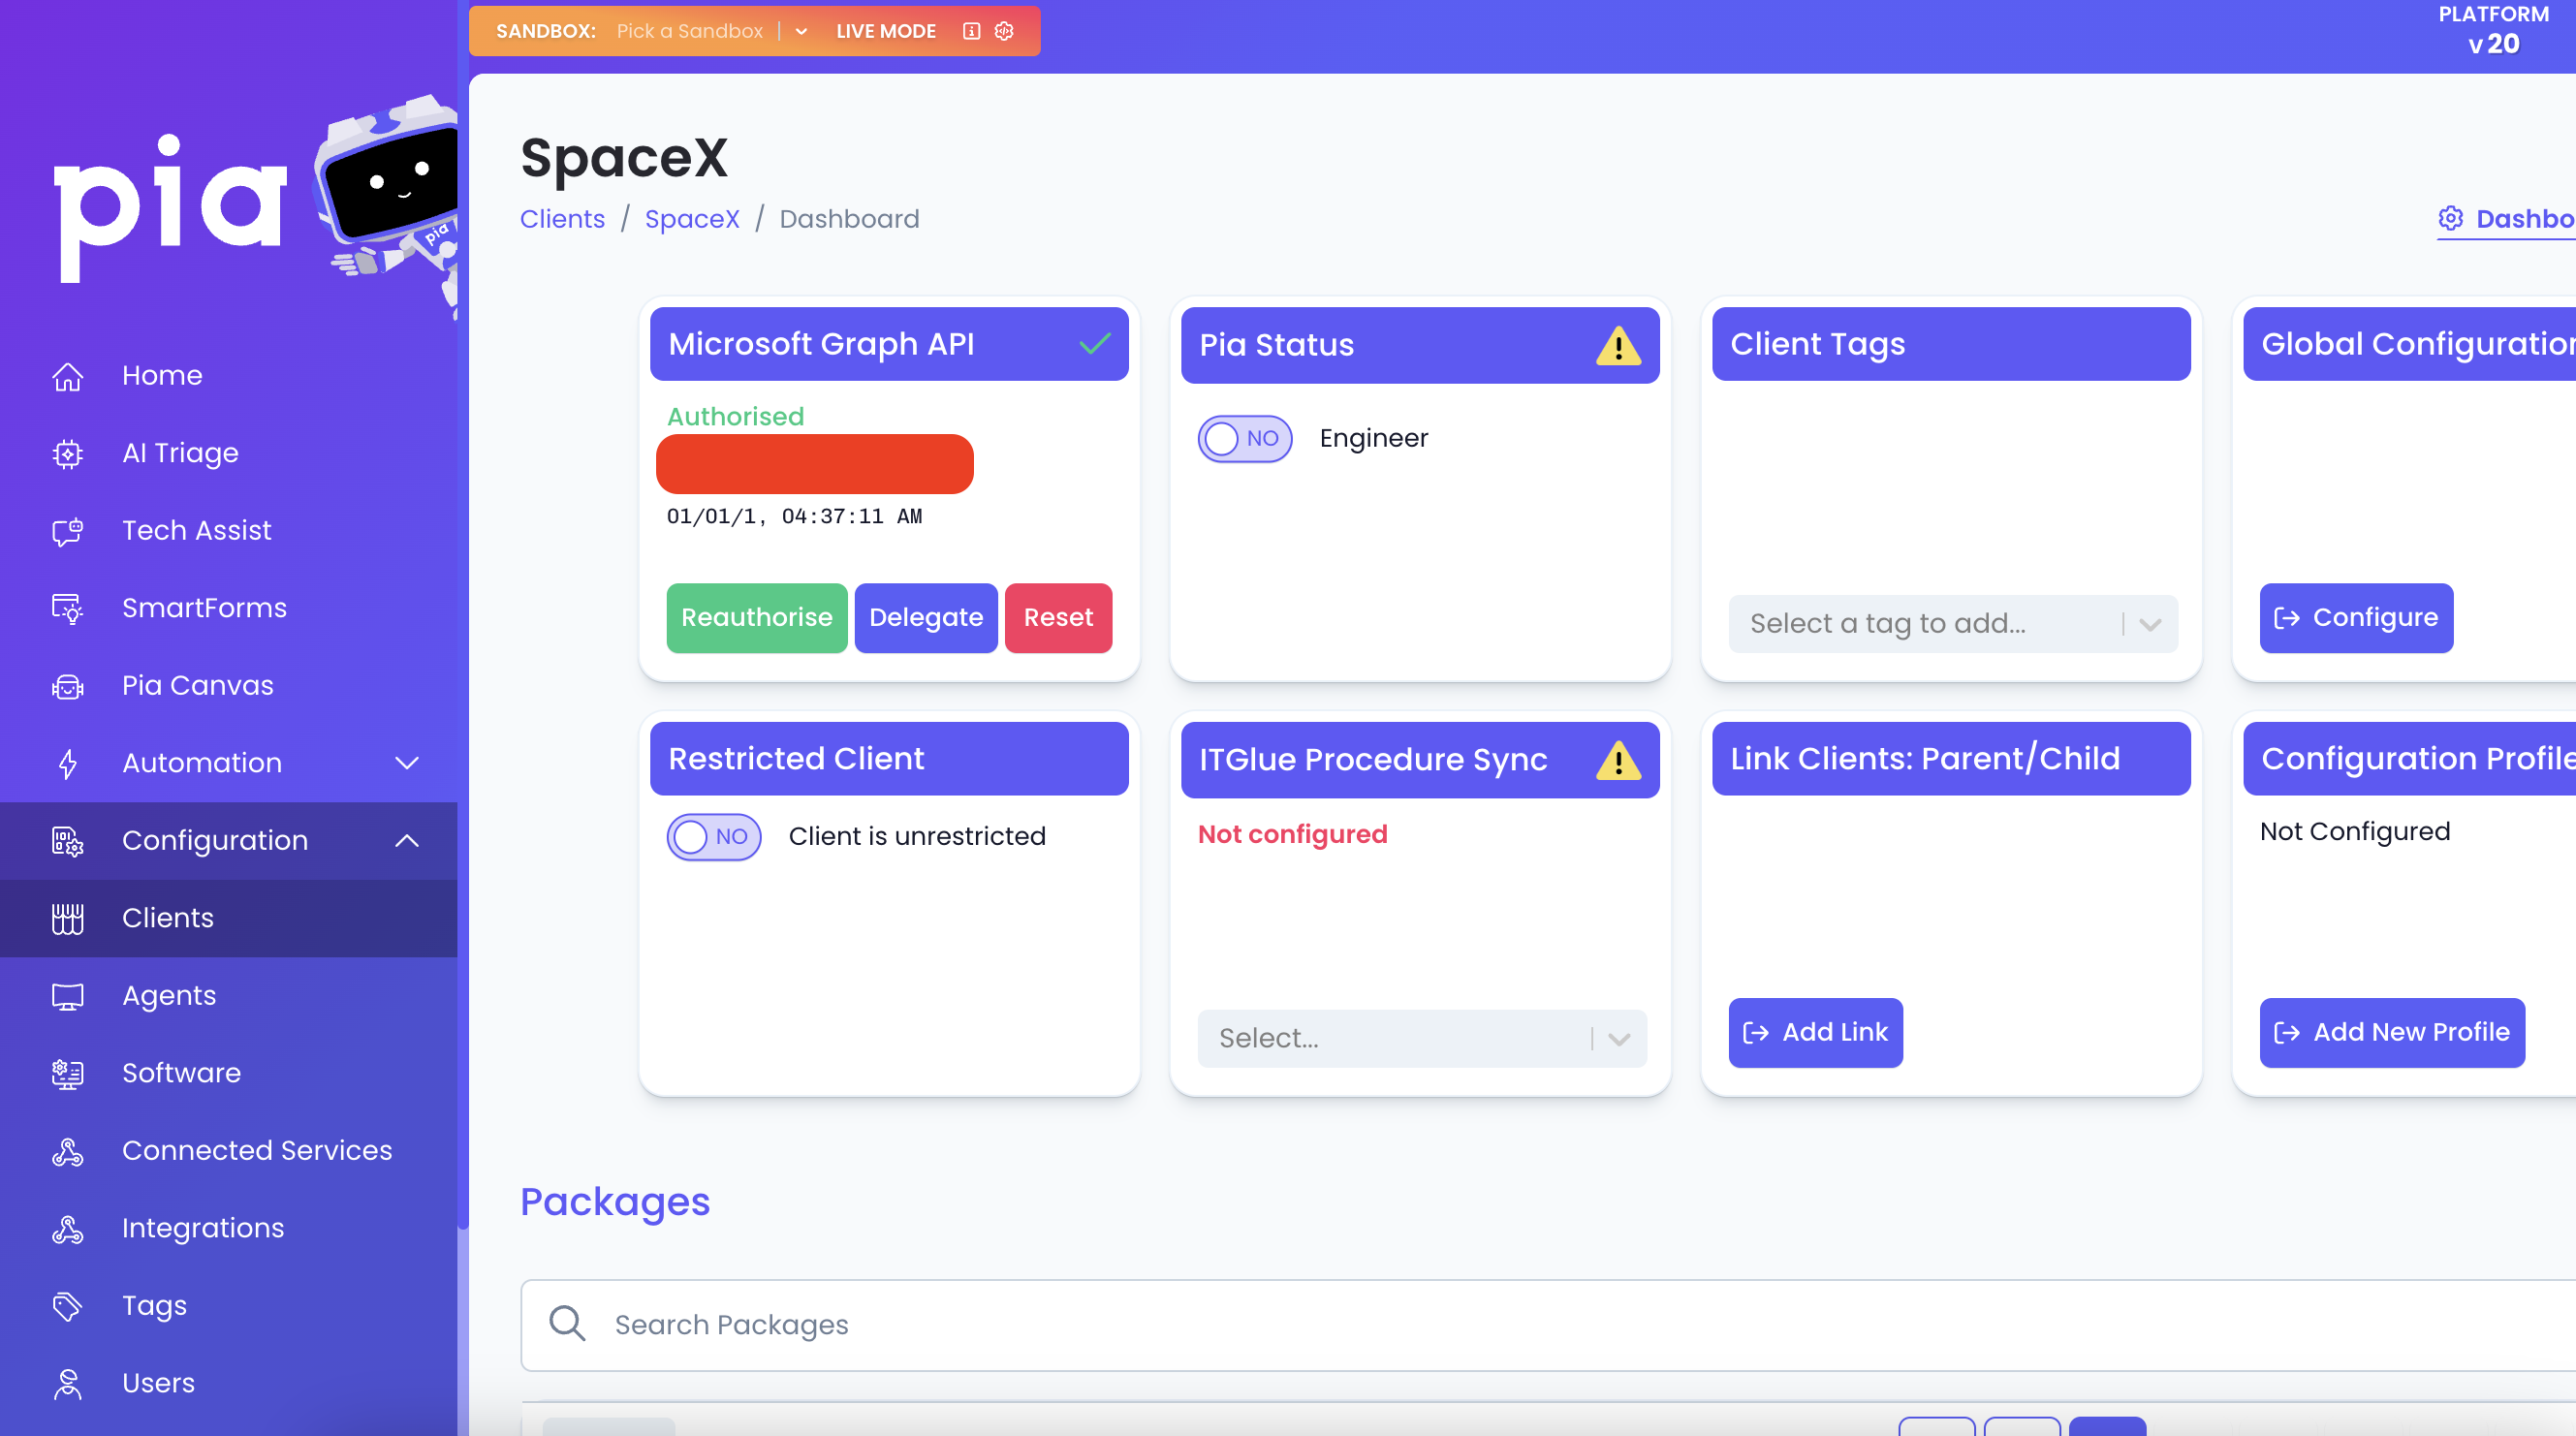
- Navigate to PIA → SmartForms → Integrations.
- Exchange the Keys:
- From Pia to Thread: Copy the "Thread App API secret" from Pia and paste it into the "API secret key" field in Thread.
- From Thread to Pia: Copy the "Thread embed key" from Thread and paste it into the "Embed key" field in Pia.
Step 2: Configure SmartForms in Pia
For a form to appear in Thread, it must be properly configured on the Pia side first.
- Create: Ensure the SmartForm exists inside Pia.
- Enable: Verify the form is enabled for the specific client you are testing.
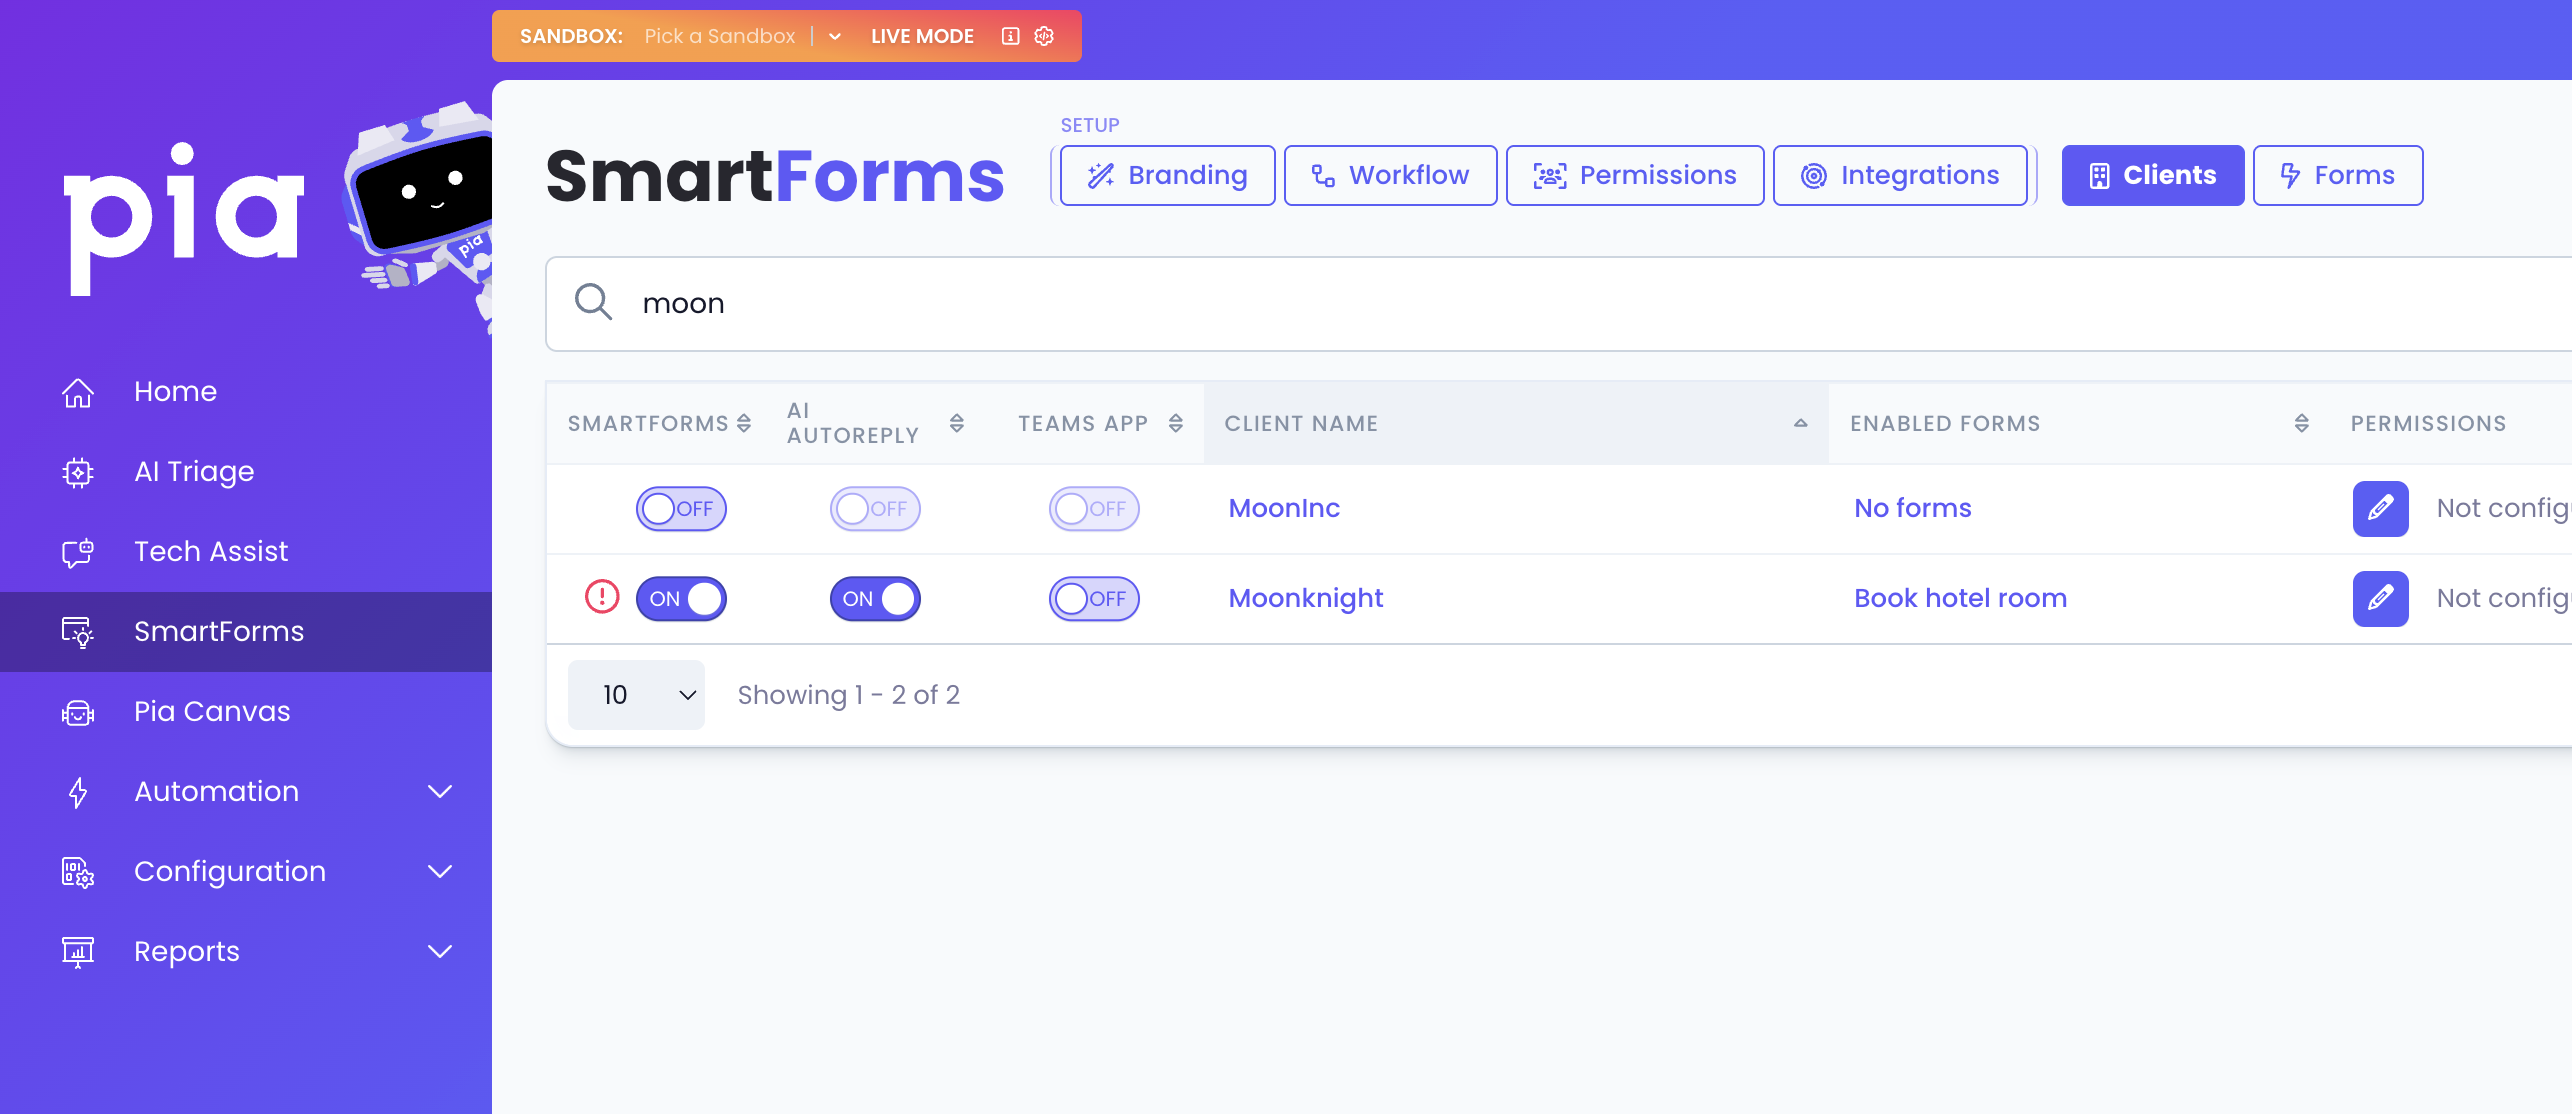
- Assign: Assign the form to the necessary PSA company (if applicable).
Step 3: Link Intent in Thread
Once connected, you need to tell Thread when to show the form.
- Go to the Thread dashboard.
- Select or create the Intent (e.g., "New User Onboarding").
- In the intent settings, enable the option to use a Pia SmartForm.
- Select the specific SmartForm you configured in Step 2.
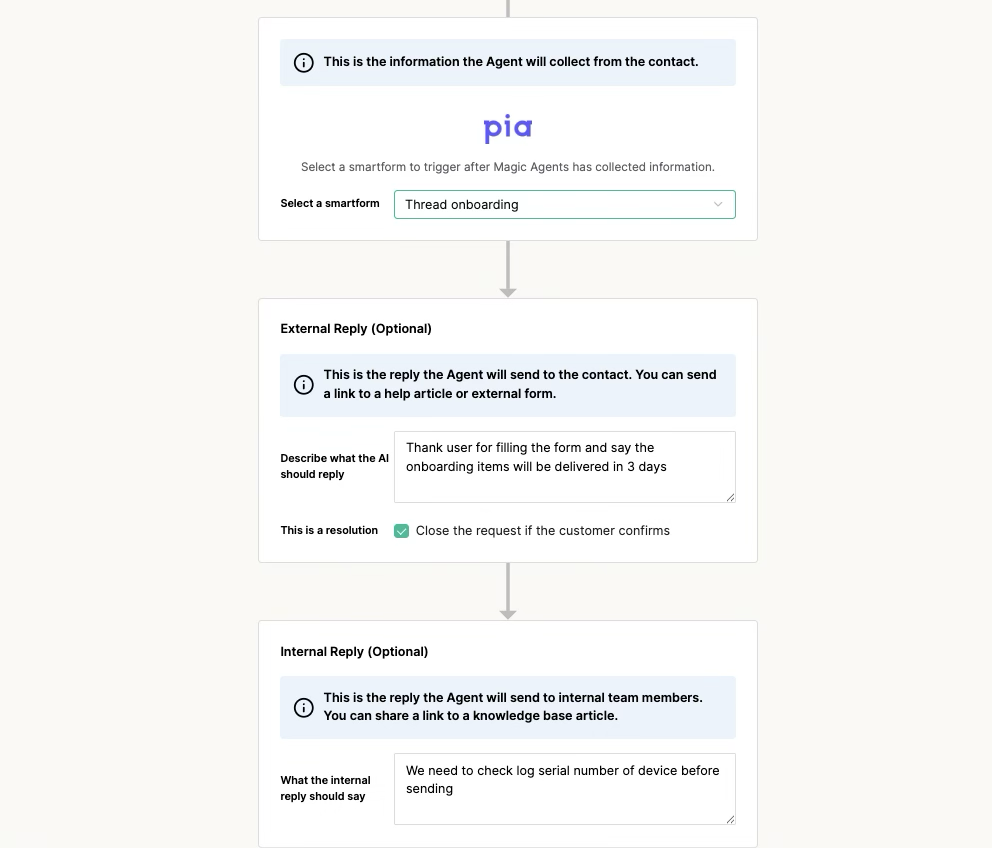
Configure Post-Form Agent Behavior (Optional)
Once you have selected a SmartForm, two new optional fields appear to control what the Triage Agent does after the form is completed.
External Reply
A free-form prompt field that instructs the agent what to say to the contact after the form is submitted or canceled. Use conditional language to cover both outcomes. Example:
"If the form was submitted successfully: confirm the submission and let the contact know the team is on it. If the form was canceled or there was an error: apologize and let them know a technician will follow up shortly."
Leave this field empty to use a default confirmation message.
Resolution checkbox — "Close the request if the contact confirms"
- Checked: After the form is submitted, the agent asks the contact whether their issue is resolved. If they confirm, the ticket closes automatically. If they say no, the agent escalates to a technician.
- Unchecked: The agent confirms the form submission and escalates to a technician automatically without waiting for contact confirmation.
Note: Both fields are optional. Existing Pia intents work without any changes — the agent will stay active by default after a form is sent.
Testing & Validation
We recommend testing the flow internally before rolling it out to production.
- Trigger the Flow: Open the chat window and type a phrase matching your intent (e.g., "I want to onboard a new user").
- Verify the Prompt: The bot should respond with a card containing an "Open Form" button.
- Check the Form: Click the button. A pop-up form (branded with the client's logo, if set) should appear requesting details like Name, Start Date, and Job Title.
Submit & Verify: Fill out the form and click Send. Confirm that:
- The form iframe closes automatically after submission.
- The agent sends a follow-up message in chat confirming the form was submitted (using your External Reply prompt if configured, or a default message if not).
- If the resolution checkbox is checked: the agent asks the contact whether their issue is resolved. Confirming closes the ticket. Denying escalates to a technician.
- If the resolution checkbox is not checked: the agent confirms the submission and escalates to a technician automatically.
- The data is correctly written back to your PSA.
- Cancel & Verify: Close the form without submitting. Confirm that:
- The form iframe closes automatically.
- The agent acknowledges the cancellation in chat and escalates to a technician.

Post-Form Agent Behavior
After a Pia SmartForm link is sent to the contact, the Triage Agent stays active and responds based on what happens next.
Scenario | What the agent does |
Form submitted | Sends a confirmation message (using your External Reply prompt or a default). Closes ticket if contact confirms (checkbox checked) or escalates to tech (checkbox unchecked). |
Form canceled or error | Acknowledges the outcome and escalates to a technician for review. |
Contact messages while form is pending | Normal triage continues. The form stays open in the background and the agent handles the new message as usual. |
No action taken | Agent enters listening mode based on your standard triage timeout settings. A single check-in is sent. If still no response, the Reminder Agent takes over on its normal cadence. |
Getting Started with Pia Intents
CHANGE CALENDAR PERMISSION
When the request strongly indicates a user wishes to add, remove, or change
another users access to their Microsoft email calendar or outlook calendar,
immediately acknowledge the request and inform the user that the Change
Calendar Permissions form will be launched. Do not ask any additional questions
before triggering the Pia Smartform.
SETUP OR REMOVE OUT OF OFFICE - SMARTFORM
When the request strongly indicates a user wishes to setup or remove an out of
office (ooo) message for their email, immediately acknowledge the request and
inform the user that an Out of Office form will be launched. Do not ask any
additional questions before triggering the Pia Smartform.
GRANT OR REMOVE EMAIL ACCESS
When the request strongly indicates a user wishes to setup or remove an out of
office (ooo) message for their email, immediately acknowledge the request and
inform the user that an Out of Office form will be launched. Do not ask any
additional questions before triggering the Pia Smartform.
FORWARDING RULE
When the request strongly indicates a user wishes to add or remove a rule to
redirect incoming emails to a specific person, immediately acknowledge the
request and inform the user that the Mail Forwarding Rule form will be
launched. Do not ask any additional questions before triggering the Pia
Smartform.
LOCKOUT REQUEST
When the request strongly indicates a user needs to unlock their account due to
entering their password incorrectly too many times, immediately acknowledge
the request and inform the user that the Account Locked Out form will be
launched. Do not ask any additional questions before triggering the Pia
Smartform.
RESET PASSWORD
When the request strongly indicates a user needs their password reset,
immediately acknowledge the request and inform the user that the password
reset form will be launched. Do not ask for a user's name or password. That
information will be asked when the user fills out the Pia SmartForm. Do not ask
any additional questions before triggering the Pia Smartform.
ACCOUNT LOCK OUT
When the request strongly indicates a user needs to unlock their account due to
entering their password incorrectly too many times, immediately acknowledge
the request and inform the user that the Account Locked Out form will be
launched. Do not ask any additional questions before triggering the Pia
Smartform.
ONBOARDING
When the request strongly indicates a brand-new employee requiring full
onboarding, immediately acknowledge the request and inform the user that the
onboarding form will be launched. Do not ask any additional setup questions
before triggering the Pia SmartForm.
OFFBOARDING
When the request strongly indicates user offboarding, immediately acknowledge
the request and inform the user that the offboarding form will be launched. Do
not ask any additional setup questions before triggering the Pia SmartForm