Voice AI Setup - 2️⃣ Phase 2: Attendant - IVR

2️⃣ Phase 2: Setup Your Attendant
Goal: The active Digital Receptionist & Router.
Overview: Configure your main agent to screen calls, triage & create tickets, and route them to the correct human teams.
Step 1: Request Attendant Phone Number
- Click the "Request Number" button if one is not already assigned.
- This is the number the AI uses to call the Attendant.
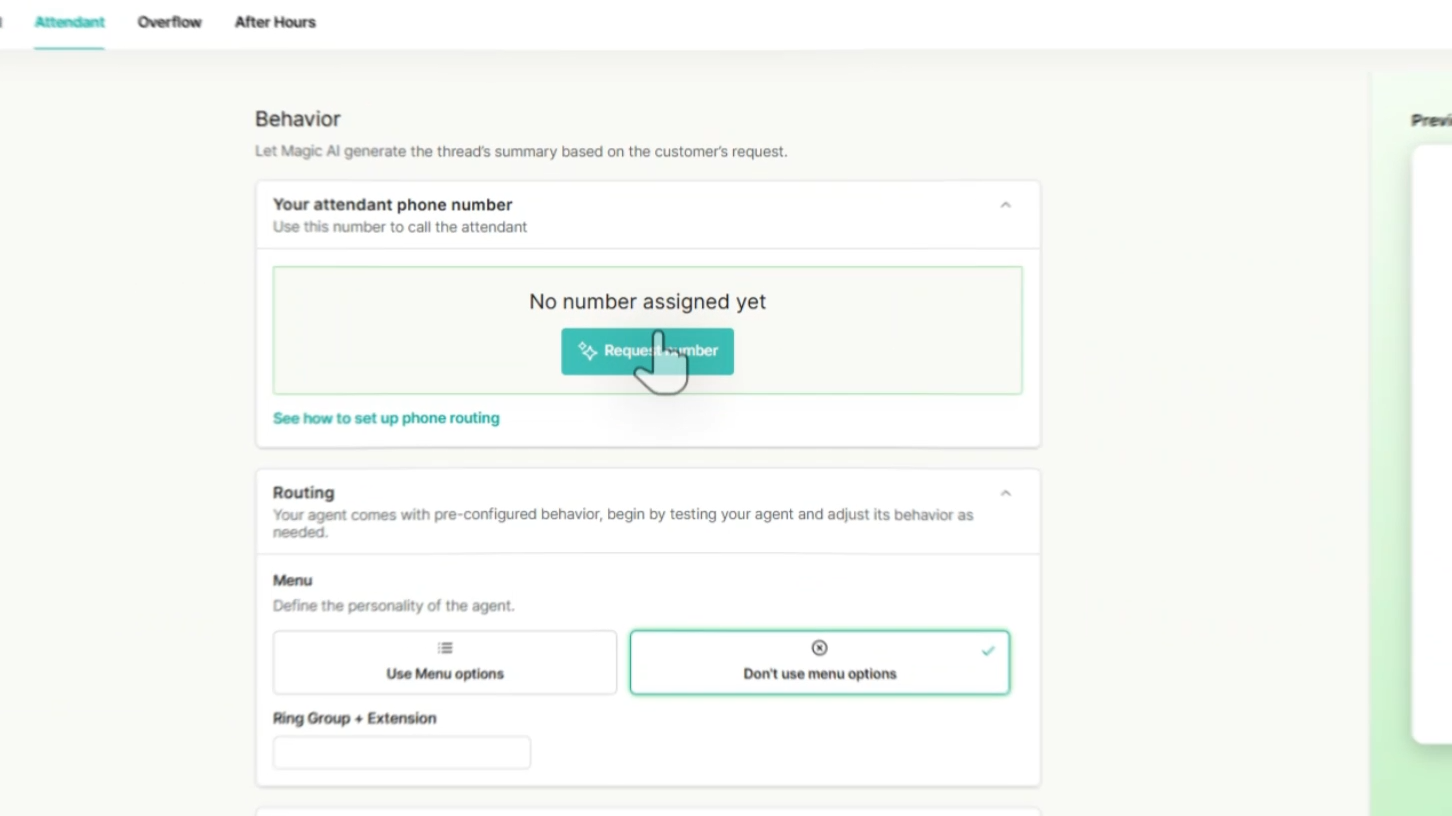
Step 2: Define Menu Options & Routing
Critical Rule: The destination phone number must go to a human, never a recording or another IVR.
Setting | Description | Recommendation |
Menu Options ON | The AI routes based on intent (e.g., "Sales" → Sales Queue). | ✅ RECOMMENDED |
Menu Options OFF | The AI greets and transfers immediately to a single destination. NOTE: If you choose to ring direct to a ringgroup, no AI interaction or ticket interaction will take place. | Optional |
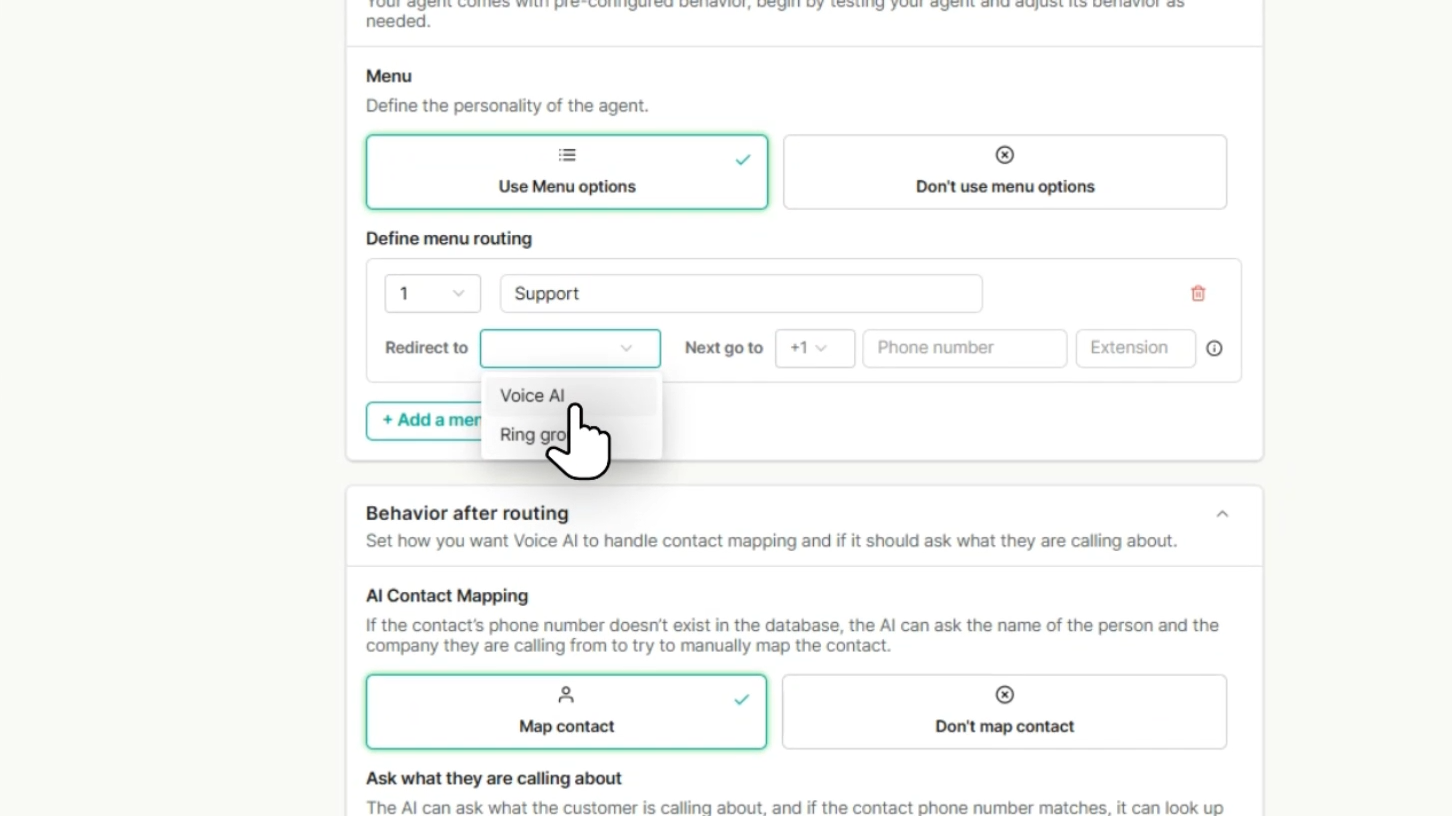
Destination Type | What It Does | When to Use It |
Ring Group | "The Handoff" (Transfer to Human) The AI identifies the caller's intent and immediately transfers the call to a specific phone number or extension on your VoIP system. The AI drops off, and your human team picks up. | Use this for standard routing (e.g., routing "Sales" requests to your Sales Team's ring group). |
Voice AI | "The Specialist" (Agent-to-Agent) The AI transfers the caller to another configured Voice AI Agent. This allows you to chain agents together (e.g., A "Main Menu" agent transfers to a "Tier 1 Troubleshooting" agent). | Use this for advanced setups where you have specialized AI agents for different departments. |
Step 3: Select Map Contact Settings
This setting controls if the AI attempts to match the caller to your PSA database.
Map Contact (Recommended)
- Allows AI to authenticate caller against PSA. If the number doesn't match, the AI asks for Name/Company to manually map them.
Don't Map Contact
- The Agent will still attempt to map contact based on the caller id, but won't ask the name of the contact or company.
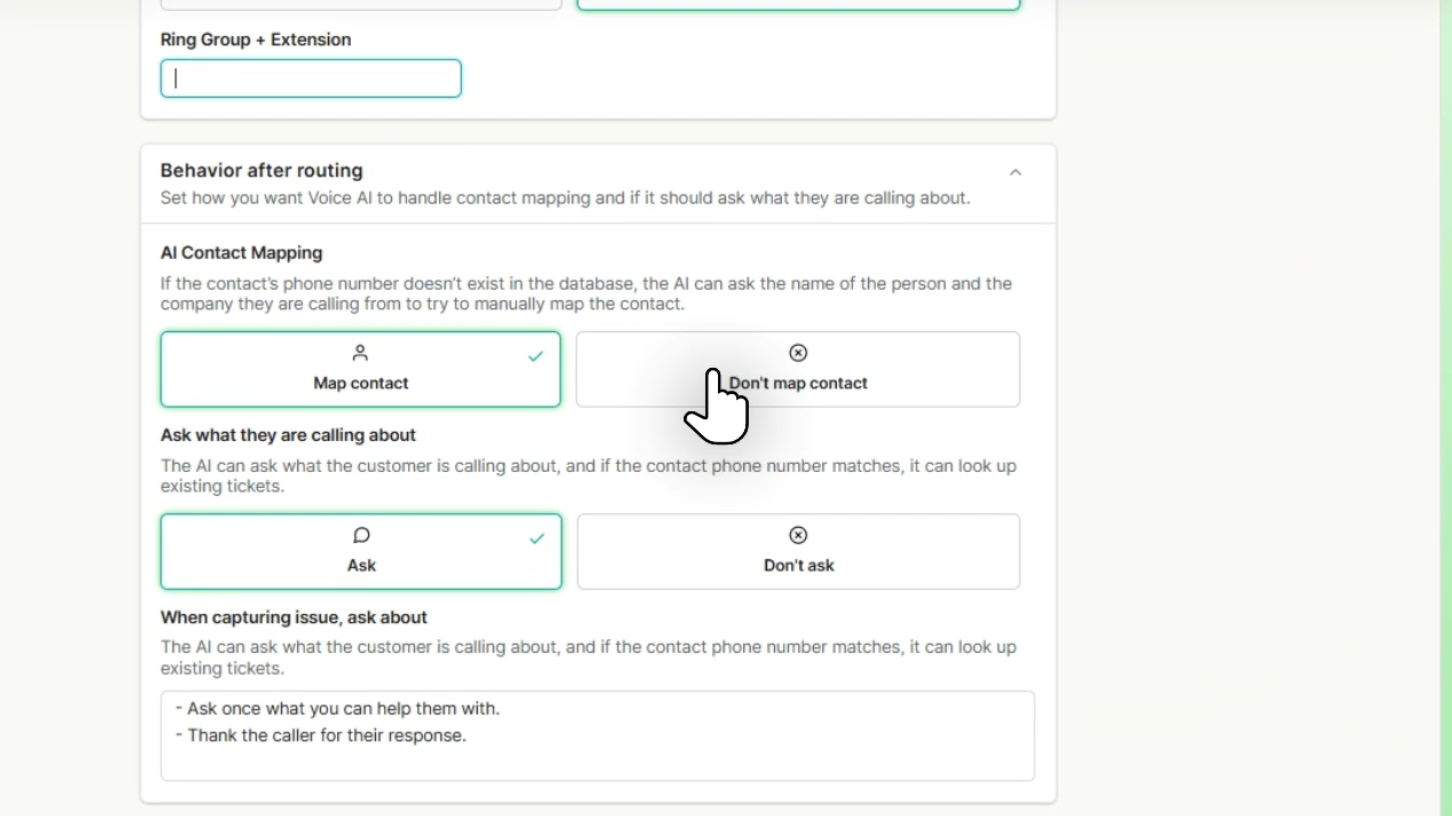
Step 4: Ask "What Are They Calling About?"
- Action: Enable this setting.
- Function: The AI will ask the customer the reason for their call. If the phone number matches a record, it can look up existing tickets to provide context to your team.
- Recommendation: Default settings are recommended for the best performance.

Step 5: Overflow Timeout
- Action: Define how long the agent should wait (ring duration) before giving up and sending the call to Overflow/Voicemail.
- Recommendation: 60-120 seconds is recommended.
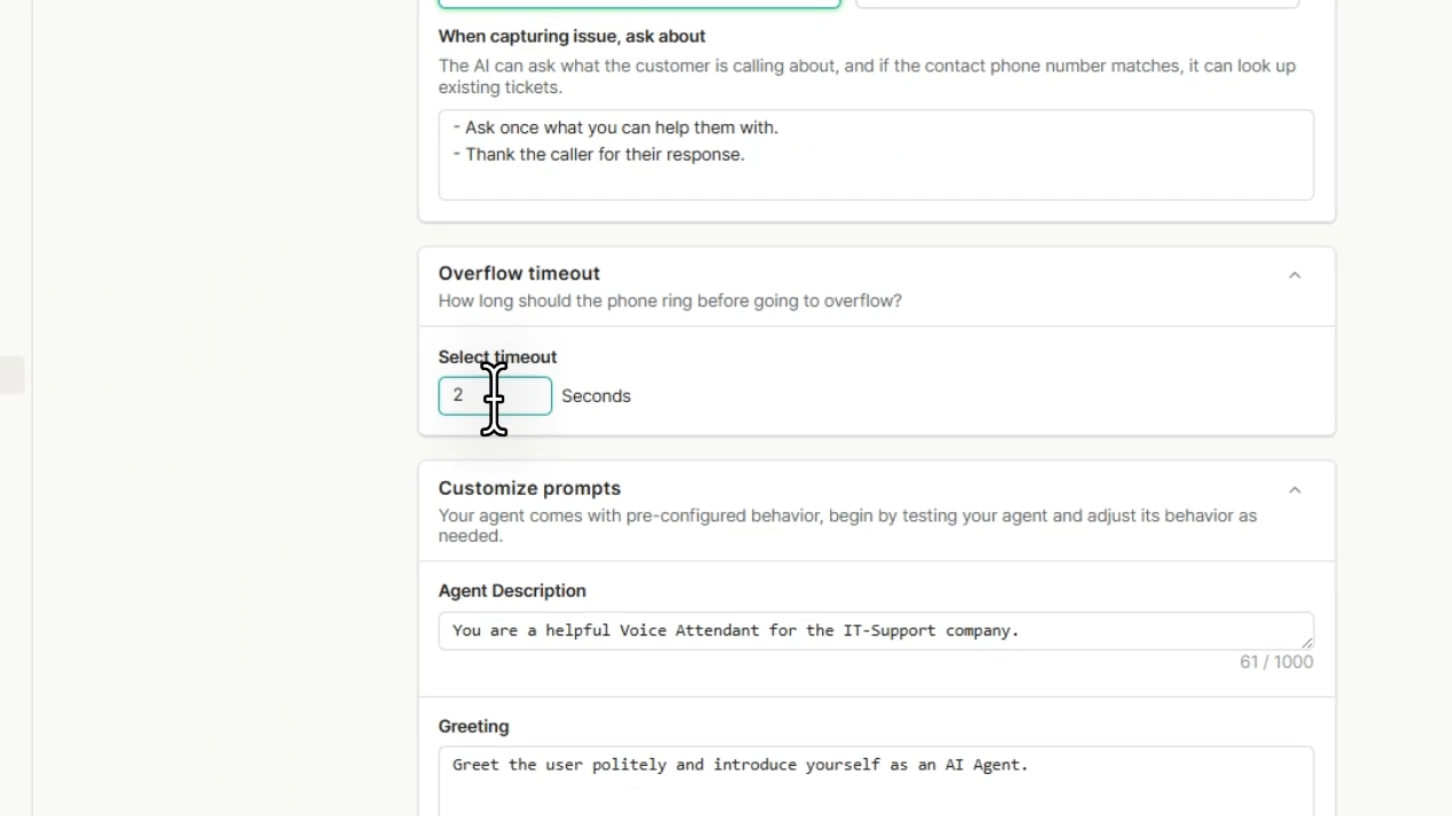
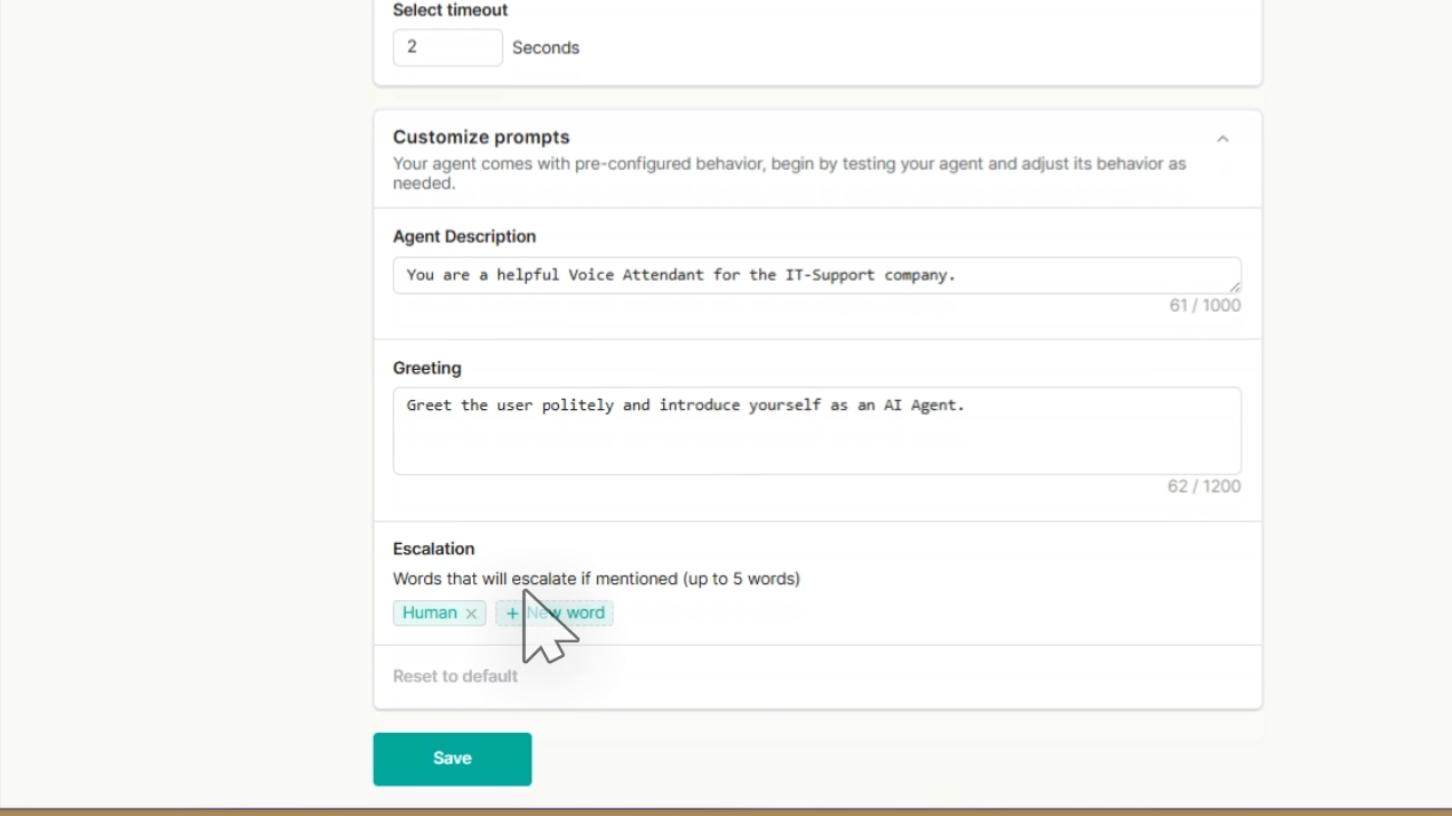
Step 6: Customize Prompts
You can give the agent a specific Role (e.g., "Helpful IT Coordinator") or specific Greeting.
Setting | Description | Recommendation |
Default Settings | Uses the system-optimized prompts for role and greeting. | ✅ RECOMMENDED |
Custom Prompts | Allows you to manually set the Agent Description and Greeting. | Optional |
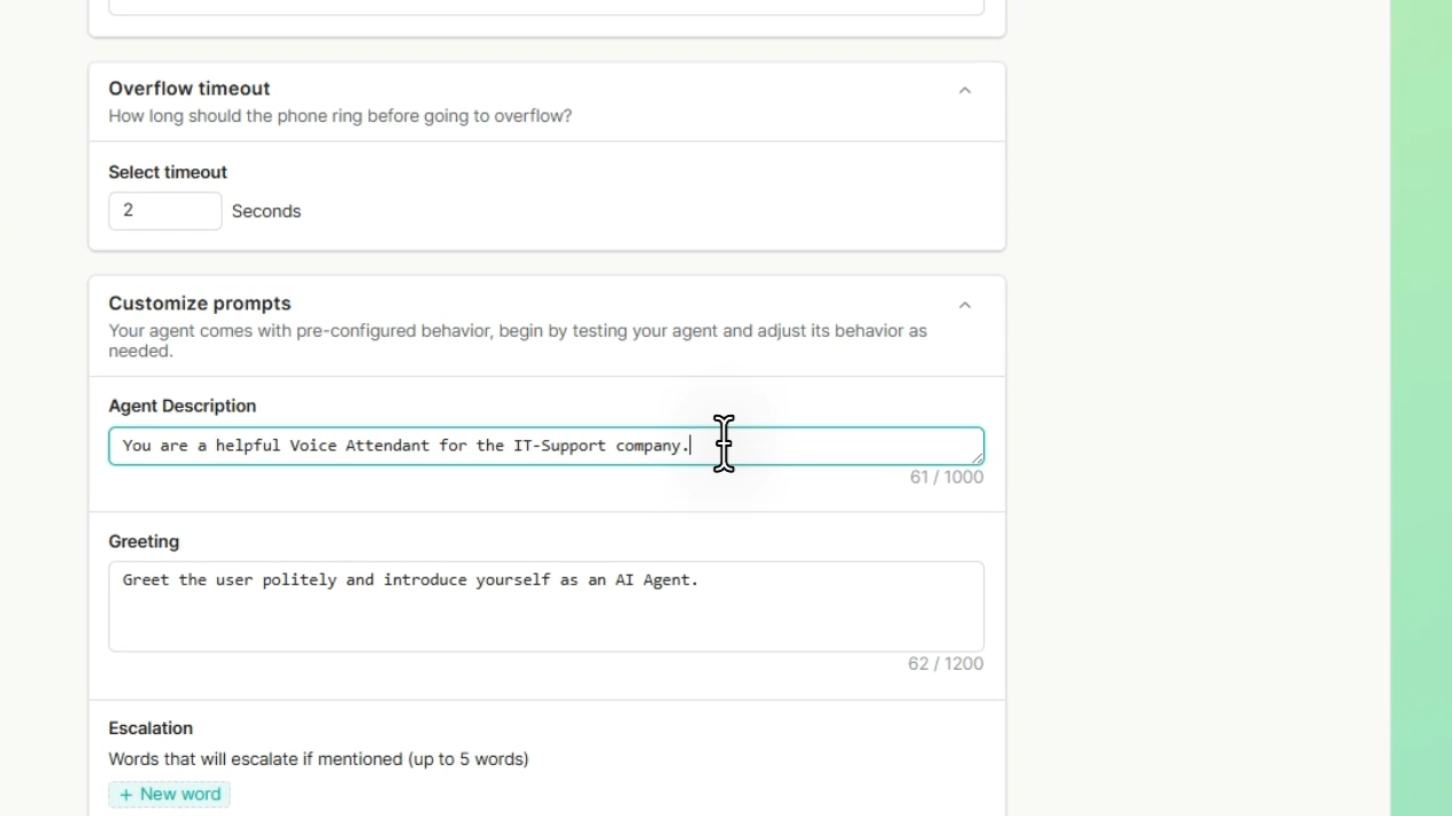
Step 7: Escalation (Panic Words)
- Action: You can define words that, if spoken, will immediately escalate the call to a human (e.g., "Emergency", "Escalate", "Operator").
- Recommendation: Default settings are recommended for the best performance.