Voice AI Setup – Phase 1: Initial Configuration

Introduction to Voice AI
Voice AI capabilities allow your business to handle calls intelligently, ensuring no client query goes unanswered while optimizing your team's workflow.
Introduction to Agent Types
- Overview of Overflow
- Provides coverage when your team is unavailable.
- Includes after-hours functionality.
- Overview of Attendant
- Acts as an intelligent receptionist, taking down customer issues before directing calls for a warm handoff to your technicians.
Use Cases: Known Configurations
Here are the common ways partners set up voice:
- Overflow as a front desk: Taking all calls, no technicians answer directly. Technicians can prioritize issues and call back later.
- Overflow + After hours as voicemail: Ensures coverage when the office is closed.
- Attendant Advanced: Intake and warm transfer with ticket creation and call recording (+ contact mapping).
- SUPERCHARGE with Call time out transfer to Overflow
- Attendant Minimal: Just immediate ticket creation and call recording.
- SUPERCHARGE with Call time out transfer to Overflow
Initial Configuration Steps
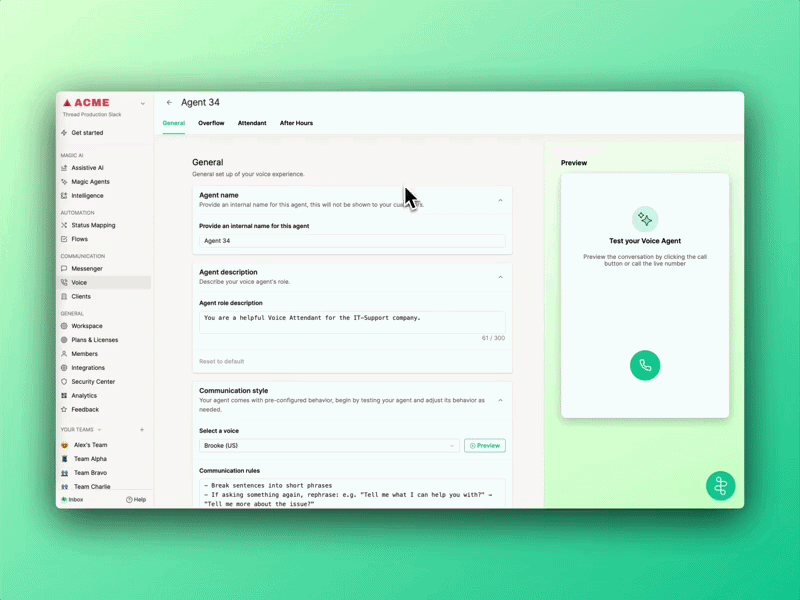
Step 1: Create Agent
- Navigate to Voice > Agents and click Create Agent.
- Give it an internal name (e.g., "Thread Overflow").
Step 2: Update the Agent Description
This is where you set the role for your agent. This can impact how the agent responds to your callers.
Examples:
- "You are a helpful support agent for [Company]"
- "You are an IT support agent that will help record caller issues."
- "You are an AI agent that helps take issues for [business categories]."
Step 3: Set Up Communication Style
Choose a Voice
Select a voice that matches your brand (e.g., Brooke (US)).
Select a Background Sound
This will play when your AI agent is updating/thinking so callers don't think the line went dead.
Custom Hold Music
Custom hold music allows you to replace the default hold music with your own uploaded audio files. Whether you want to play a promotional message, brand-specific music, or a custom greeting, providing unique audio keeps your callers engaged and reinforces your professional identity while they wait.
How to Set Up Custom Hold Music:
- Navigate to the General tab.
- Under the "Select Hold Music" section, select the Custom tab.
- Upload your audio file.
- Click Save to apply your changes.
Maximum File Size: 10MB
Recommended encoding for best results:MP3 or OGG at 64kbps, mono, 16kHz sample rate. This keeps file sizes small while maintaining clear voice quality.
What does this mean in practice?At recommended settings, MP3 and OGG files can hold 20+ minutes of audio well under the 10MB limit. WAV files are uncompressed and much larger, so they're only practical for short recordings (under 5 minutes).
My file was rejected – what do I do?
If your audio file exceeds 10MB, it's almost always an encoding issue, not a duration issue. Check for these common culprits:
- Stereo instead of mono – voice calls only need one channel. Stereo doubles the file size for no benefit.
- High bitrate – settings like 128kbps, 192kbps, or 320kbps are designed for music. 64kbps is plenty for voice.
- WAV format on longer recordings – if your call is more than a couple of minutes, switch to MP3 or OGG.
Most phone systems and recording tools let you configure these settings. If you need help adjusting them, reach out to your CSM.
Speech Speed & Volume
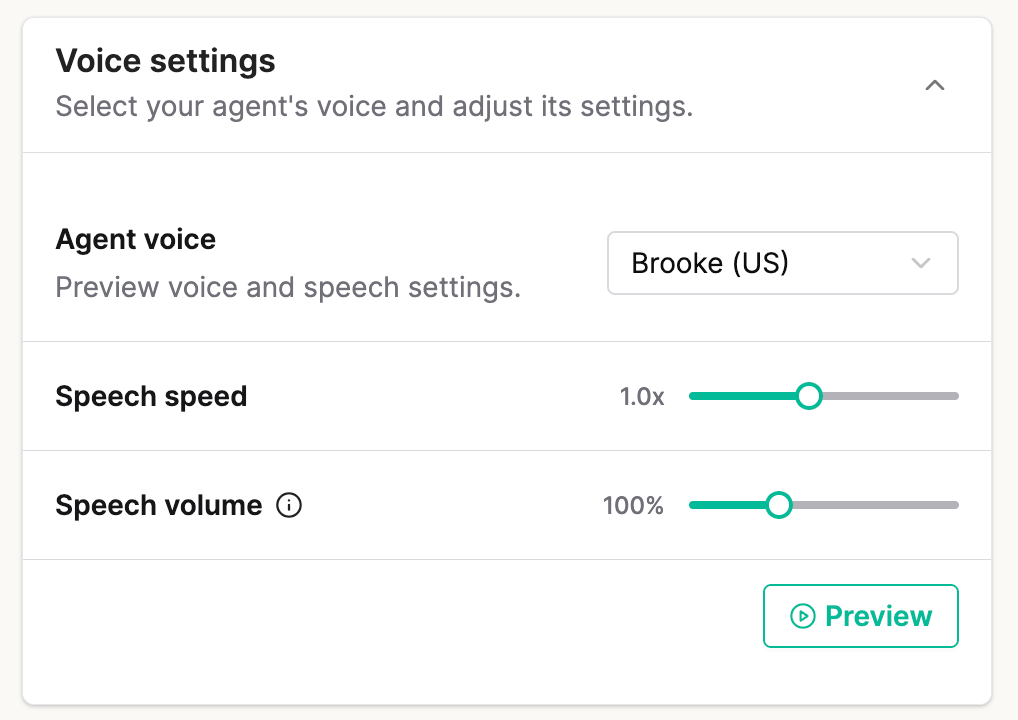
You can adjust the Voice Agents speech speed from 60% up to 150%
Voice Agent speech volume can be adjusted from 50% up to 200%
Communication Rules
You can generally keep these with our default settings, but this area helps control how the agent responds. For example, rephrasing questions or lengthy responses.
Tone of Voice:
You can generally keep these with our default settings, but this area helps control the agent's delivery of what it is saying. For example, tone, positivity, helpfulness.
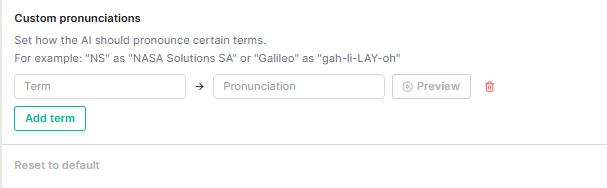
Custom Pronunciations (Optional)
You can use custom pronunciations to help standardize how the agent says specific words. You can preview the pronunciation using the "preview" button, but we recommend also testing this when you have your agent fully set up by calling the Agent phone number.
Step 4: Default Company and Contact (Critical)
Action: You MUST select a "Default Company" and "Default Contact".
Why: If the AI cannot identify the caller's phone number in your PSA, it needs a fallback contact to create the ticket against. Without this, the system will error out.
Click Save.
Step 5 : Set Backup Number
Enter a Backup number that the agent will fall back to in the rare case of PSA Outages

Optional Best Practice – Visibility & Source Tracking
Isolate AI-generated traffic from standard phone traffic within your PSA by using unique "Source" identifiers.
The Problem
Most MSPs use a generic "Phone" source for everything, making it hard to track AI performance.
The Solution (Unique Source)
- Create a unique Source in your PSA called "Voice AI" (or similar).
- When creating your voice agents, under Agent > Overflow AND Attendant > Default Board and Source, select this new "Voice AI" source.
- Important: Remove this source/board from Triage agent to prevent conflicts.
Create the Inbox View
- Go to the Thread Inbox.
- Create a new View filtered by Source = Voice AI.
- Benefit: This creates a dedicated feed of all calls handled by the AI, allowing management to review transcripts and performance in one place without digging through other tickets.